DIY How to fix cracks & bumps & also prime
 07-Sep-2009, 06:25 PM
#1
DIY How to fix cracks & bumps & also prime
Hey guys, this tutorial are for those like myself, who like to do things themselves and don't mind saving money here and there.
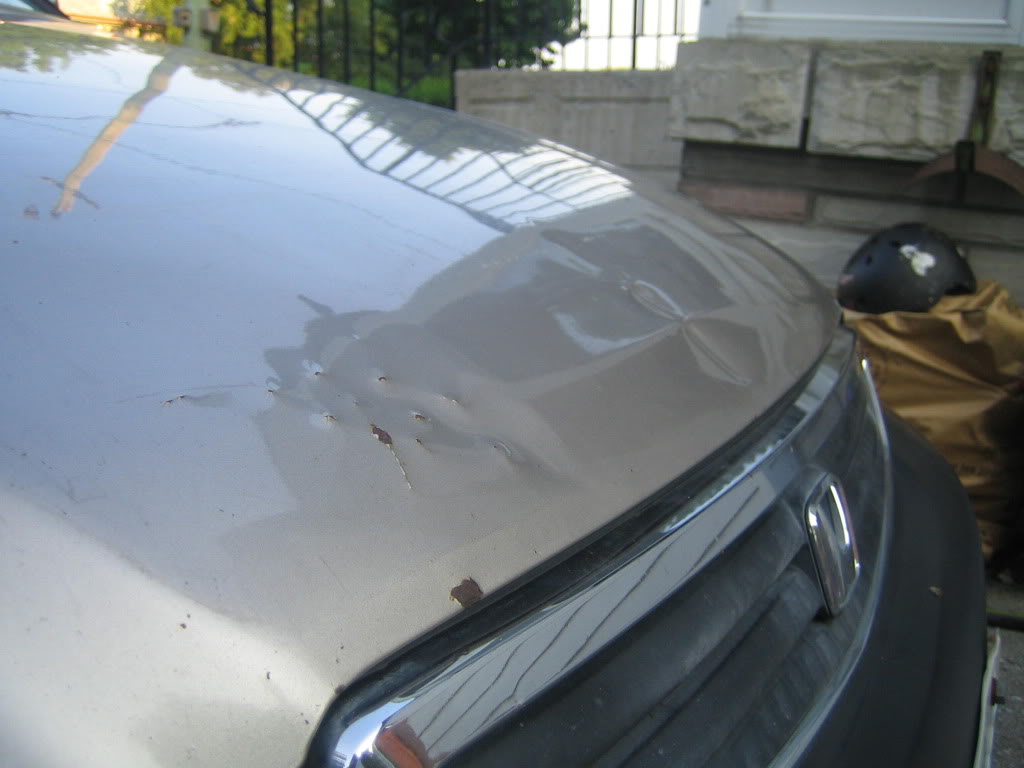
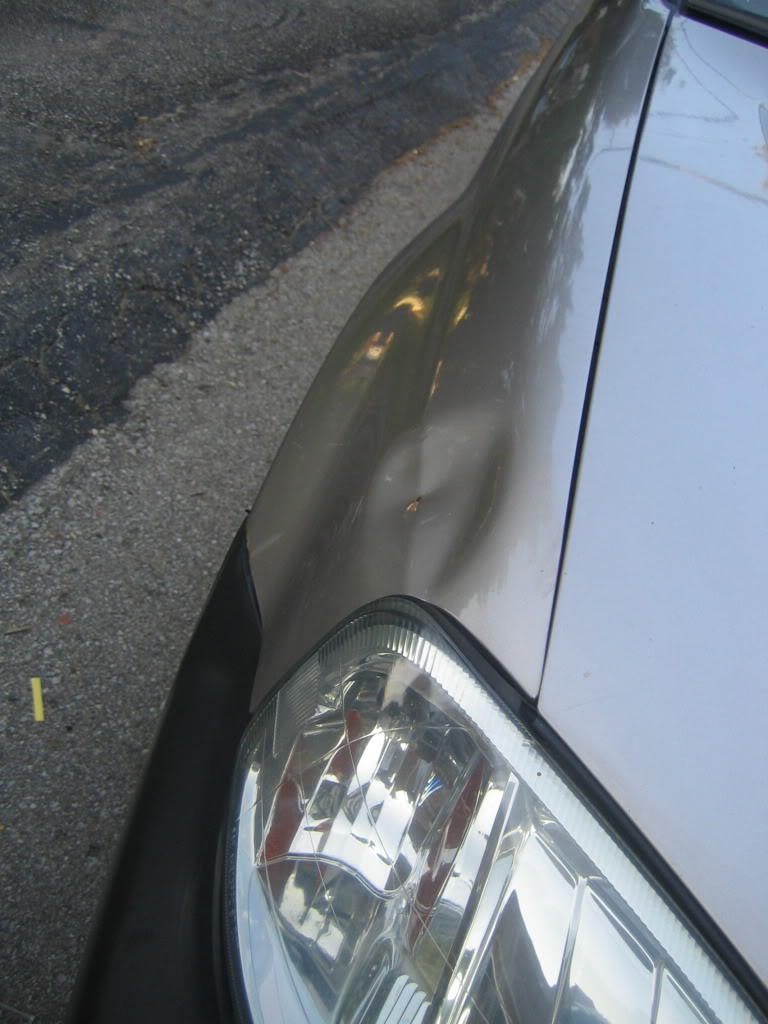
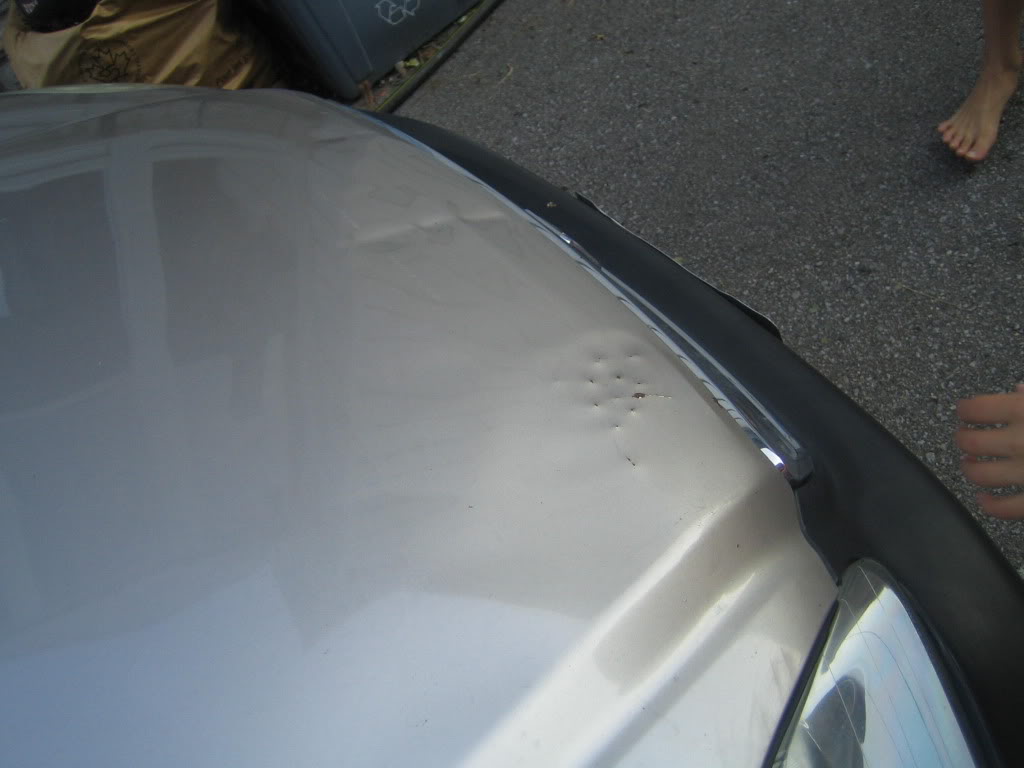
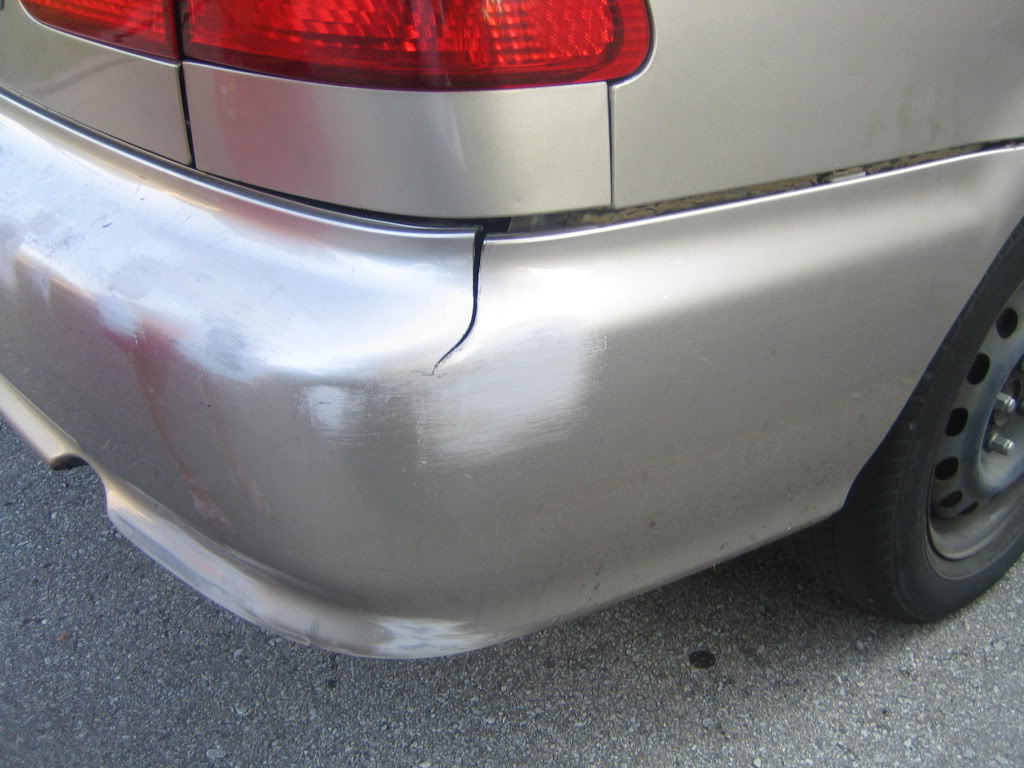
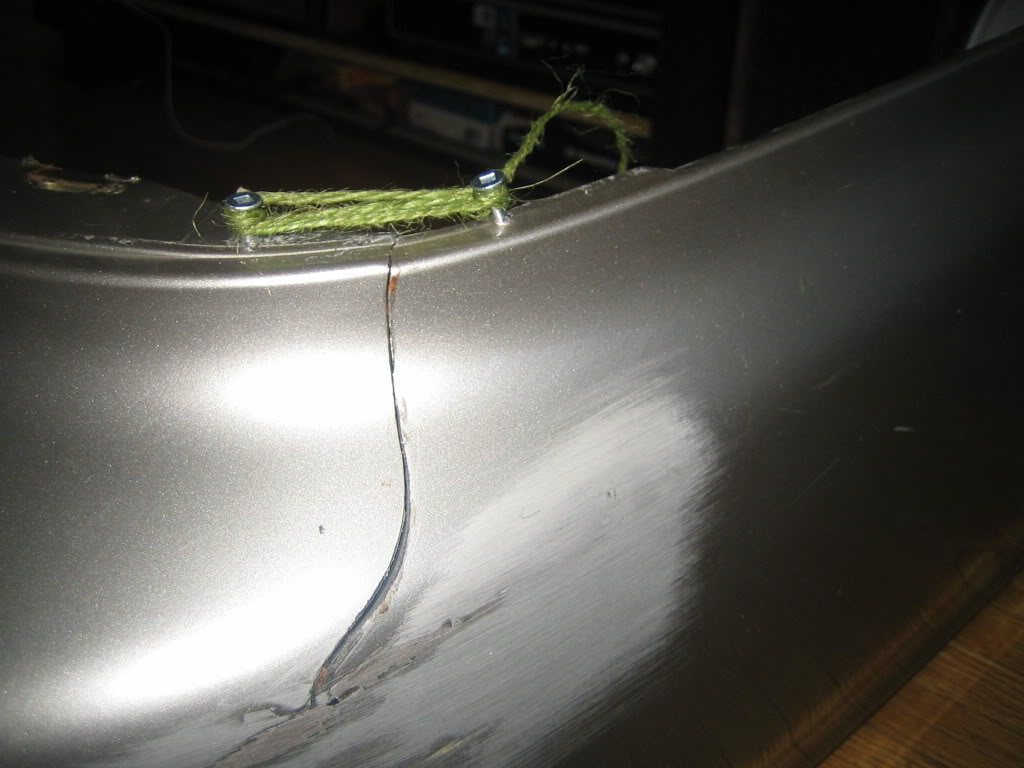
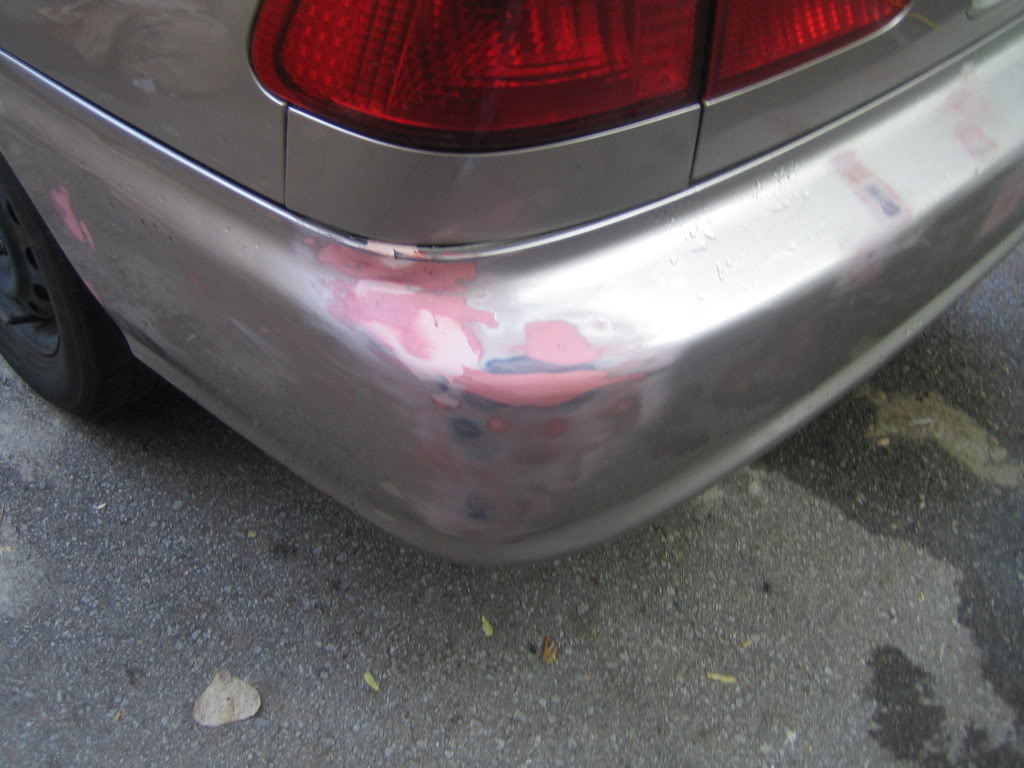
Throughout the years my civic had taken a few bumps and scratches, Ive been rear ended as you'll see from pics and Ive also hit someones trailer hitch when some douche decided to J-walk, I took it to an auto repair near by because my hood wouldnt close, he fixed that but put small dimple in the hood when trying to pop it out. Anyhow the reason for the black bumper would be 2 Christmas's back on my way to work, A dog got lose and ran across the street, Unfortunately I hit it and well... there went the bumper, along with my fist size dent in my fender.
Enjoy.
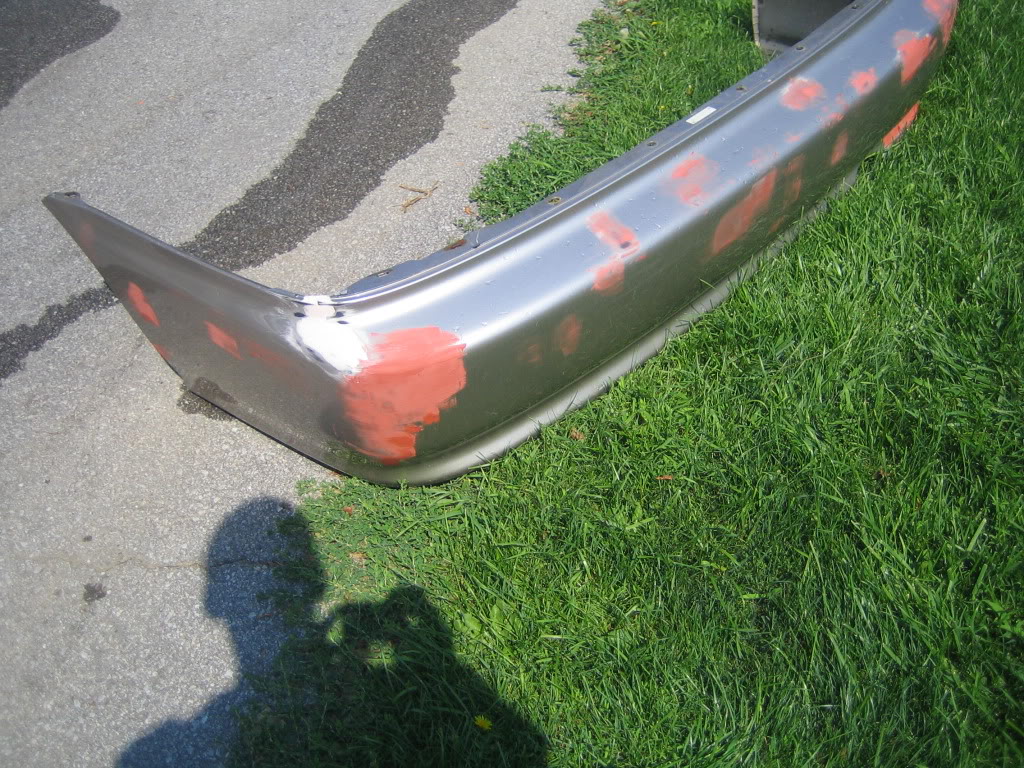
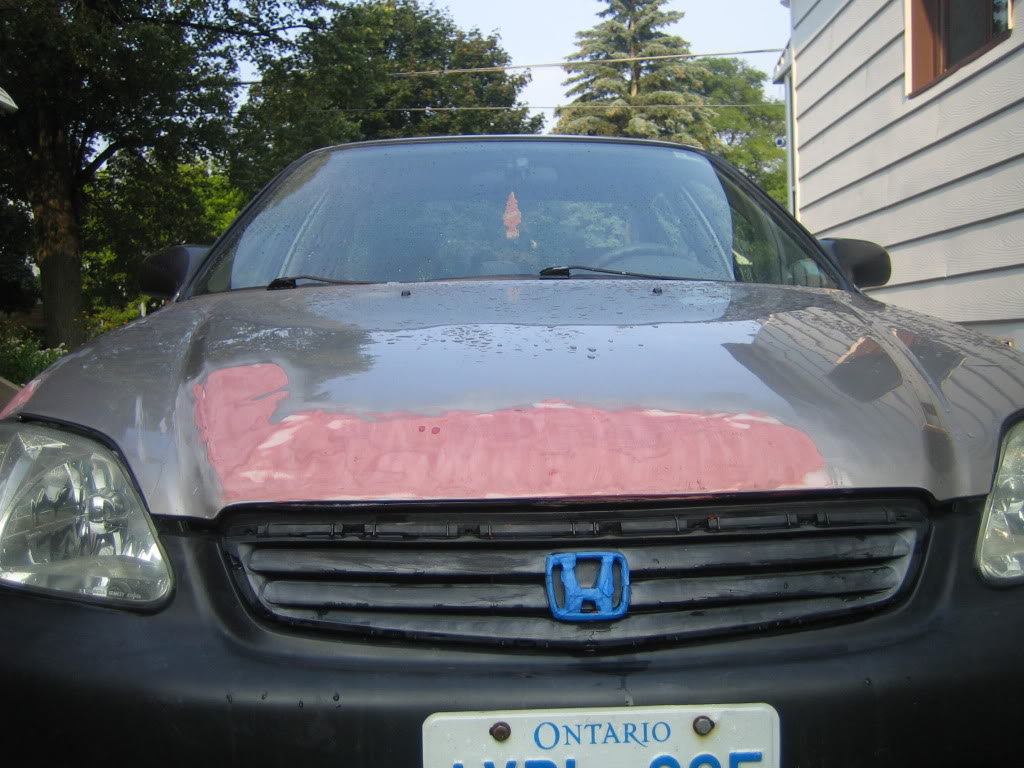
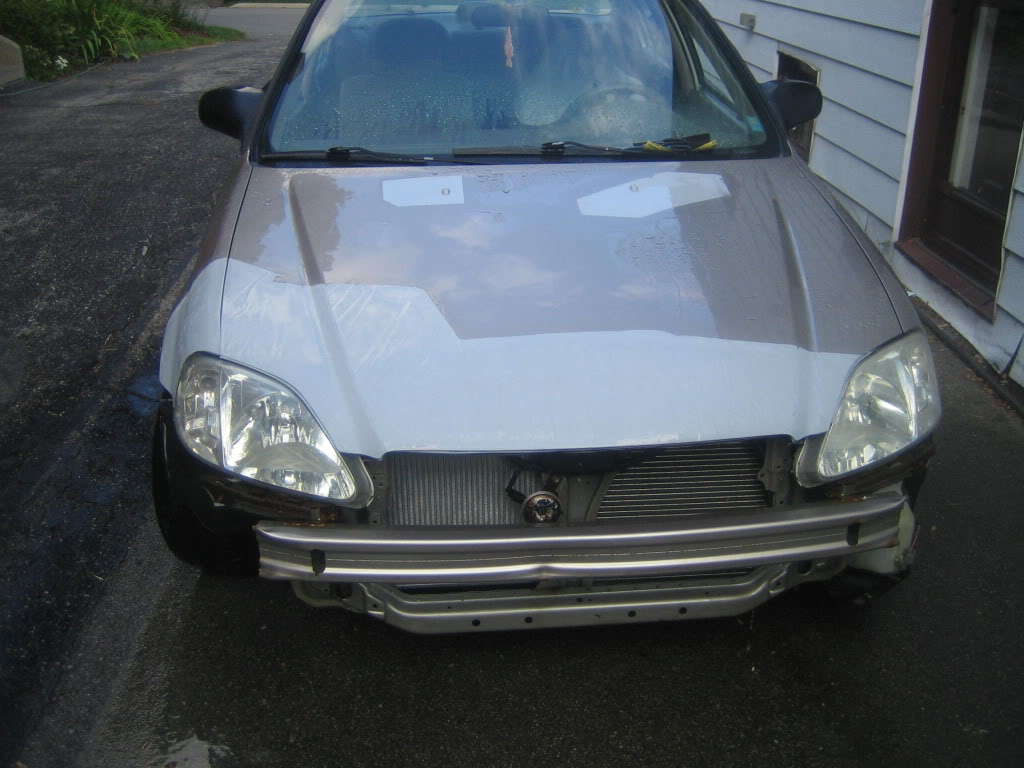
First things first, here are a few pics from before, All white looking marks are rough sanding with an 80 GRIT paper:

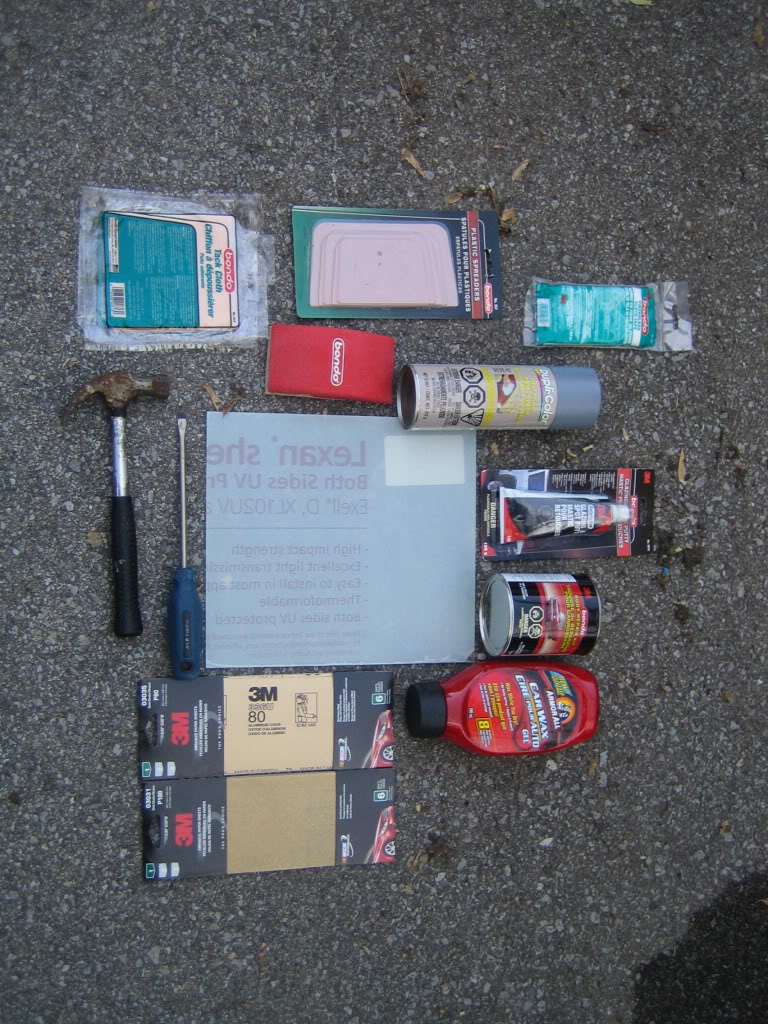
Here's a Photo of Most products used I also suggest you do must of this in a dust free environment (as dust free as possible) ie Garage
For fixing the crack in rear bumper I used Bondo's Body Repair Kit with fiber glass to ensure strength on the inside, on the outside I used the Bondo by itself along with Bondo's Glazing Putty to smooth things out. Innovation was needed to hold the bumper together while applying product.
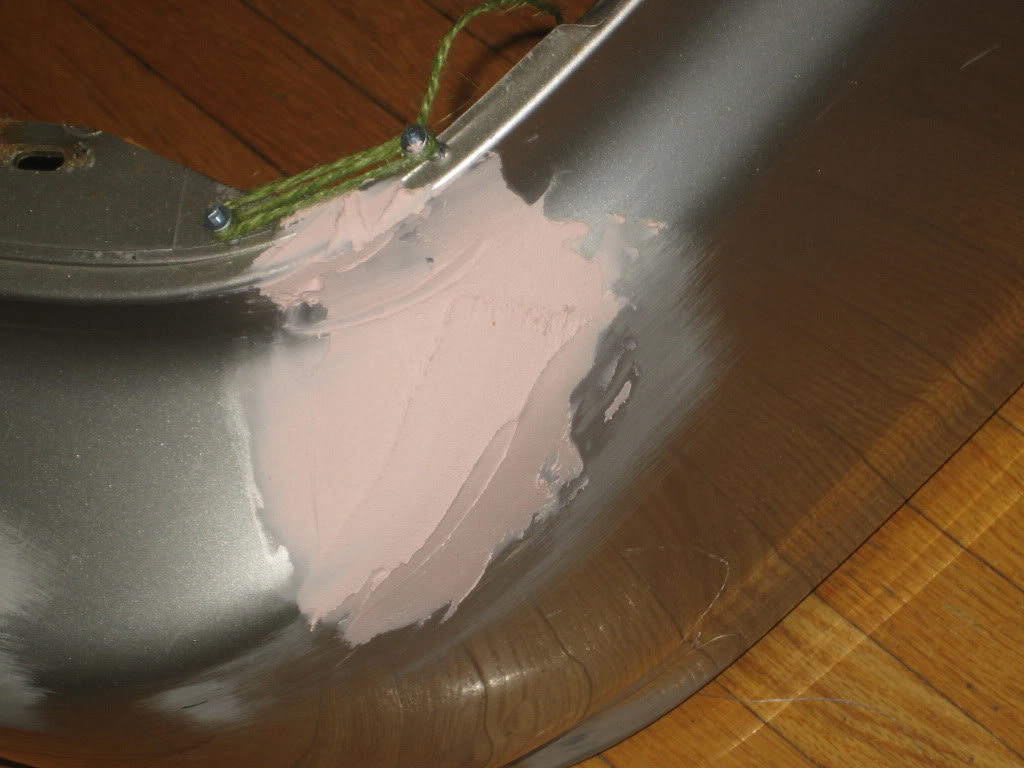
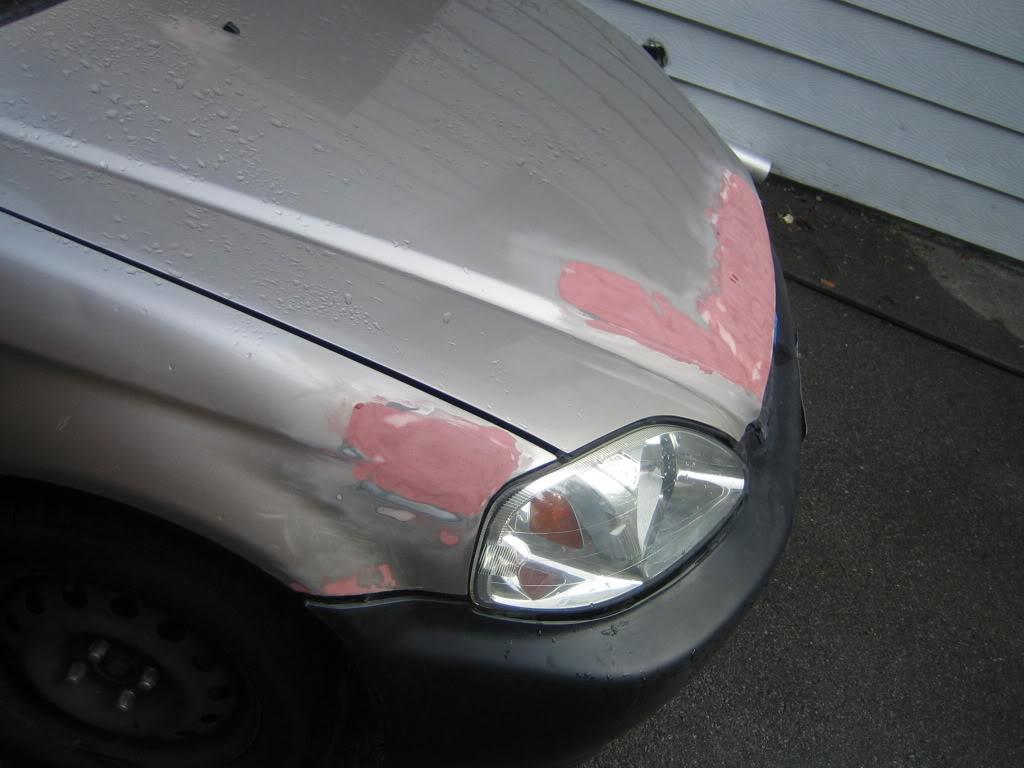
After the body repair, I sanded the area down with 80 Grit paper, then featherwighted it with 180, once pleased with genaral contouring I went back over it with a 400 Grit.
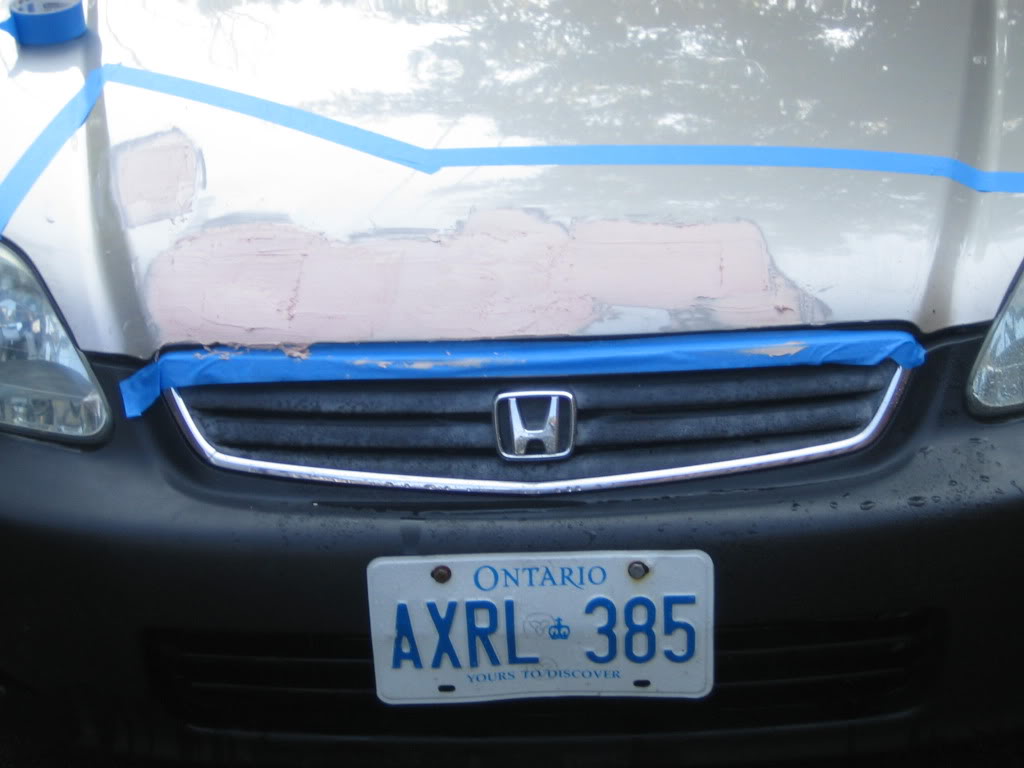
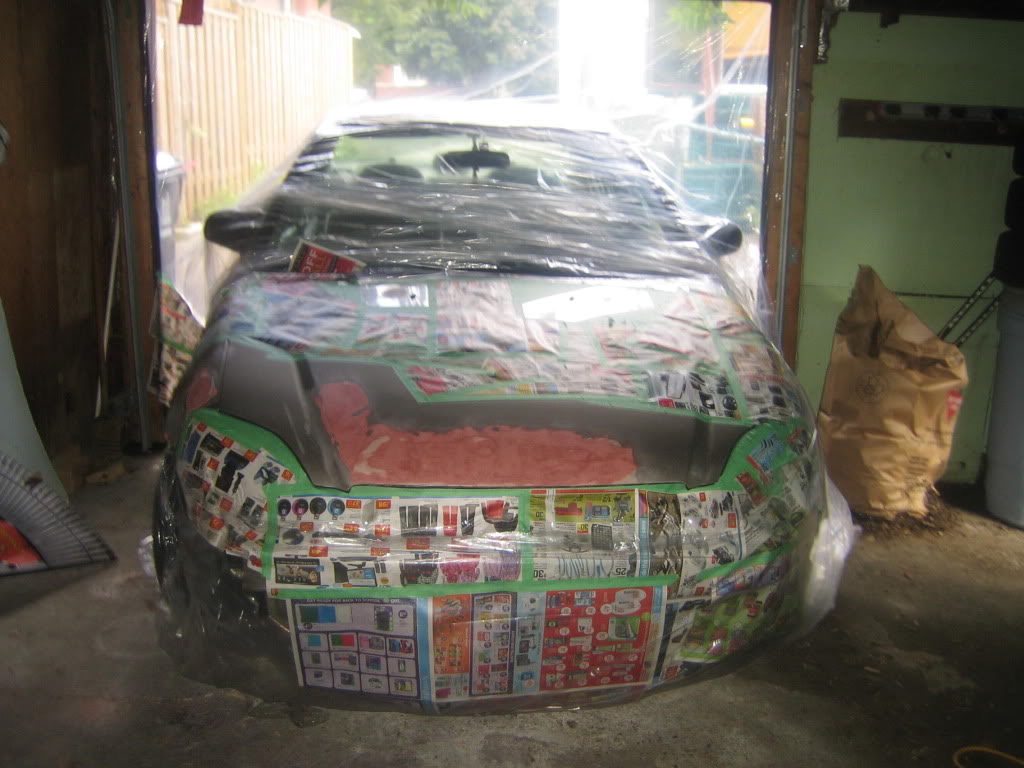
Before priming, I wet sanded with the 400 Grit paper as well... primer was DUPLICOLOR Sandable spray paint/primer. I masked off most of the car by pulling in only partly into the garage, sealing off all external elements with plastic (from dollar store), and obviously news paper was used where needed.
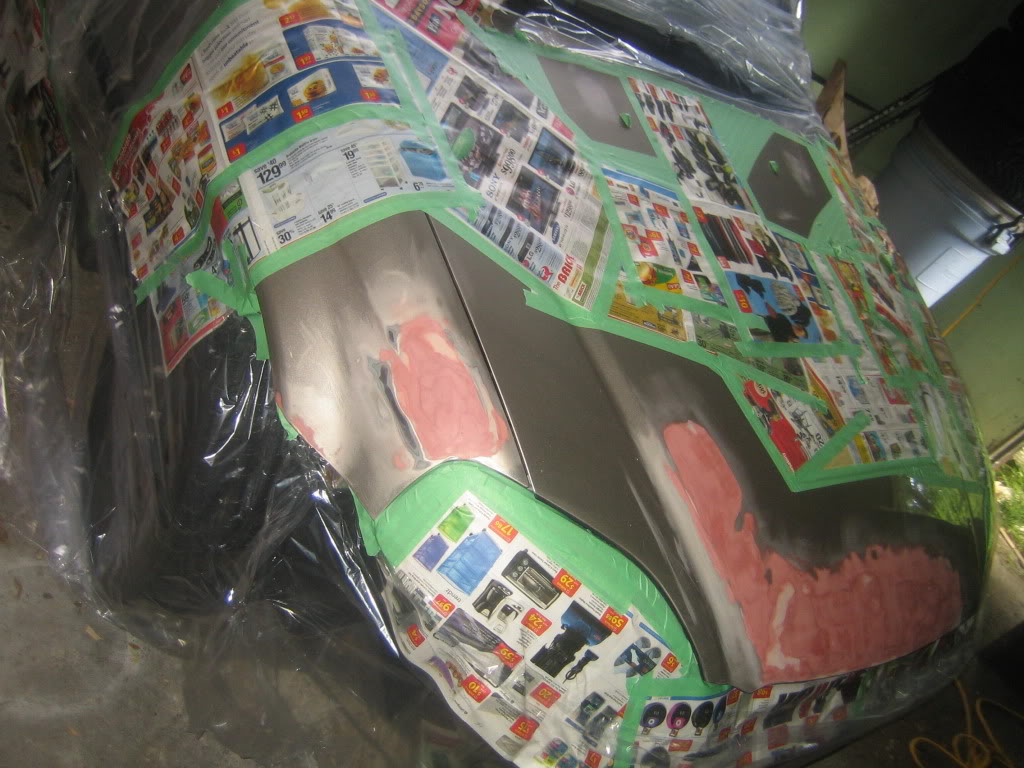
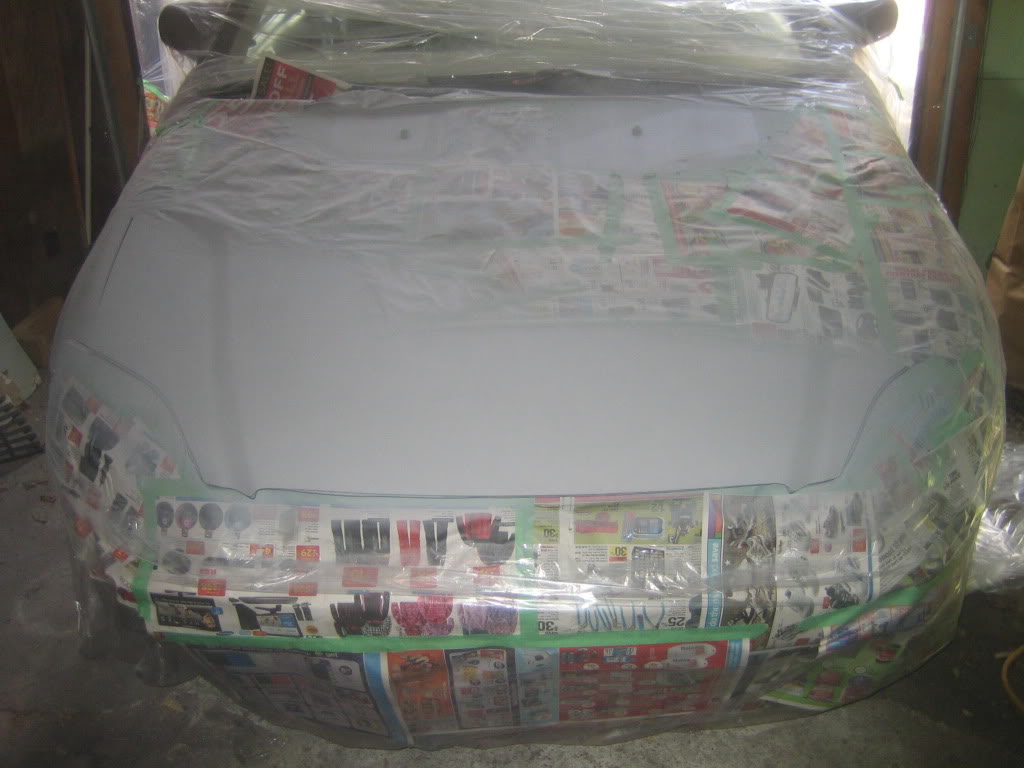
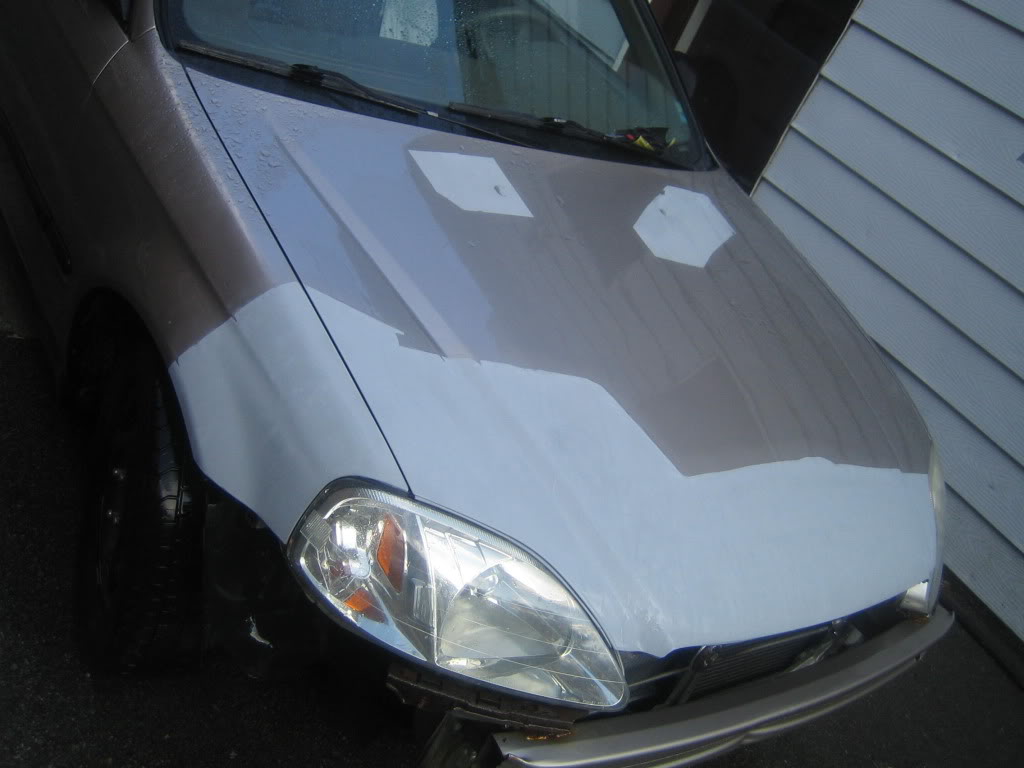
After these photos I once again wet sanded with 400 grit, word of advice, close your eyes while feeling your vehicle for any imperfections, if you do this correctly you should be able to run your hand across your vehicle not even noticing where the primer was applied.
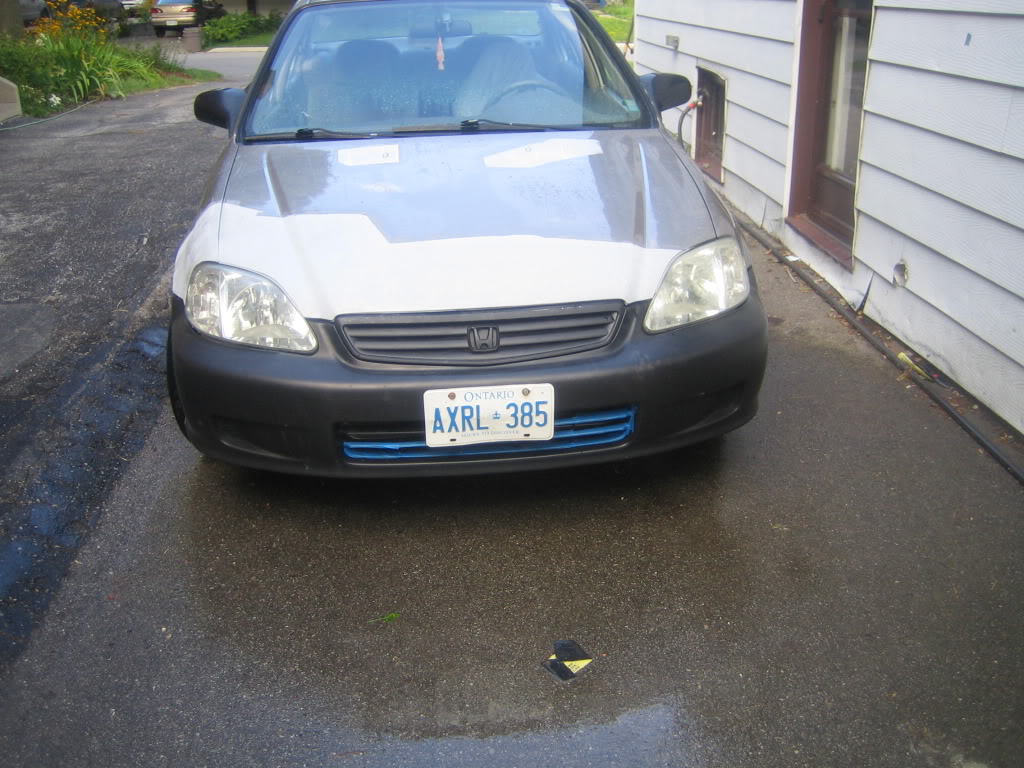
Photos of Finished painted product will be uploaded once I've received and applied the product.
Thanks, D
If there is anything you want to know or maybe Ive simply forgotten a step and youve noticed please feel free to let me know.
Throughout the years my civic had taken a few bumps and scratches, Ive been rear ended as you'll see from pics and Ive also hit someones trailer hitch when some douche decided to J-walk, I took it to an auto repair near by because my hood wouldnt close, he fixed that but put small dimple in the hood when trying to pop it out. Anyhow the reason for the black bumper would be 2 Christmas's back on my way to work, A dog got lose and ran across the street, Unfortunately I hit it and well... there went the bumper, along with my fist size dent in my fender.
Enjoy.
First things first, here are a few pics from before, All white looking marks are rough sanding with an 80 GRIT paper:
Here's a Photo of Most products used I also suggest you do must of this in a dust free environment (as dust free as possible) ie Garage
For fixing the crack in rear bumper I used Bondo's Body Repair Kit with fiber glass to ensure strength on the inside, on the outside I used the Bondo by itself along with Bondo's Glazing Putty to smooth things out. Innovation was needed to hold the bumper together while applying product.
After the body repair, I sanded the area down with 80 Grit paper, then featherwighted it with 180, once pleased with genaral contouring I went back over it with a 400 Grit.
Before priming, I wet sanded with the 400 Grit paper as well... primer was DUPLICOLOR Sandable spray paint/primer. I masked off most of the car by pulling in only partly into the garage, sealing off all external elements with plastic (from dollar store), and obviously news paper was used where needed.
After these photos I once again wet sanded with 400 grit, word of advice, close your eyes while feeling your vehicle for any imperfections, if you do this correctly you should be able to run your hand across your vehicle not even noticing where the primer was applied.
Photos of Finished painted product will be uploaded once I've received and applied the product.
Thanks, D
If there is anything you want to know or maybe Ive simply forgotten a step and youve noticed please feel free to let me know.
Last edited by Darrylmcl; 07-Sep-2009 at 06:42 PM. Reason: pictures arent uploading
 07-Sep-2009, 07:42 PM
#3
I hammered it out a bit to the best of my abilities via lifting the hood and placing a screwdriver with cloth rapped around the edge, then hammering gently. With the dents on the hood, I aslo hammered those DOWN a bit.

Thread
Thread Starter
Forum
Replies
Last Post
Darrylmcl
Civic DIY Tutorials - Info
15
09-Jun-2010 06:30 AM
charlie_wong
Honda Civic (+ other) Parts/Accessories for Sale or Trade
1
01-Nov-2004 10:32 AM


