DIY: CONTINUATION - How to fix cracks & bumps & also prime "AND PAINT"
 11-Oct-2009, 12:59 PM
#1
DIY: CONTINUATION - How to fix cracks & bumps & also prime "AND PAINT"
Sorry for the new thread, for whatever reason I cant go back and edit my old one, but if youd like to take a look at how I came the these steps below please visit: http://www.torontocivics.com/tccv5forums/t160685/
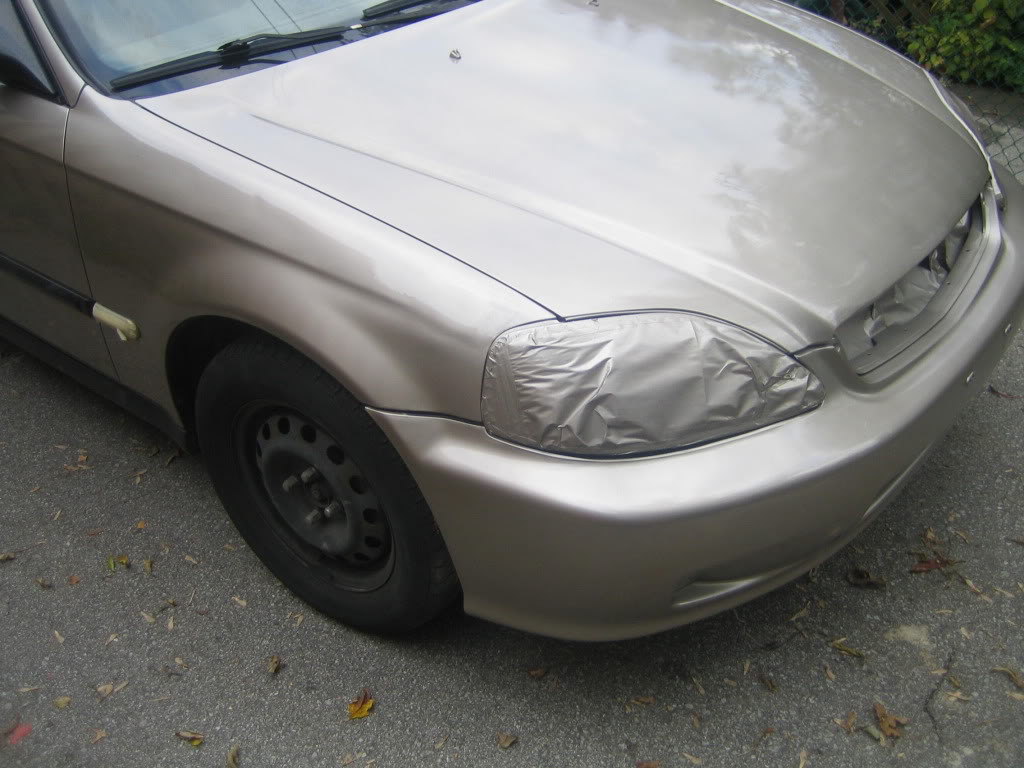
So... Here I am, it's been a while since I fixed all dents, scratches and bumps. I had primed the car and left it there for a while, 1 reason is so that it would settle... second was cause I've had experience where you think everything is perfect but under the right lighting you'll notice things here and there... as it turned out, I did notice a few places that weren't sanded as well as others and of course I went over it and fixed it... so time for paint.
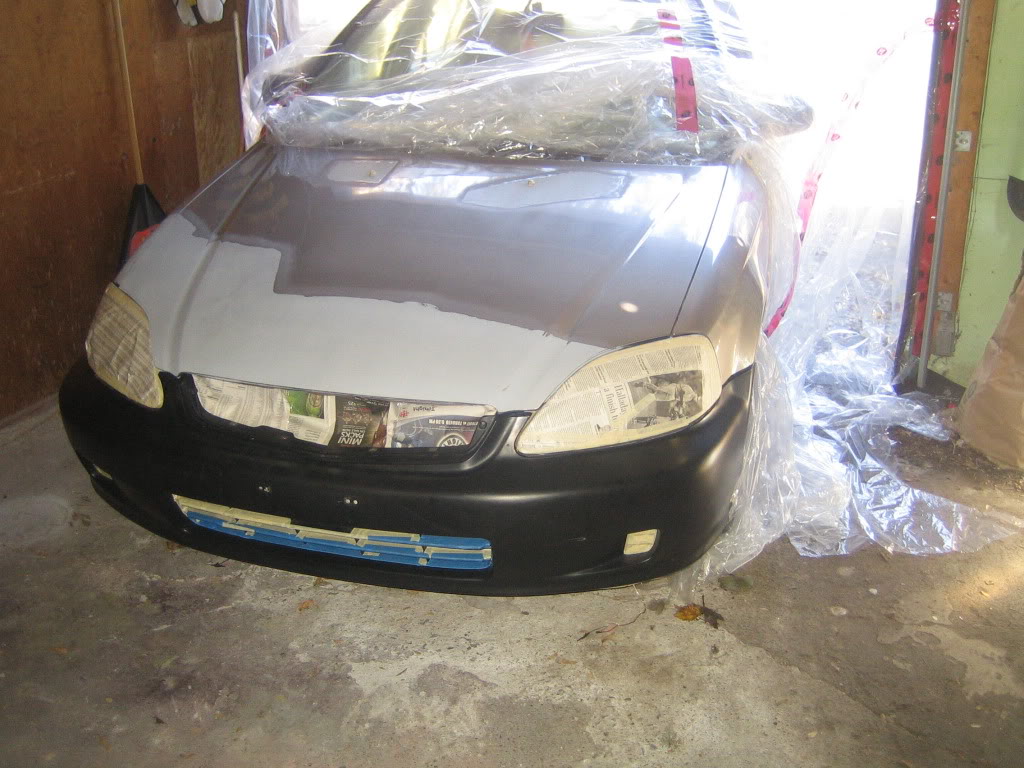
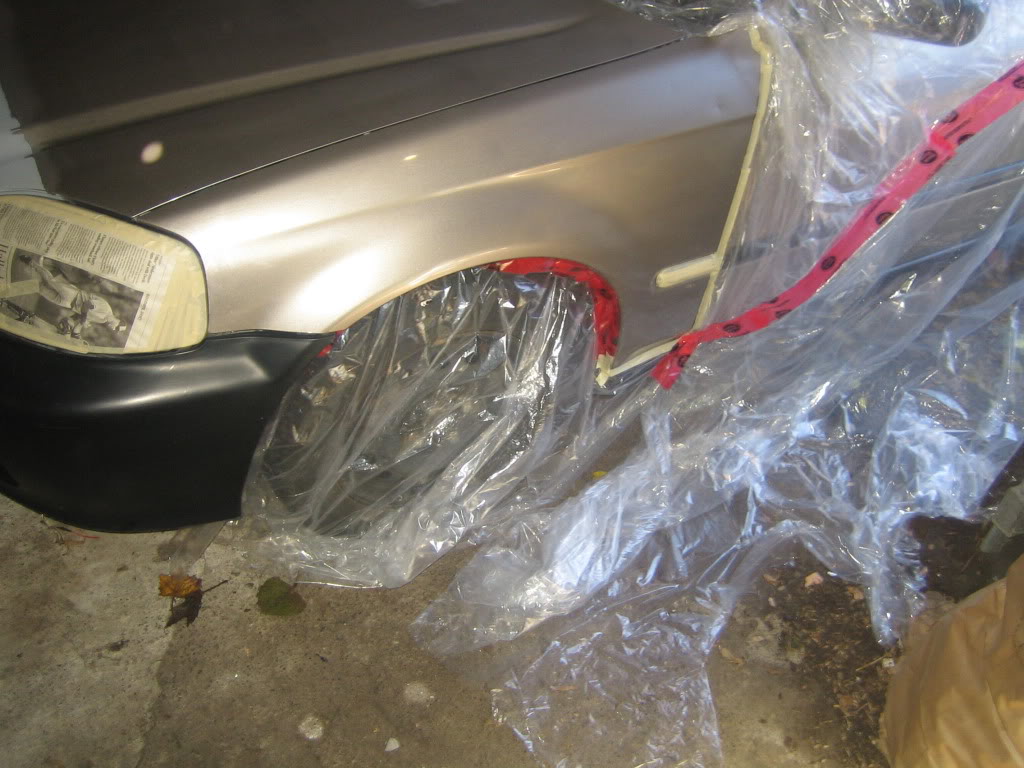
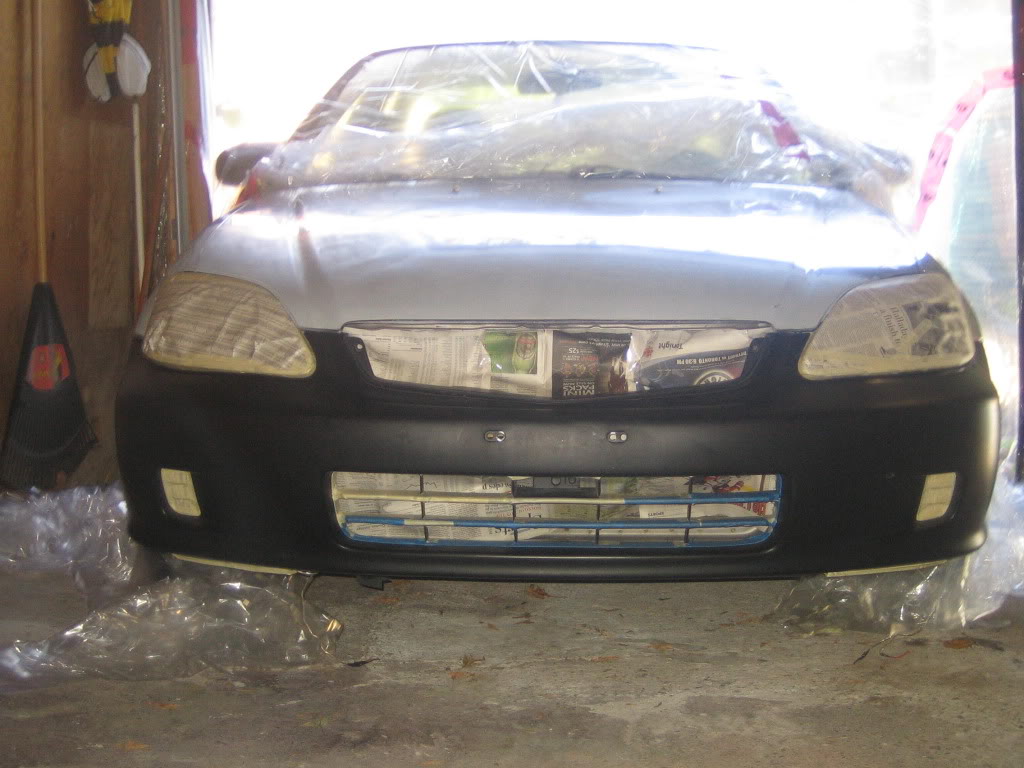
Before painting the car I gave it a simple wash with soap and water, nothing special. Pulled it into the garage half length and proceeded to tape off, once again using dollar store plastic and newspaper for under the fenders and whatnot.
Prior to painting, I obviously taped off all areas where i wanted to keep the bumper black. I also placed newspaper over the rad and A/C unit so that no paint would subsequently enter them.
PLEASE NOTE: This is the mostttttttttttttttt boring and tedious part of the entire procedure. Just like painting a home, preparation accounts for about 75% of the job, do it well so you don't kick yourself later.
Taping done. Time to paint. I purchased 4 cans of spray paint from NAPA Auto Parts Store @ $30.00 per and also 4 cans of clearcoat @ $18.00 per.
Paint = NAPA Custom Colour (specifically, my color code was) YR525M-4 [Titanium Metallic]
Clearcoat = DuPont Acrylic Clear A-7480S (Acrylic Trim and Jamb Clear)
You can find your colour code on the inside door jamb of your driver's side.
Before a single drop of paint touches your car, wipe it down with a tack cloth, CT has em for about $1.50.
This is a MUST, microfibre cloths will not do the trick.
WEAR A MASK... and not the cheap dust ones, a good chemical one (about $45.00 I think) and btw.... if you can smell paint through the mask, its garbage.. time for new filters
Follow directions on cans.. I tested my product by spraying my gas door. This allowed me to gauge optimal distances, drying times, finishing look and colour matching. Glad I did this as the first time I did... my clearcoat didnt come out as shiny and didnt feel as smooth as expected. Took it off and brought it into the store, they suggested I get closer while spraying and that should solve the problem... sure enough it did.
NOTE: I 100% Recommend you test this product before applying.
I ended up painting both fenders though I only needed to do one... reason for this was to achieve a seamless colour blend, from bumper to hood to fender.
Bumper, and fender were pretty simple, due to the fact that I had a directly straight spraying angle.
How to spray Hood.
The hood is a tricky part of the car to spray because youve got to place the can at an angle to get coverage.
DANGER While holding the can at an angle, the paint will collect a bit at the edges of the can (in my case, the spray gun topper), if it does start to collect, this WILL lead to little drips on your new paint.
To avoid this, wear something you dont care about and after every straight line spray you make, wipe the can.
I had to learn this the hard way.
Rather than spraying from left to right as you would have with the bumper and fenders, spray up and down, holding the can accordingly. IE while spraying up and down, hold the can horizontally.
Anyways enough talking... Behold!
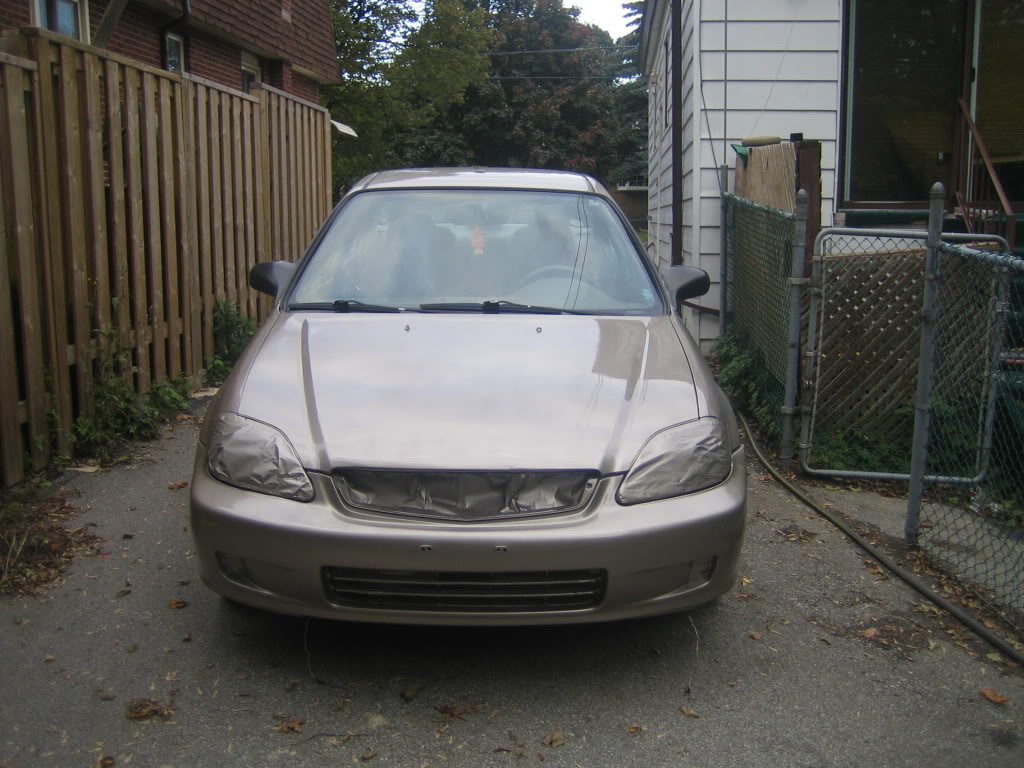
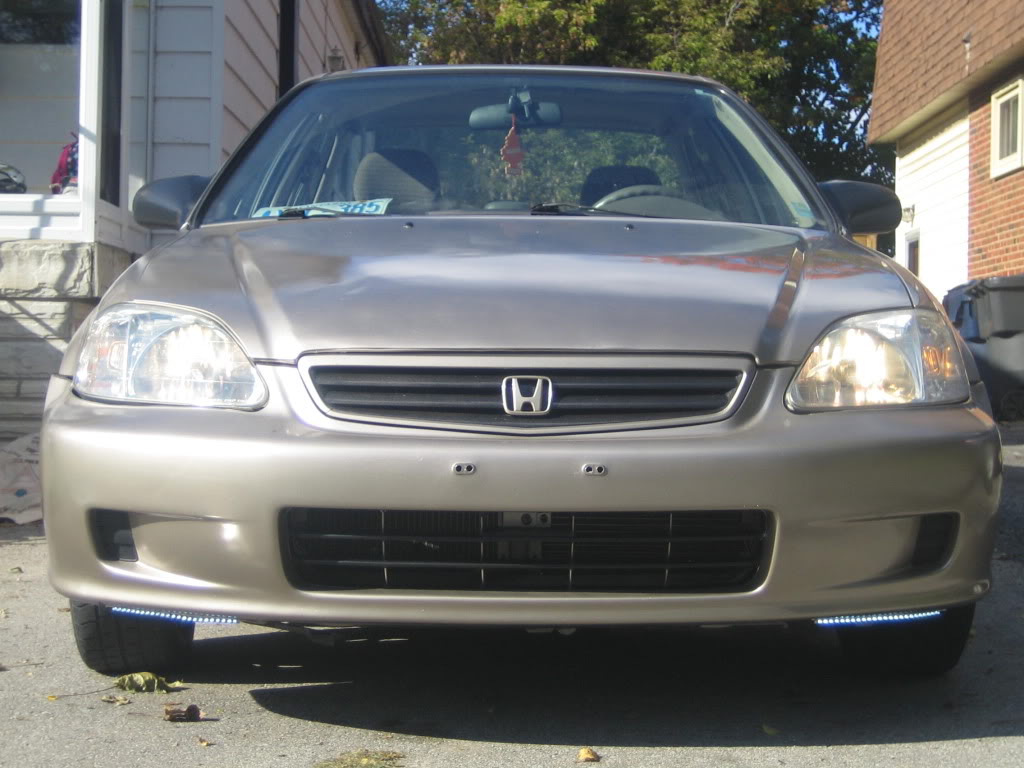
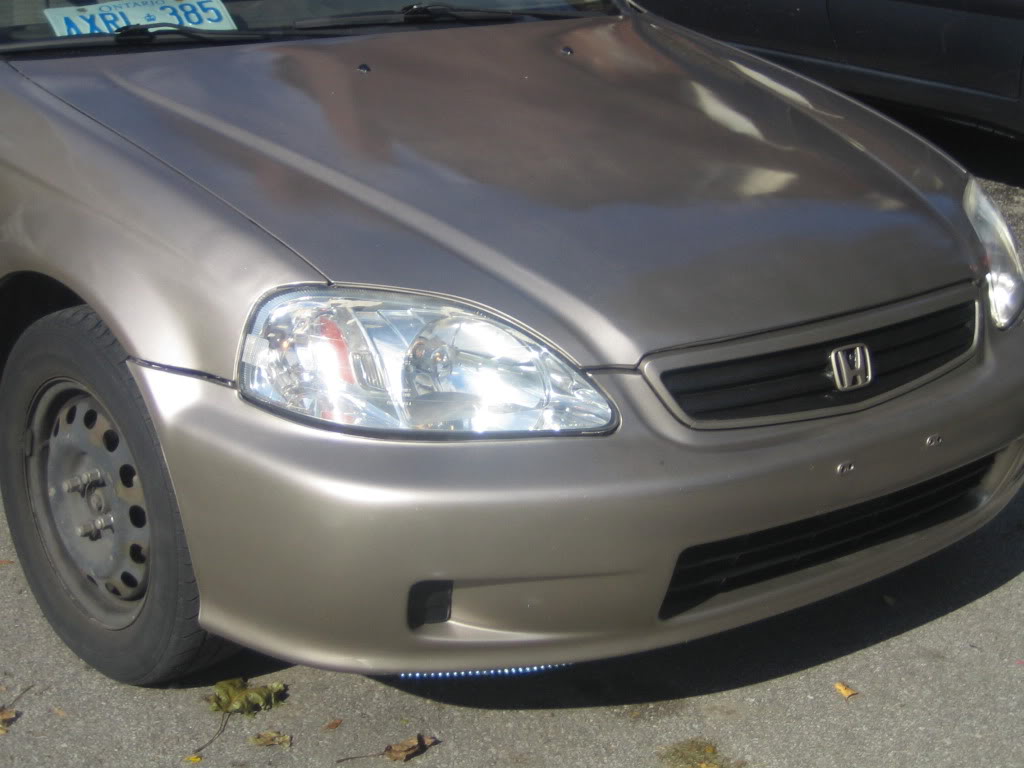
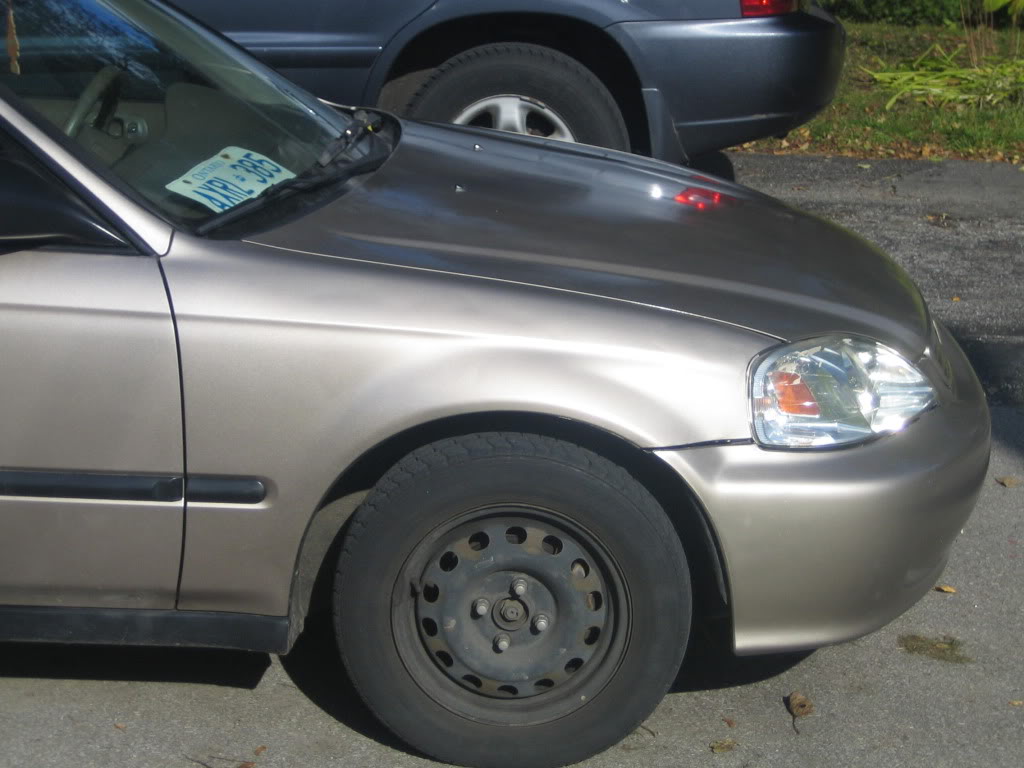
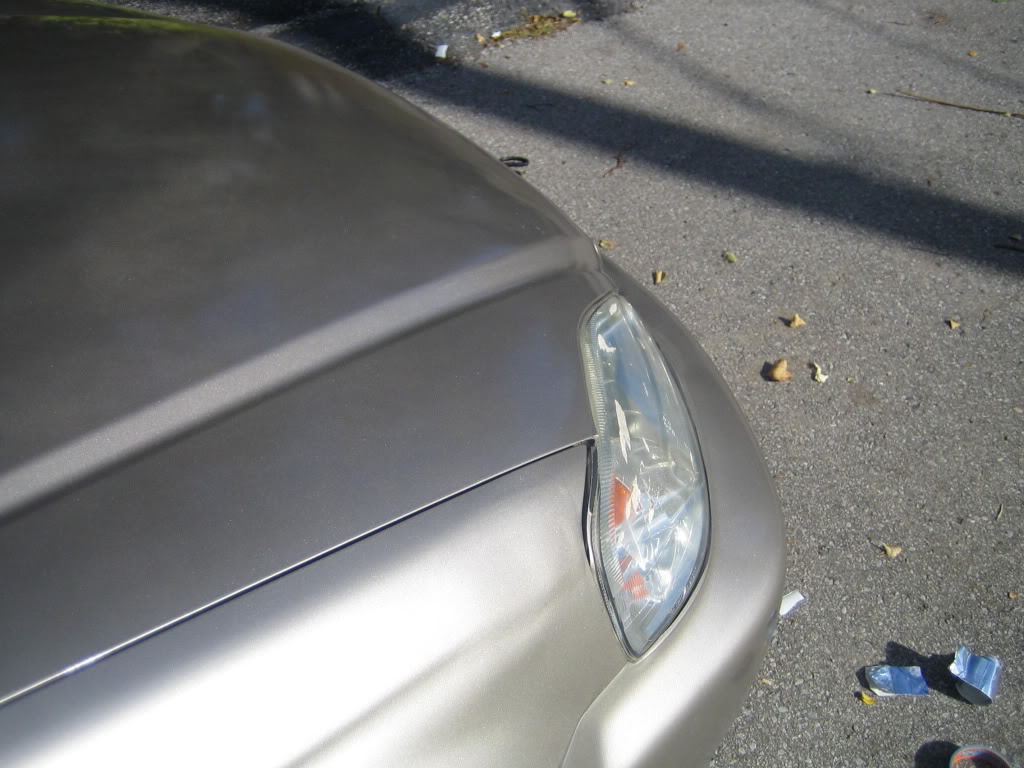
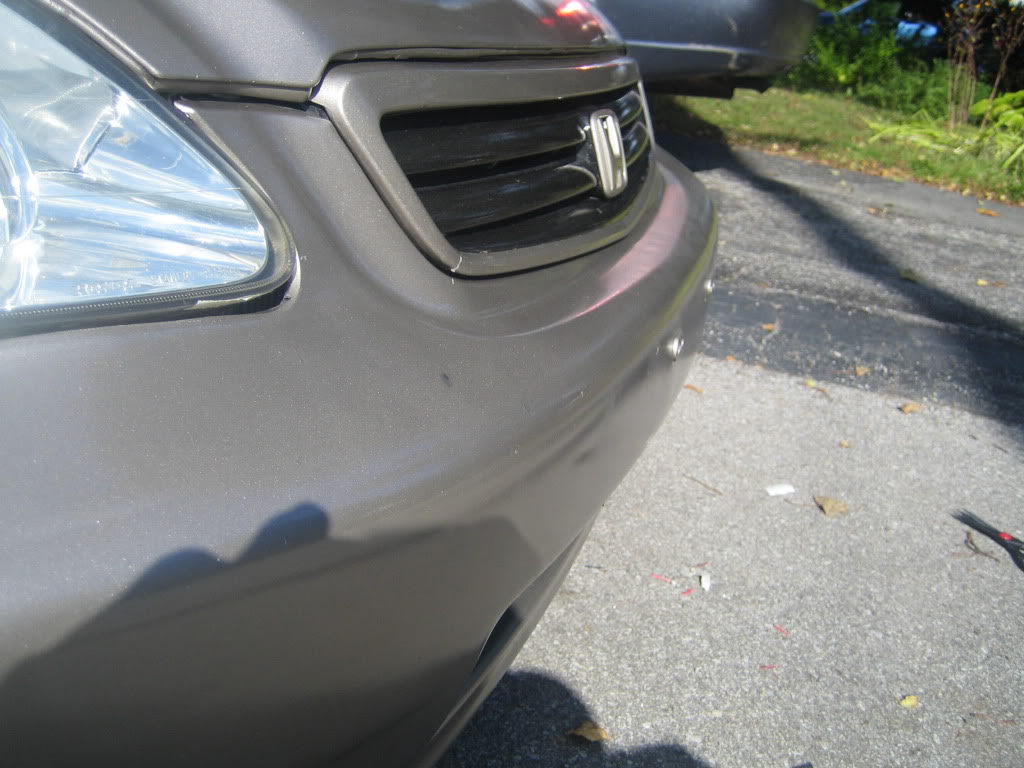
So... As you can see, though I waited a while before applying paint, trying to smooth everything out and get an exact contour it wasn't perfect, though better than it was, and I'm pleased. I dont do this for a living so as a first timer I think I did well.
You may notice some places where it looked like a drop of paint may have fallen... IT DID, thats why Ive given you the warning, learned that wiping trick a bit too late, but hey, next time I guess.
There are a few parts that require more clearcoat, I simply ran out. So gauge how much you'll need for your project from my mistakes.
NOTE: After Clearcoat allow your car time to dry... you can use it and all, but I do not suggest washing it it, nor allowing too much rain to hit for atleast a month. The clearcoat is thin, VERY thin. IE, though the car has settled for a few days, if I were to simply press my nail into the Finish it would leave a mark, it needs a great deal of time to dry and cure properly as opposed to manufacturing clearcoat.
Anyways, if you have any hopes of doing something like this I hope this thread helps you. Also if youve got anymore questions, give me a shout, I'd be glad to help.
Darryl
PS, Total cost of job...
fixing dents with Bondo, filling is small holes with glazing putty, sanding, priming, sanding, and painting + miscellaneous costs.
$350.00
So... Here I am, it's been a while since I fixed all dents, scratches and bumps. I had primed the car and left it there for a while, 1 reason is so that it would settle... second was cause I've had experience where you think everything is perfect but under the right lighting you'll notice things here and there... as it turned out, I did notice a few places that weren't sanded as well as others and of course I went over it and fixed it... so time for paint.
Before painting the car I gave it a simple wash with soap and water, nothing special. Pulled it into the garage half length and proceeded to tape off, once again using dollar store plastic and newspaper for under the fenders and whatnot.
Prior to painting, I obviously taped off all areas where i wanted to keep the bumper black. I also placed newspaper over the rad and A/C unit so that no paint would subsequently enter them.
PLEASE NOTE: This is the mostttttttttttttttt boring and tedious part of the entire procedure. Just like painting a home, preparation accounts for about 75% of the job, do it well so you don't kick yourself later.
Taping done. Time to paint. I purchased 4 cans of spray paint from NAPA Auto Parts Store @ $30.00 per and also 4 cans of clearcoat @ $18.00 per.
Paint = NAPA Custom Colour (specifically, my color code was) YR525M-4 [Titanium Metallic]
Clearcoat = DuPont Acrylic Clear A-7480S (Acrylic Trim and Jamb Clear)
You can find your colour code on the inside door jamb of your driver's side.
Before a single drop of paint touches your car, wipe it down with a tack cloth, CT has em for about $1.50.
This is a MUST, microfibre cloths will not do the trick.
WEAR A MASK... and not the cheap dust ones, a good chemical one (about $45.00 I think) and btw.... if you can smell paint through the mask, its garbage.. time for new filters
Follow directions on cans.. I tested my product by spraying my gas door. This allowed me to gauge optimal distances, drying times, finishing look and colour matching. Glad I did this as the first time I did... my clearcoat didnt come out as shiny and didnt feel as smooth as expected. Took it off and brought it into the store, they suggested I get closer while spraying and that should solve the problem... sure enough it did.
NOTE: I 100% Recommend you test this product before applying.
I ended up painting both fenders though I only needed to do one... reason for this was to achieve a seamless colour blend, from bumper to hood to fender.
Bumper, and fender were pretty simple, due to the fact that I had a directly straight spraying angle.
How to spray Hood.
The hood is a tricky part of the car to spray because youve got to place the can at an angle to get coverage.
DANGER While holding the can at an angle, the paint will collect a bit at the edges of the can (in my case, the spray gun topper), if it does start to collect, this WILL lead to little drips on your new paint.
To avoid this, wear something you dont care about and after every straight line spray you make, wipe the can.
I had to learn this the hard way.
Rather than spraying from left to right as you would have with the bumper and fenders, spray up and down, holding the can accordingly. IE while spraying up and down, hold the can horizontally.
Anyways enough talking... Behold!
So... As you can see, though I waited a while before applying paint, trying to smooth everything out and get an exact contour it wasn't perfect, though better than it was, and I'm pleased. I dont do this for a living so as a first timer I think I did well.
You may notice some places where it looked like a drop of paint may have fallen... IT DID, thats why Ive given you the warning, learned that wiping trick a bit too late, but hey, next time I guess.
There are a few parts that require more clearcoat, I simply ran out. So gauge how much you'll need for your project from my mistakes.
NOTE: After Clearcoat allow your car time to dry... you can use it and all, but I do not suggest washing it it, nor allowing too much rain to hit for atleast a month. The clearcoat is thin, VERY thin. IE, though the car has settled for a few days, if I were to simply press my nail into the Finish it would leave a mark, it needs a great deal of time to dry and cure properly as opposed to manufacturing clearcoat.
Anyways, if you have any hopes of doing something like this I hope this thread helps you. Also if youve got anymore questions, give me a shout, I'd be glad to help.
Darryl
PS, Total cost of job...
fixing dents with Bondo, filling is small holes with glazing putty, sanding, priming, sanding, and painting + miscellaneous costs.
$350.00
Last edited by Darrylmcl; 12-Oct-2009 at 07:44 AM.
 12-Oct-2009, 01:24 AM
#3

 12-Oct-2009, 09:37 AM
#6
Senior Member

Join Date: Mar 2009
Posts: 124
looks nice, if anyone wants to paint their bumper alone and not the hood and fenders it is best to remove the bumper cover and paint it off the car, they are pretty easy to remove and it is much easier to paint it evenly without runs or getting paint on the rad lights etc,
for painting the hood and fenders, removing them is a matter of undoing a few bolts and again a lot less masking to do and you can paint them very evenly that way, you can buy more clear coat than you think you need so you dont run out part way through the job and return the unused spray cans to CT or wherever you buy them from
even though you dont have a big spray booth to bake the painted parts in like a real body shop you can try using a heat gun that can be bought at canadian tire on sale for about $10 to help bake the paint on after spraying, yes this will take awhile to do it by hand but really helps cure the paint. note that even a car painted by a pro body shop and baked in a booth still takes about two months to fully cure afterwards, so it will take a lot longer if you dont bake it at all
after a couple of months you can polish the paint as there will likely be dust in the paint and solvent pops, before painting the car there is a solution you can buy that really degreases the car and removes silicone like from armour all and tire spray that leaves little crater like imperfections called fish eyes in newly painted surfaces, check with a body shop paint supply place they can get you this degreaser, I think Fincham carries it. also wet the floor just before you paint this will keep alot of dust from flying around when you are spray painting, not as good as a down draft booth but better than nothing at all
 14-Oct-2009, 11:21 AM
#8
Just your simple spray cans... they were custom made from NAPA but other than that it was your everyday variety stuff.
oh and the spray gun topper I was talking about is this pastic handle you place on top of the can, achieves a more even spray since its more comfroatble in your hand.
14-Oct-2009, 02:18 PM
#9
Just your simple spray cans... they were custom made from NAPA but other than that it was your everyday variety stuff.
oh and the spray gun topper I was talking about is this pastic handle you place on top of the can, achieves a more even spray since its more comfroatble in your hand.
oh and the spray gun topper I was talking about is this pastic handle you place on top of the can, achieves a more even spray since its more comfroatble in your hand.
peter
14-Oct-2009, 06:20 PM
#10
Crappy Tire surprisingly

Think it was about 8 bucks.
there were better ones, metal one, for about 25, but i had used this one before so I felt comfrotable, not to mention I didnt car for the extra cost.
Think it was about 8 bucks.
there were better ones, metal one, for about 25, but i had used this one before so I felt comfrotable, not to mention I didnt car for the extra cost.
22-May-2010, 10:41 AM
#11
sorry to revive an older thread but darryl, my question is did you prime the bumper? I have unpainted front/rear bumpers with unpainted lips and I wanted to get this done myself until I have enough $$ for a good shop... and i noticed you only primed the parts you repaired, the bumpers didn't look like u primed them...
22-May-2010, 08:21 PM
#13
i believe napa carries them in stock but if anything there's a place on mcnicoll between vp and don mills, first intersection if you're coming down vp called paint circuit i think? they supply the body shops, those guys have our paint codes in spray cans or any quantity you need... that's where i'm going to get mine...
25-May-2010, 02:00 AM
#14
STEV - I didnt prime the bumper.... the bumper comes primes (black) Though NAPA did suggest that I get some type of "bonder", essentially a primer... but no I didnt, straight paint and so far so good.
JDM EK4 - Napa does have it in stock, they make it right there actually... you tell them the code off your car and they'll make it, take into consideration that the paint on your car is however many years old so blending is essential. and you MUST get a good clear coat, no crappy tire stuff.
JDM EK4 - Napa does have it in stock, they make it right there actually... you tell them the code off your car and they'll make it, take into consideration that the paint on your car is however many years old so blending is essential. and you MUST get a good clear coat, no crappy tire stuff.

Thread
Thread Starter
Forum
Replies
Last Post
Darrylmcl
Civic DIY Tutorials - Info
2
07-Sep-2009 07:42 PM
Ruff_Rever
Honda Civic Performance - JDM Discussion
7
29-May-2007 11:02 AM
charlie_wong
Honda Civic (+ other) Parts/Accessories for Sale or Trade
1
01-Nov-2004 10:32 AM
imported_BlazeInEk
Chit-Chat
16
06-Aug-2004 05:04 AM


