DIY - Washer Nozzle Install for C/F Hoods
 25-May-2005, 12:52 AM
#1
Senior Member
Thread Starter
Join Date: Aug 2002
Location: Mississauga
Posts: 13,184
So i picked up a CF Hood today, and had to find a way to put my windshield washer nozzles on because around here you can't deal without them, unless you like dirty streaked windsheilds... which would drive me absolutley insane.
Then i tried to find a DIY on it, but was hardpressed to find one, i had to piece stuff together from a bunch of different forums... very annoying.
So anyways here's the product of all my work.
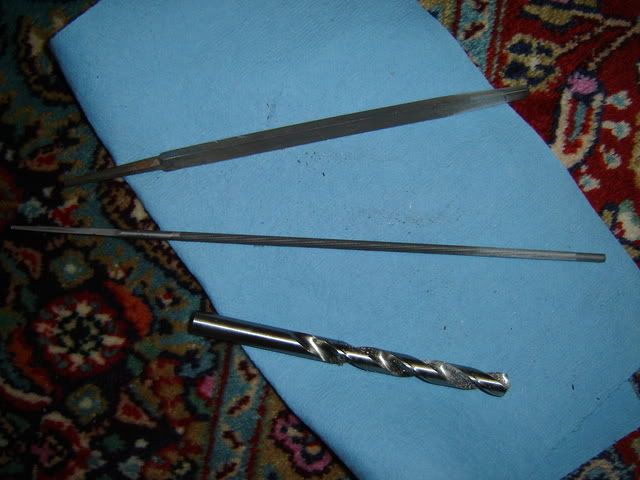
Things you need.
Drill
3/8" New, SHARP, Drill Bit
1/4" New, SHARP, Drill Bit (Optional)
Masking Tape
Assorted files (one round one and one triangle one preferrably)
1. Make a cardboard template of your OEM hood and where the nozzle hole is going to be, and it's shape (it's a weird shape, imagine a circle with a rectangle going through it. [O] ) Cut out the shape of the opening from the cardboard.
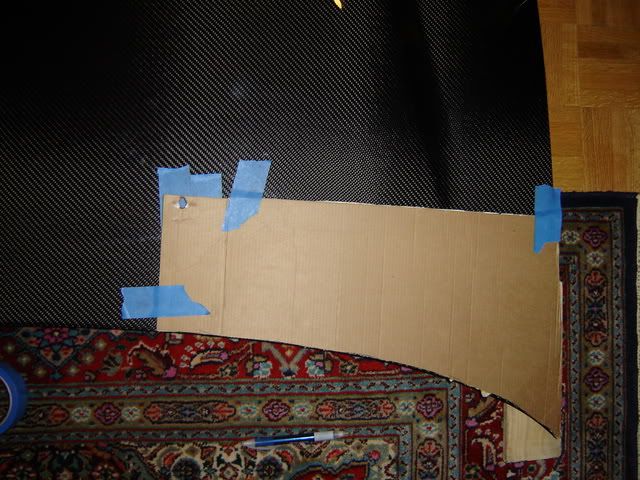
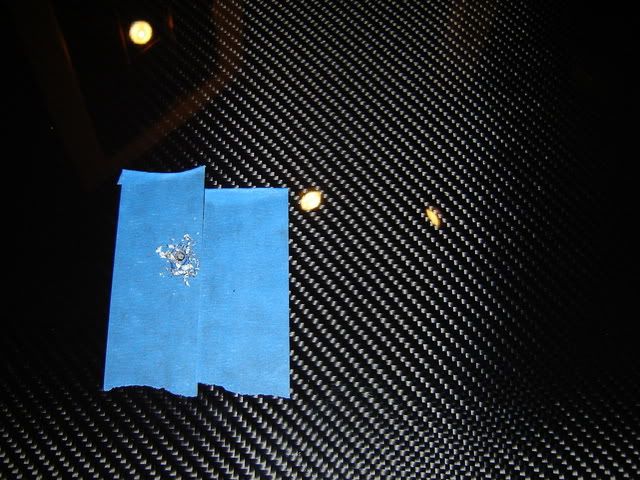
2. Put masking tape over the areas where the nozzles are going to go to lessen the chance of you damaging the clear or tearing any part of it.. (i used my template which you'll see in a later pic to figure out the general area in which i'd have to drill.)
3. Trace the shape of the opening onto the tape through the template.
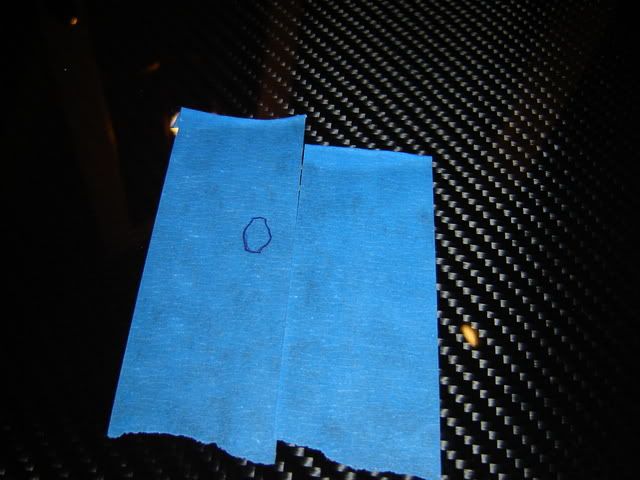
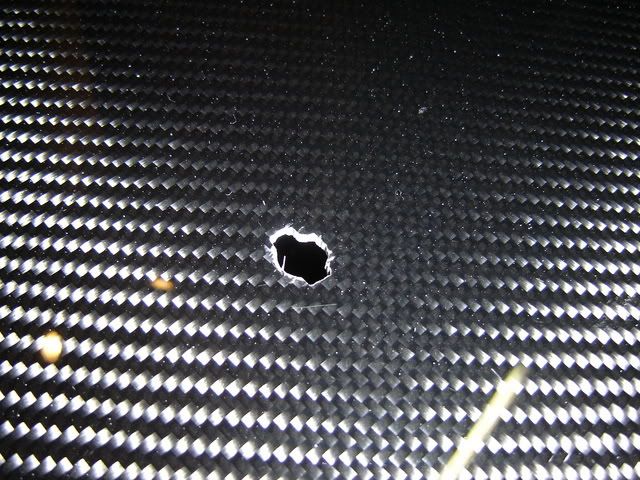
4. You'll need the 3/8" drill bit to drill your hole, make sure it's brand new and sharp as hell! you don't want to skimp out here, you can pull the CF and kill that beautiful pattern. I drilled a pilot hole first to guide the big drill bit. Remember to drill through the whole in one smooth motion, don't take your time. If you do it quickly you'll have less of a chance of ruining the finish and the CF.
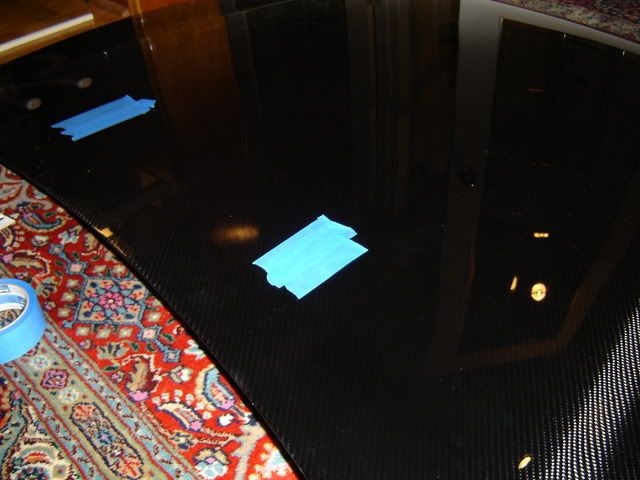
This is the pilot hole before i drilled the big one.
5. Remove the masking tape (or leave it on, i didn't want the adhesive getting all ground up and stuck all over by the file) and start filing the edges away into your desired shape. Make sure you do a little at a time and take one nozzle off to test fit it as you go to make sure you don't make the hole too big cuz then you're SCREWED! (The nozzle comes off your stock hood with a pair of strong manly hands, or pliers to squeeze the tabs on the edges, and some finesse to pull the tube off the end)
This is the hole almost finished
6. Put the nozzle into the hole.
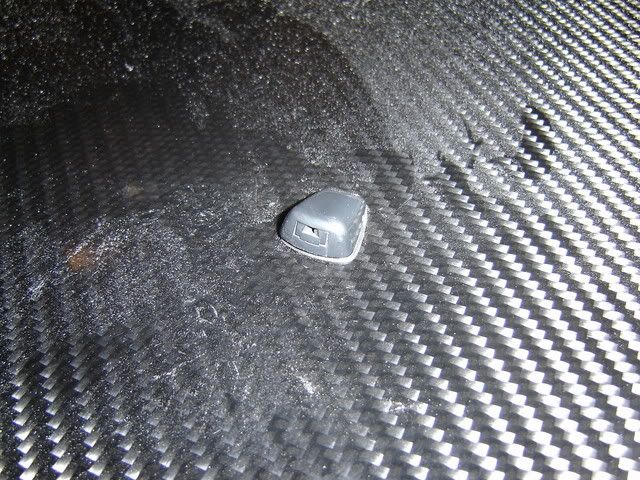
As you can imagine it's a very dusty process i was continually cleaning my hood, and at the end i cleaned it as well (after this pic) If you want a really tight fit you need to trim down the clips on the sides of the nozzles because the CF hood is thicker than your stock steel one, however as i still want to leave myself the option of just switching them back over to the stock one whenever i want, i left them the way they were. They fit just fine.
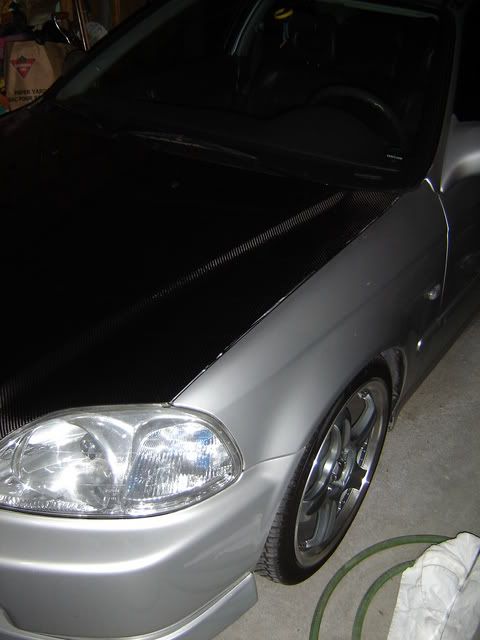
7. Install your hood and enjoy!
*Note - when you're filing the holes make sure you don't sit on an angle, otherwise you'll end up having your nozzles pointing to the car beside you. Sit directly infront of your work.
Thankfully mine are only slightly off, which means they still cover my windsheild perfectly, only a perfectionist would notice the difference... like me
Enjoy!
Then i tried to find a DIY on it, but was hardpressed to find one, i had to piece stuff together from a bunch of different forums... very annoying.
So anyways here's the product of all my work.
Things you need.
Drill
3/8" New, SHARP, Drill Bit
1/4" New, SHARP, Drill Bit (Optional)
Masking Tape
Assorted files (one round one and one triangle one preferrably)
1. Make a cardboard template of your OEM hood and where the nozzle hole is going to be, and it's shape (it's a weird shape, imagine a circle with a rectangle going through it. [O] ) Cut out the shape of the opening from the cardboard.
2. Put masking tape over the areas where the nozzles are going to go to lessen the chance of you damaging the clear or tearing any part of it.. (i used my template which you'll see in a later pic to figure out the general area in which i'd have to drill.)
3. Trace the shape of the opening onto the tape through the template.
4. You'll need the 3/8" drill bit to drill your hole, make sure it's brand new and sharp as hell! you don't want to skimp out here, you can pull the CF and kill that beautiful pattern. I drilled a pilot hole first to guide the big drill bit. Remember to drill through the whole in one smooth motion, don't take your time. If you do it quickly you'll have less of a chance of ruining the finish and the CF.
This is the pilot hole before i drilled the big one.
5. Remove the masking tape (or leave it on, i didn't want the adhesive getting all ground up and stuck all over by the file) and start filing the edges away into your desired shape. Make sure you do a little at a time and take one nozzle off to test fit it as you go to make sure you don't make the hole too big cuz then you're SCREWED! (The nozzle comes off your stock hood with a pair of strong manly hands, or pliers to squeeze the tabs on the edges, and some finesse to pull the tube off the end)
This is the hole almost finished
6. Put the nozzle into the hole.
As you can imagine it's a very dusty process i was continually cleaning my hood, and at the end i cleaned it as well (after this pic) If you want a really tight fit you need to trim down the clips on the sides of the nozzles because the CF hood is thicker than your stock steel one, however as i still want to leave myself the option of just switching them back over to the stock one whenever i want, i left them the way they were. They fit just fine.
7. Install your hood and enjoy!
*Note - when you're filing the holes make sure you don't sit on an angle, otherwise you'll end up having your nozzles pointing to the car beside you. Sit directly infront of your work.
Thankfully mine are only slightly off, which means they still cover my windsheild perfectly, only a perfectionist would notice the difference... like me
Enjoy!


 25-May-2005, 09:28 AM
#11
Senior Member
Thread Starter
Join Date: Aug 2002
Location: Mississauga
Posts: 13,184
yes dust mask... 
I didn't want to drill, but then again i didn't want to attach the squirters to my windhsheild wiper arms i wanted something barely noticable, it's an OEM style hood and it's black so the black nozzles are barely noticable.
i'll take some full pictures later Younes, maybe tonight or this weekend hopefully. I put the hood on at like 12 in my garage, and i didn't feel like driving to some well lit parking lot to take pics right then.
25-May-2005, 09:30 AM
#12
Senior Member
Thread Starter
Join Date: Aug 2002
Location: Mississauga
Posts: 13,184
Originally posted by BBProductions
nce diy, that hodd gonna def change the look of the car, enjoy...
nce diy, that hodd gonna def change the look of the car, enjoy...
now i have to debate whether to black house the headlights to match, or if that's too much dark stuff on my silver car...
 25-May-2005, 09:42 AM
#13
Registered User
Join Date: Jan 2003
Location: A Place Called Ontario
Posts: 3,694
ahhh i say leave the headlights as is.....well i dunno...i guess u'd have to see a picture of a before and after kinda deal...photoshop. . .
your car looks good man....probably looks better with the cf hood now too. . . .awesome job
your car looks good man....probably looks better with the cf hood now too. . . .awesome job

 24-Jul-2005, 10:54 PM
#18
Registered User

Join Date: Jul 2005
Location: Kingston
Posts: 48
Might be worth mentioning that you should seal the CF after drilling and filing. Use a good quality CA. Cheap dollar store crazy glue wont cut it. Spend the $10 at a decent hobby shop. just apply a couple drops to the bare CF and run it around with a Q-tip. Let it dry and repeat a couple times. This way the CF wont chip, fray, or delaminate.
Dan.
Dan.
03-Dec-2005, 05:35 PM
#20
Registered User

Join Date: Jun 2003
Posts: 589
hey I did the same thing.l. but I need to connect the led lights for the nozzle tip. I wanna connect it to my headlights. What wires do I tap into? whats positive and negative on my headlights? can someone please PM me? thanks


