DIY Side Moulding Trim Painting
 25-Jan-2008, 05:34 PM
#1
Senior Member
Thread Starter
Join Date: Sep 2007
Location: Markham
Posts: 302
DIY Side Moulding Trim Painting
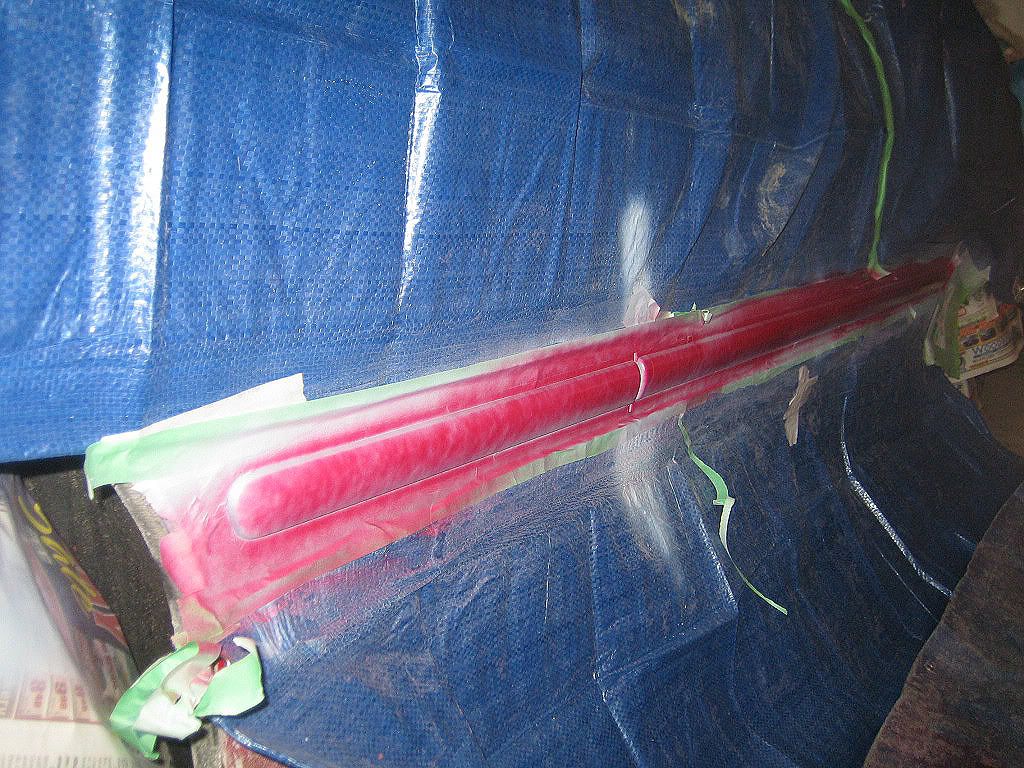
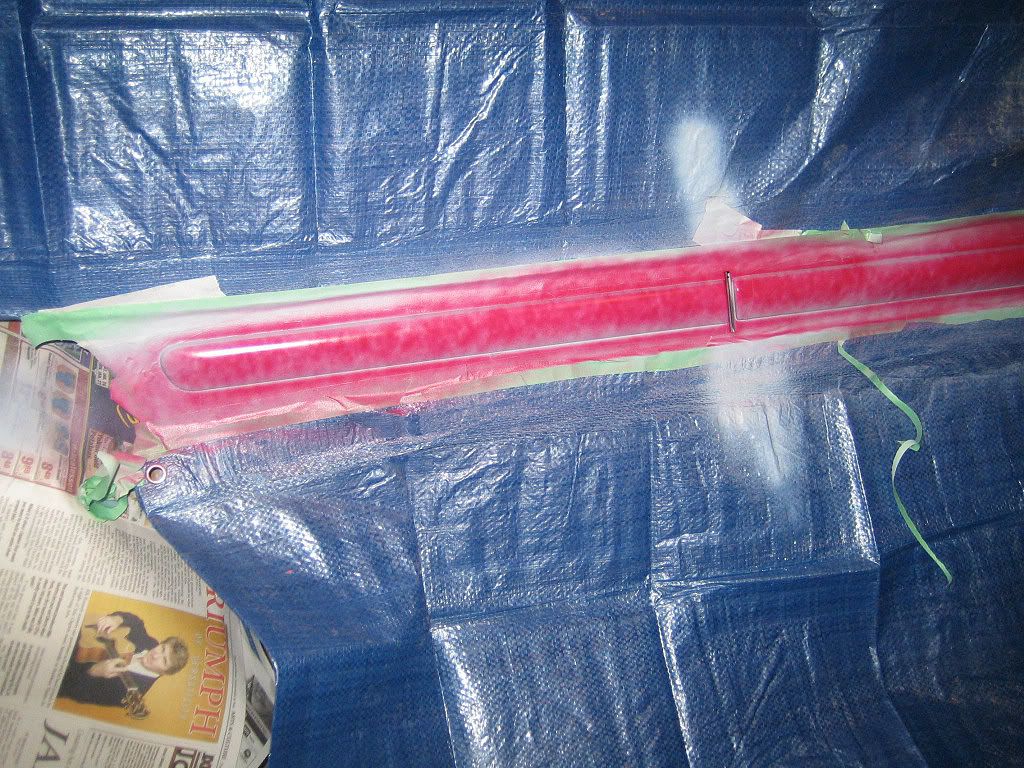
I was helping a buddy paint his side moulding as its been a boring winter and we've been wanting to work on the cars. so here is a DIY on how to paint the mouldings that many people have.
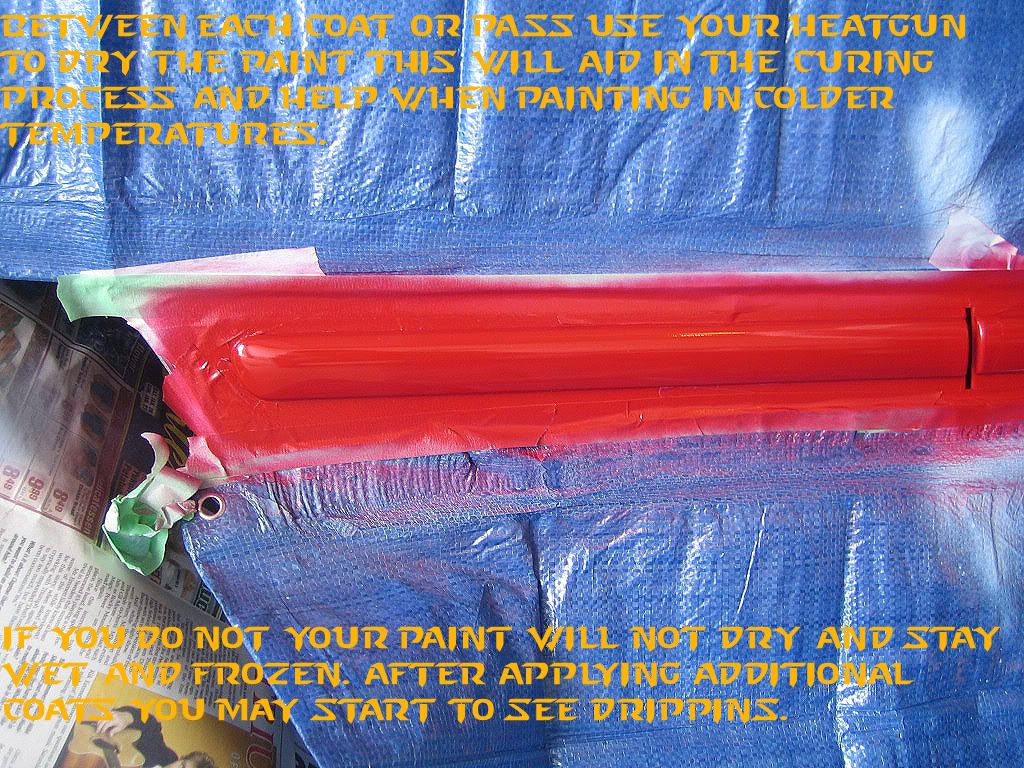
Note that many people may not be able to paint in colder temperatures and its not the best condition but Ive dont it many times and with a heat gun. If you do not have a buddy to work with you and a heat gun dont bother trying this as it will be very difficult alone and without a heat gun.
Supplies
Heat Gun
Masking tape - preferably both masking and black vinyl electrical tape(excellent in that it does not leave glue residue)
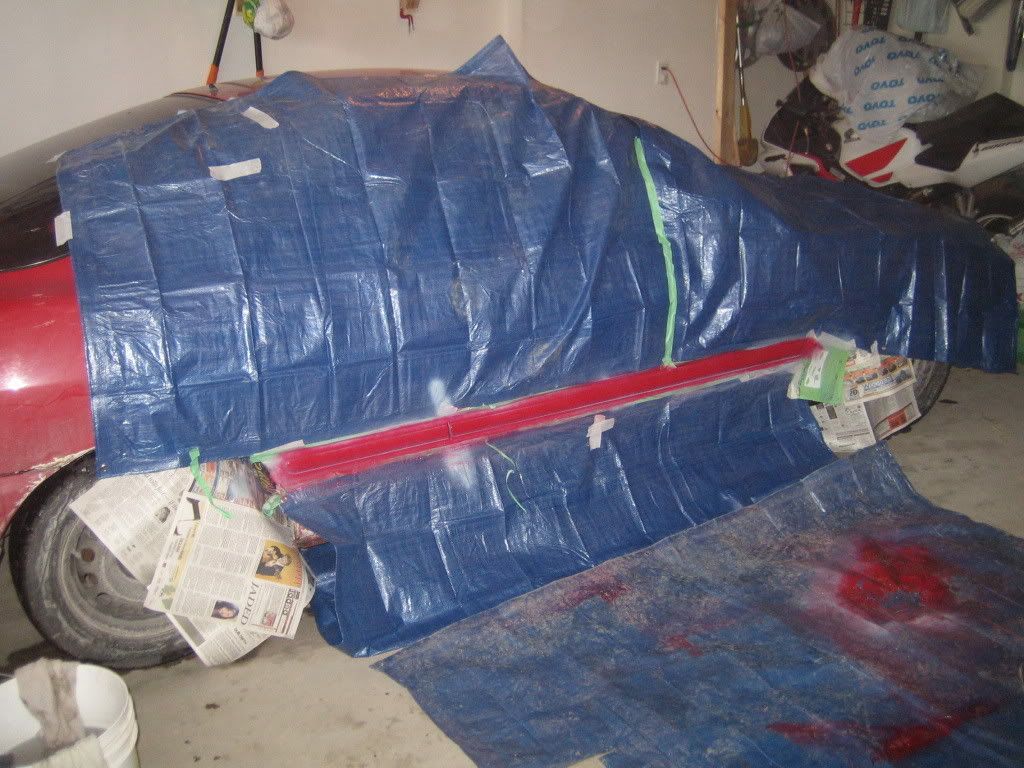
4 Tarps
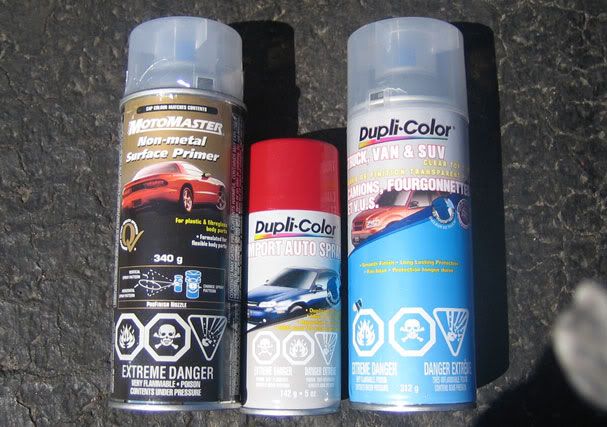
Primer - i would prefer using motomaster clear plastic primer, as i have had best results with that.
Base Coat ($25 1 can)
Towels
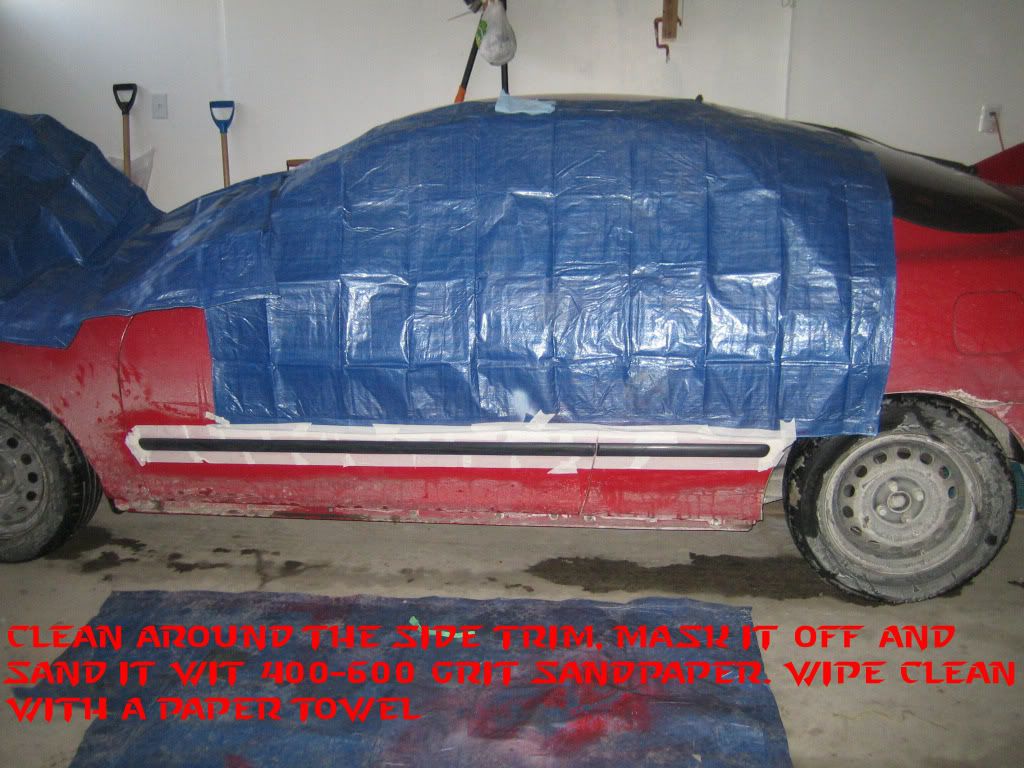
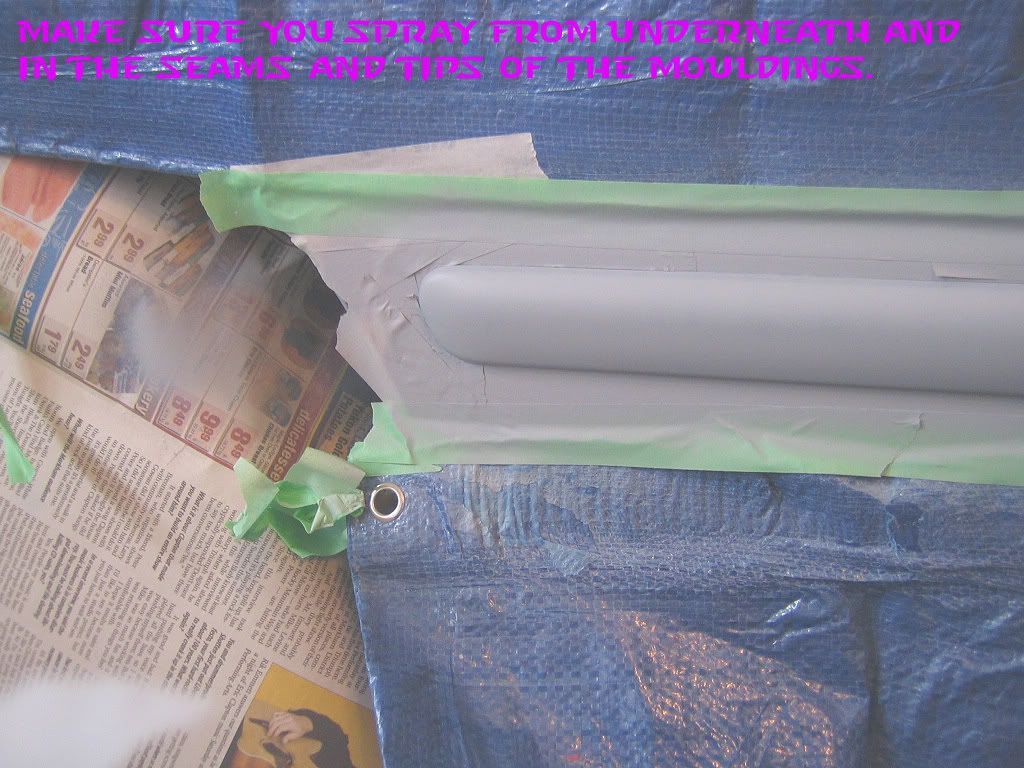
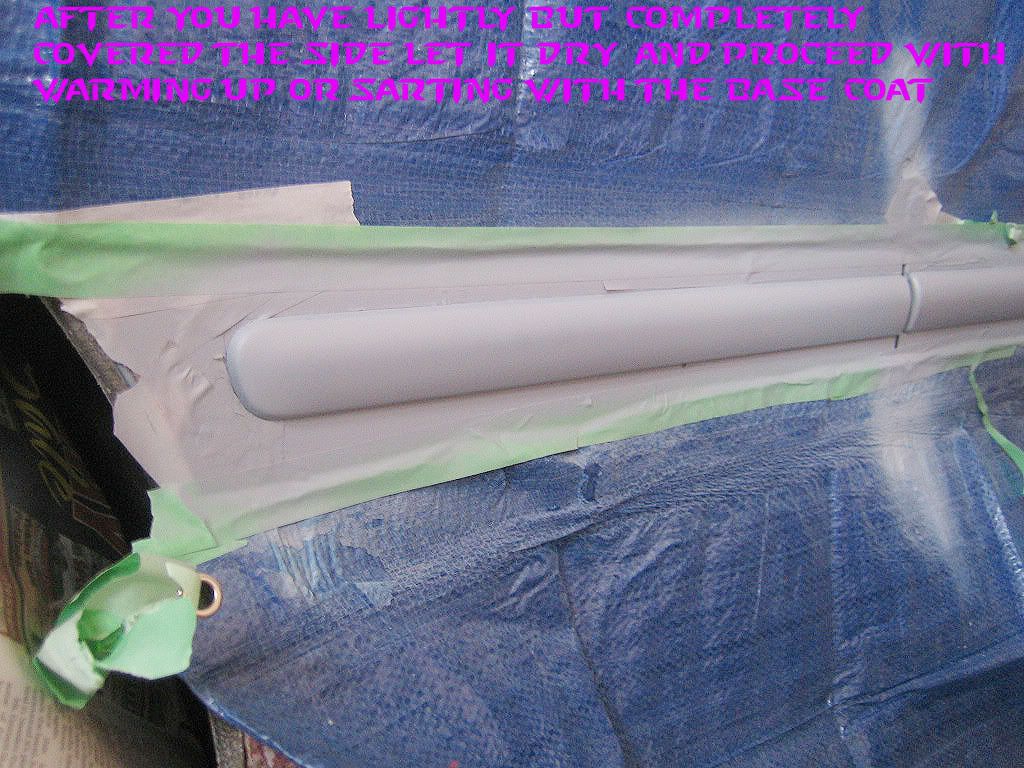
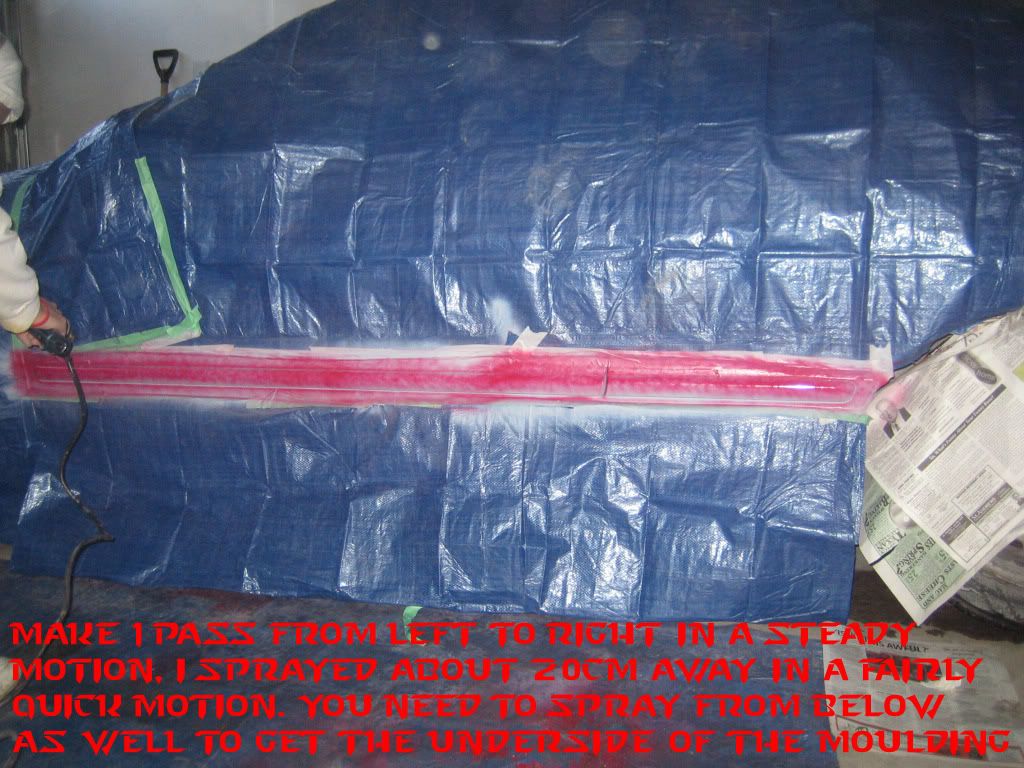
400-600 grit sandpaper
Goo Gone
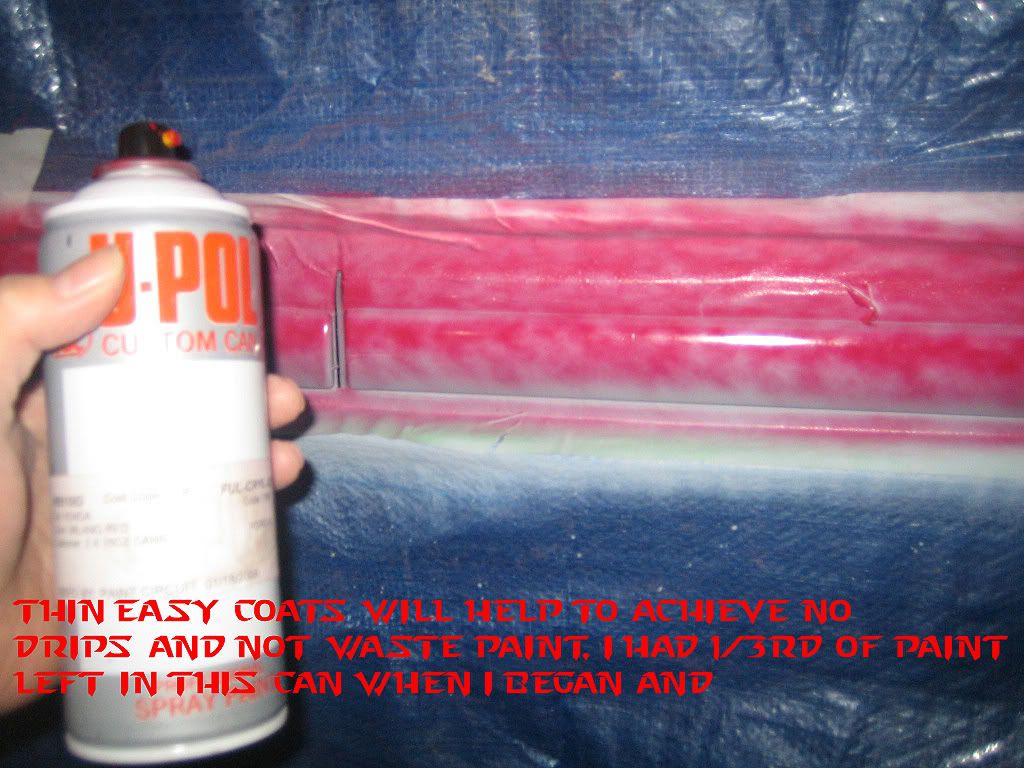
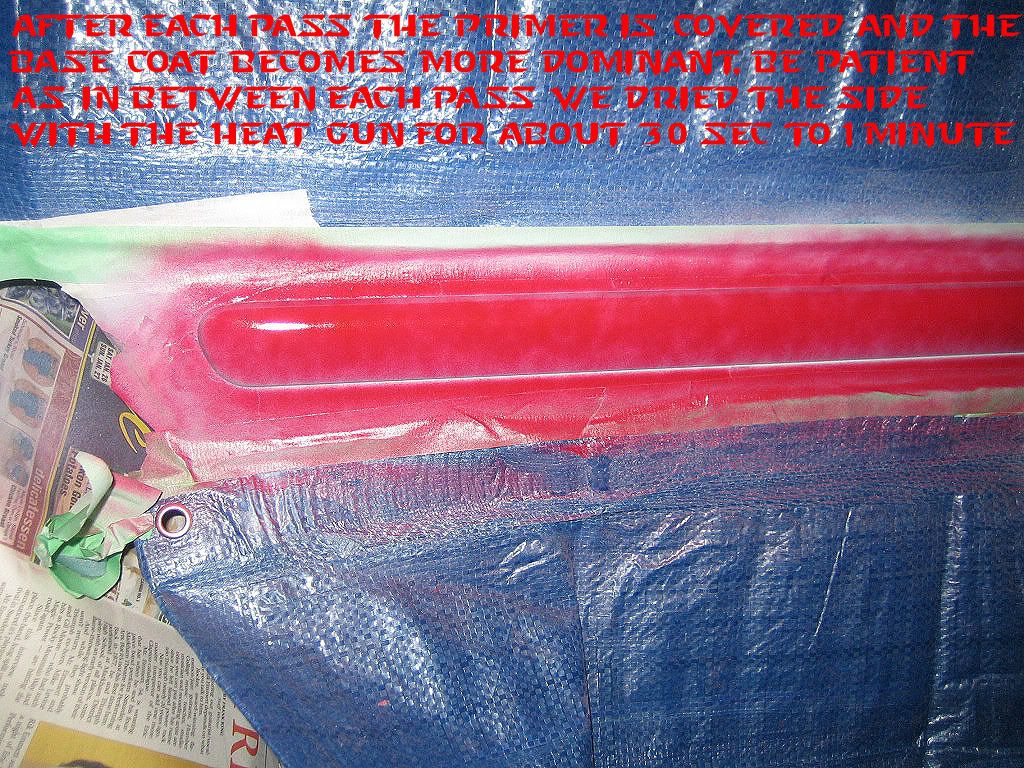
Video of paint pass
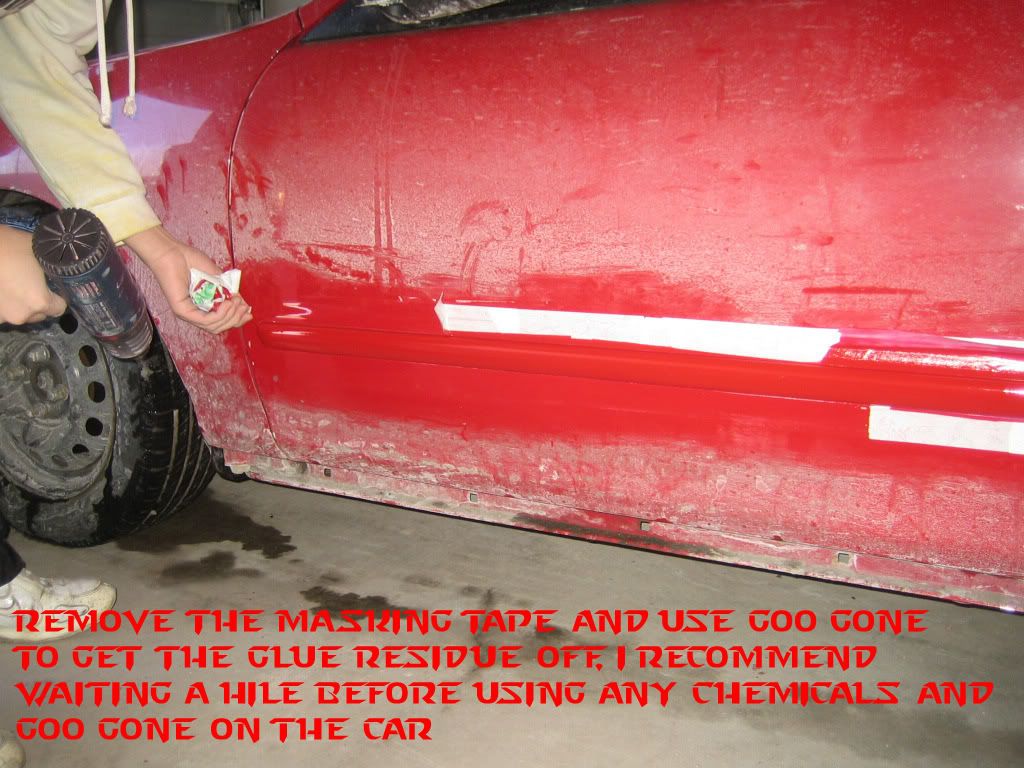
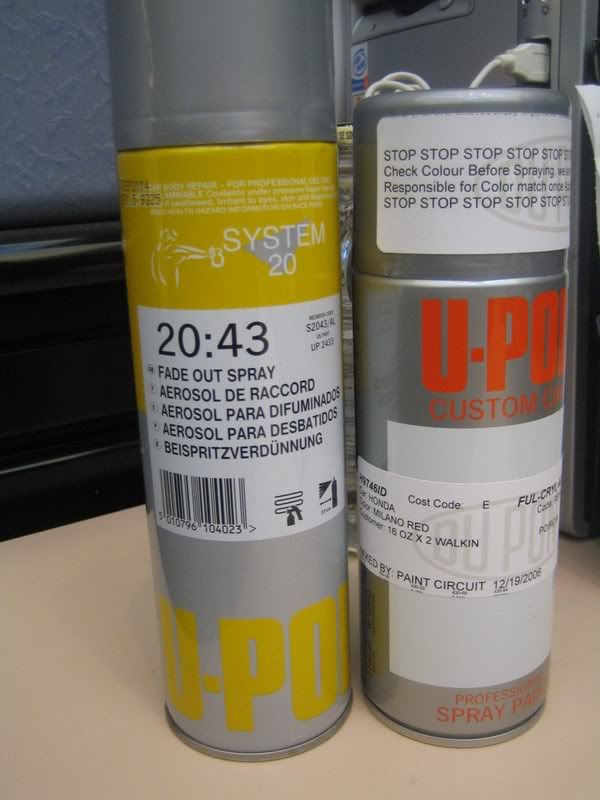
I purchased a thick 2" and a 1" masking tape and 4 tarps from the dollarstore(but get 2 rolls of electrical tape also available at the dollar store). I hate using painters tape as it always tears on me and leaves residue, so first use electrical tape to mask off the side trim, and for the tarp tapign use the masking. Primer and paint I get from Paintcircuit.com, theres one close to me around Mc Nicoll and Vic Park, however i would use caution as the last batch of primer i purchased from them which is a premixed general primer was a bad batch. You will need Towels to wipe and clean the mouldings after sanding. and Goo Gone to remove the tape residue after your done painting. A heat gun is imperative in painting in colder temperatures and to help warm paint etc.
Where to get your paint?
http://www.paintcircuit.com
the one in scarborough is located at vic park and mc nicoll
http://maps.google.ca/maps?f=q&hl=en...wHss5D6BA&cd=2#

Note that many people may not be able to paint in colder temperatures and its not the best condition but Ive dont it many times and with a heat gun. If you do not have a buddy to work with you and a heat gun dont bother trying this as it will be very difficult alone and without a heat gun.
Supplies
Heat Gun
Masking tape - preferably both masking and black vinyl electrical tape(excellent in that it does not leave glue residue)
4 Tarps
Primer - i would prefer using motomaster clear plastic primer, as i have had best results with that.
Base Coat ($25 1 can)
Towels
400-600 grit sandpaper
Goo Gone
I purchased a thick 2" and a 1" masking tape and 4 tarps from the dollarstore(but get 2 rolls of electrical tape also available at the dollar store). I hate using painters tape as it always tears on me and leaves residue, so first use electrical tape to mask off the side trim, and for the tarp tapign use the masking. Primer and paint I get from Paintcircuit.com, theres one close to me around Mc Nicoll and Vic Park, however i would use caution as the last batch of primer i purchased from them which is a premixed general primer was a bad batch. You will need Towels to wipe and clean the mouldings after sanding. and Goo Gone to remove the tape residue after your done painting. A heat gun is imperative in painting in colder temperatures and to help warm paint etc.
Where to get your paint?
http://www.paintcircuit.com
the one in scarborough is located at vic park and mc nicoll
http://maps.google.ca/maps?f=q&hl=en...wHss5D6BA&cd=2#
Last edited by Crazydragonclk; 19-Sep-2008 at 08:35 AM.


 10-Mar-2008, 07:47 PM
#9
11-Mar-2008, 09:46 AM
#10
Senior Member
Thread Starter
Join Date: Sep 2007
Location: Markham
Posts: 302
11-Mar-2008, 09:53 AM
#11
Senior Member
Thread Starter
Join Date: Sep 2007
Location: Markham
Posts: 302
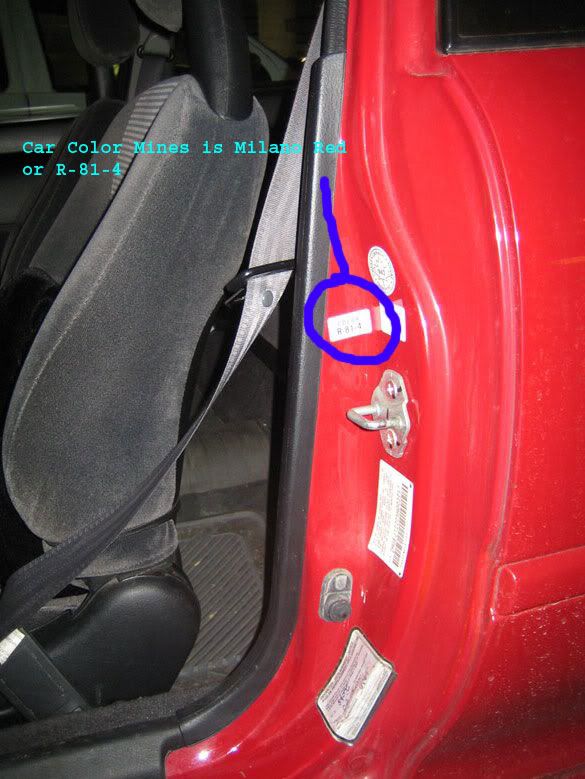
you will need to look in your inside driverside door jam, there is a sticker
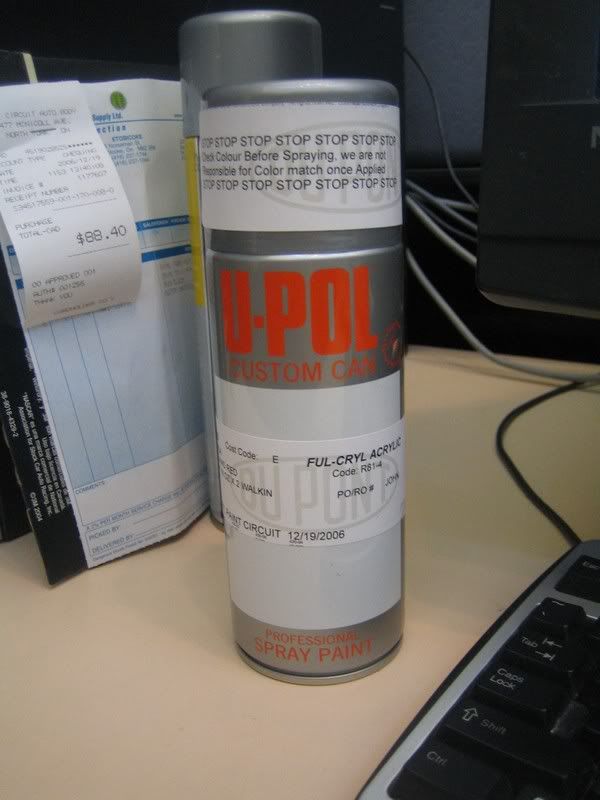
also another paint supplier
http://www.paintcircuit.com
the one in scarborough is located at vic park and mc nicoll
http://maps.google.ca/maps?f=q&hl=en...wHss5D6BA&cd=2#
you can use either the cantire cans the small and or which i recommend and prefer handsdown custom can with clear mixed in with it
Last edited by Crazydragonclk; 11-Mar-2008 at 09:57 AM.
 11-Mar-2008, 11:10 AM
#13
Member

Join Date: Sep 2007
Posts: 88
24-Apr-2008, 03:07 PM
#15
Senior Member
Thread Starter
Join Date: Sep 2007
Location: Markham
Posts: 302
http://www.youtube.com/watch?v=7C00UiaJqPY
video of paint passing technique
video of paint passing technique
22-Jul-2008, 05:47 AM
#16
Junior Member

Join Date: Mar 2008
Location: Scarborough
Posts: 12
very nice job,
I am going to try this on my front and rear lip!
I was told that Napa and parts source can paint match aswell, I provide them with the paint code and they give me a custom can. Where did you get yours?
I am going to try this on my front and rear lip!
I was told that Napa and parts source can paint match aswell, I provide them with the paint code and they give me a custom can. Where did you get yours?
 26-Jan-2009, 10:50 AM
#19
Senior Member
Thread Starter
Join Date: Sep 2007
Location: Markham
Posts: 302
31-Jan-2009, 08:47 PM
#20
Member

Join Date: Jan 2009
Posts: 30
Cool tutorial brother,
I would just point out that with plastics, cleanliness is the most important step to assure good adhesion. Raw plastic is more reliant on chemical adhesion rather then mechanical (sanding), it will be much more resistant to peeling & chipping if you use a scotch pad in conjunction with a plastic cleaning paste opposed to sandpaper. A scotch pad will also get into the groves on a textured plastic where sandpaper will not. The adhesion promoter (plastic primer) is a very important step I would never recommend anyone skipped. A plastic cleaner is a good idea too.
The only other thing I might suggest is that a 2 component clearcoat be applied overtop of the basecoat. Otherwise the UV rays from the sun will breakdown the pigment in the paint and it will likely fade. Very nice DIY tutorial!


