DIY Bodywork Painting & Wetsanding
 19-Jun-2007, 11:23 PM
#1
Registered User
Thread Starter
Join Date: Mar 2006
Location: Markham
Posts: 868
DIY Bodywork Painting & Wetsanding
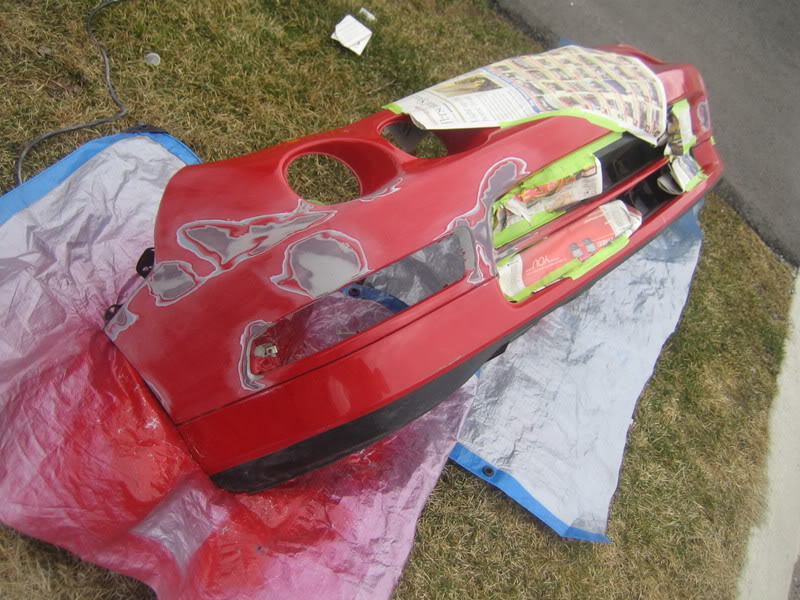
Completed Photos 3 posts down
Heres the way I have learned to do bodywork, painting and wetsanding, you can use variations of this tutorial for your own personal projects or patch ups but I am not responsible if you mess up. I advise that you start small and work your way up to bigger projects, but none the less I hope you find this tutorial useful and Im always available to answer any questions you have just email me or PM me anytime and I'll try to get back to your messages asap. This DIY is for those who cant afford full car paint jobs and bodywork and or dont mind having a less then showcar finish. By all means if you are picky dont bother commenting as this is not a professional paintjob, work as it is just a backyard job. I think you will be satisfied if you dont have the extra hundreds of dollars lying around and enjoy doing some of your own work on your car. It can be a temporary job until you save up or you can do a nice job that will last you a few years. The supplies places I goto for paint, filler sandpaper masks are Paint Circuit, Walmart and or Canadian tire. Some others to name are Car Quest and Napa which sell custom paints and supplies. But for this Tutorial my prices and experience will be based on the above. The Paint Circuit closest to me is At Victoria Park and Mc Nicoll. Paint Circuit Map A note before you begin, Both the Base Coat and the Clear Coat will look Hazy until the final step.
Click On the Hyperlink Words to see a photo or Website
Bodywork
Supplies
Plastic Body Filler
Creme Hardener
Cheesegrater File
Spreaders
Sandpaper
Palm Sander
Pinhole filler creme
I have used canadian tire[CT] 'Bondo' brand plastic filler as well as professional bodyshop filler, the pro ones are a bit better from experience and the one I use is the same company different line of filler. The Dynatron X Grip line is cheaper then the Bondo I got from CT so just pick up a paint can size and you should be good. Filler can range from $15-$30 and you will also need a tube of hardener which is about $4-$8 a tube. You will need a Heat gun to aid in the process of drying the filler, and also the moisture after each time you wipe or clean the panel for each process. It is imperative that you mask off areas around the area being filled, whether it be a driveway or your wheels, you will regret it if you dont do this prep work. You will also need aCheese Grater file, Spreaders to ****** the filler. Sandpaper in 100, 200, 300, 400 grit papers. mainly 200 about 5 sheets if doing both quarter panel rust. A Grinder one like the below photo or a better brand about $40-$50 one should be good dont go cheap and buy a crappy one like i did the first time you will never get anything done. I advise you to get the filler, hardener from the paint shop or bodyshop supplies place, the rest of the stuff you can get for CT. You will also need a Heat Gun to dry and speed the process of curing and drying between coats and wetsanding and filling.
Instructions
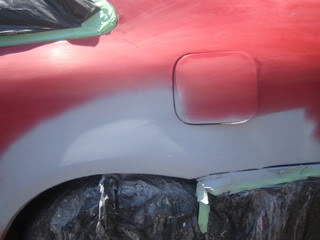
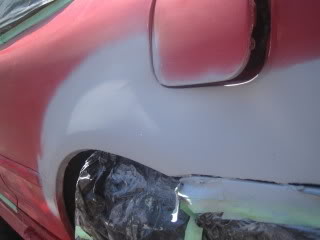
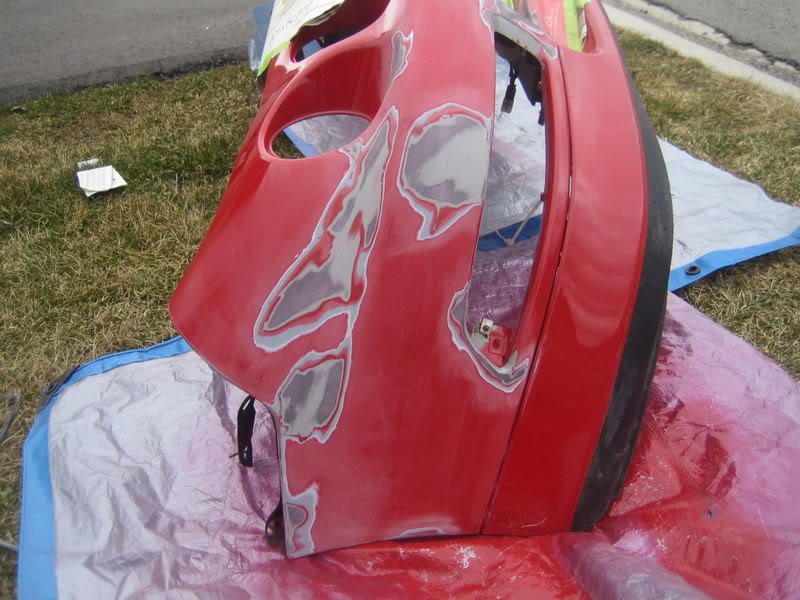
I start by wetsanding the whole panel with 200 grit sandpaper, this removes the clear coat and prepares the panel for painting. you will see white powder drip off as you sand when you start getting ur base coat color sanding off move to the next area as you dont need to cut it down to the bare metal or primer, again I have done just the clear coat and have been fine, you can experiment on your own.The area of rust needs to be sanded down, cut out, grinded or removed. Remember the rust can be severe on the inside and appear only with a little paint bubbling on the exterior. For dents I sand the rough area of about 2 or 3 inches around the area to metal. using the filler mix about 1 or 2 golf ball sizes with a pea sized hardner for each golf ball, mix evenly in a scrape and wipe action with your plastic speader. Now Quickly apply over the dent or rust area that needs to be treated. Wipe it smooth over the surface to fill the low dented areas or areas needed to be filled. Let it dry and repeat this process to build up the low dented area. After you have built the area up, let it dry. Sand it down using a cheesegrater file which is a tool used to sand off the really rough high areas which would normally take hours to sand with sand paper. With the grater go in 1 direction to sand instead of a back and forth motion. after you have done this you can wetsand it again with 150-200 grit to the approximate shape. For painting trim pieces like a front lip sideskirts etc, you will need to use a Plastic Primerthat has a flex agent in it to help bond and flex as most of these parts are flexible plastics and not metal. The same painting process applies, a primer, base coats and then a clear. smaller pieces will be alot easier to paint and in most cases come out shiny without any additional work like wetsanding and buffing.
The next steps of filling are the final stages of fixing the area. Using a primer or body filler primer spray spray the area of filler, this will reveal any high areas or low areas that need to be reworked. Again fill those areas and rework them with filler. The final process will be to wetsand the area with a 300 grit and then 400 grit to a smooth filler surface. Then spray 1 more primer spray on the area to make sure it is smooth and comforming to the rest of the panel contours. If you have small pinholes of small little holes in the paint or filler you can use a pinhole filler creme which looks almost exactly like the creme hardener except it says pinhole filler on it. With this product just wipe small amounts of the pinholes and then lighlty wetsand with 300 grit.
Painting
Supplies
Primer
Basecoat Car Color
Clear Coat
Garbage Bags
Wheel Covers
Tarp
Masking Tape
Cardboard
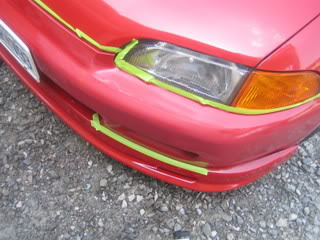
For painting you will need Basically a Primer, Base Coat[Car color], Clear Coat. I have used both bodyshop brand Paints as well as CT ones. For Primer you will need a primer or bodyfiller primer spray, I use a regular Motomaster primer which comes in both a brownish red and a Grey . For the Base coat or the color of your car I have used the Ct dupicolor Small Cans and the Custom mixed Spray Can ones, I prefer the bigger custom mixed cans for a few reasons, they are a little cheaper[$22 a big can+ tax], the nozzle and pressure sprays better. Goto Paint Circuit and get as many cans you need, I use about 1 full can to exhaustion for 1 full quarter panel or for 1 door, so a good rule of thumb is to get 1.5 cans for every panel as you may end up needing it, its better to have extra then to have none left over. For clear coat I use again the regular Motomaster clearcoat from CT but would advise to get a can from Paint Circuit if you have the extra cash. Some Pointers for base coating are that Very often the primer will show through the base coat and you will need to paint the panel with continuos strokes to cover it, which is why i wish they made metal primer in clear like the plastic primer I use, I havent seen a clear primer before so I still use the color primers as they aid in the body working process. Heres a Photo of primer bleeding through the milano red around the wheel well area from a past job. Most paints are a Tri stage formula, basically it looks like 1 color from 1 angle and another color from another angle and then the clear on top. from experience with paint mixed with the clear and everything i foudn that in some cases the paint faded or become discolored from differnt chemicals or gasoline, so I clearcoat the premixed paint regardless. You can find your Paint Code on the interior of your drivers side door Jam, mines is R-81-4 Milano Red. I also use Wheel Covers that are $8 for a pack of 4 from Paint Circuit they are made of like a Tarp. material. I use Dollar store blue camping Tarp. to mask of areas and its cheap easy and doesnt bleed through. I use Masking Tape from the automotive section its green in color, about $4-$10 depending on the width i use an inch or 2 width as the 4 inch one is like $10 a roll. The use of cardboard can aid by deflecting paint overspray instead of masking the whole car down. Somethign that is a must is a 3M Gas Mask it must be a pesticide or chemical filter not a dust mask or anything else pick one of these up at your local Currys Art Store for about $30 total[$18 for mask and $10 for filters] make sure the mask is fitted properly and snug when you paint as the paint is extremely toxic. These masks come in 3 sizes as well.
Instructions
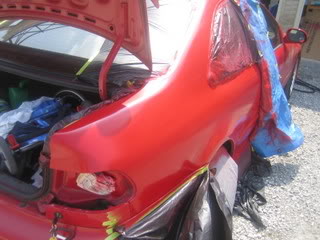
Start with cleaning the panel off making sure you dust it off of debris after the filler has dried I usually wait 15 minutes or so after using the heat gun to help dry it. I let cool while masking off the windows or trim areas u are not painting, the method I use which is easier to mask and clean up is basically masking the surrounding areas then masking the inner area with the garbage bags or Tarp. Now you are ready to paint the panel, shake up your can nicely for about 2 minutes in a medium warm temperature and with hopefully some shielding from either sun, wind and dust. The sun can be brutal to the eyes and make it too hot to work, the wind can diffuse your spray and make it hard to make nice wet tacky spray Passes, the dust and flying debris can leave ugly bumps to the finish of your paint. If debris falls or somthing rubs the wet tacky paint wreckign the smooth finish DO NOT ATTEMPT TO REMOVE IT. This will 75% of the time make things worse. Let it dry and then remove the debris or nic it off and then wetsand that area again to redo ur painting of the panel. When you paint a panel paint the whole Panel otherwise you will have blotches or weird areas that look hazy or matte.Now you can cut off or fade off in some case like I have done with the quarter panel, I faded out the paint right up ontop of the door where the Pillar goes up from. But in most cases try to paint the full panel, so if its a door ur painting, paint the whole door, etc. Start from one side to the next, in a steady motion about 15-20cm away, so the paint lands nicely on the panel otherwise you'll just end up wasting paint. but remember if you do not go in a fast enough motion or not steady enough you will either drip or have uncovered areas that you will need to go over. I usually do about 3 or so full coats in which to cover all bodywork and primer. and then 1 final coat in which i make sure the paint is just enough to be tacky and wet looking but not dripping this allows a nicer shinier or reflective finish. Now at this stage the panel will still look Hazy or matte do not worry the 2 final stages will complete the job. in between coats use your heat gun to dry the panels from a moderate distance making sure not to stop in 1 place too long or ull bubble and destroy the good work you have just done. Both the Base Coat and the Clear Coat will still look Dull until the final step.
Base Coat Complete
After 15-20 minutes I bust out the Can of clearcoat and get ready to paint again. shake for 2 or so minutes. Adhering to the environmental conditions above and paint in the similar fashion. The clearcoat is more liquidy so you will have to wait 2 or so minutes between each coat before applying the next coat, I do about 2 full coats and 1 final wet coat to seal it all in nicely. Make sure your coats are again like the basecoat starting from right to left and then right to left again from top to bottom, in a continuos steady motion. Now if you have made drips do not worry jut let dry fully and let it cure for about 1 week. this will allow the paint to properly cure and then you can begin the final stage.Both the Base Coat and the Clear Coat will still look Hazy until the final step.
Clear Coat Complete
Clear Coat Complete2
Clear Coat Complete3
Wetsanding
Supplies
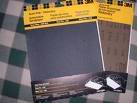
1500, 2000 Grit Sandpaper
Rubbing Compound or Swirl Remover
Orbital Buffer or by hand
Towels or buffing pads
Bucket of water
Foam Sanding Pads
I use a Foam Pad cut out of a Float tube used in childrens swimming. Any firm Styrofoam will do. You will also need 1500-2000 grit sandpaper that is for wet and dry primarily wet for this procedure. I use thick paper towels for buffing and do not produce any lint.
Instructions
For wetsanding you will need to fill a bucket of water doesnt need to be alot or a big bucket jus enough so that you ca keep dunking the pad and sandpaper into the water. You can start with 1500 Grit and work down to 2000 Grit Sandpaper. Every 10 or so seconds of sanding dunk your pad and sandpaper into the water. This will help you get a more smoother surface. The reason the paint finish is hazy at this point is because the clearcoat is all unevenly sprayed on, the wetsanding process will finely sand and tune the level of the clear to an evenly smooth surface. After doing the panel it should take approximately 15-20 a panel or longer if your slower. rememer not to overdo the sanding as you can take away but you cant put back as easily, you should not be seeing any basecoat color washing off or your sanding too much, there should only be clearcoat washing and sanding away.
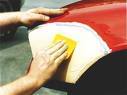
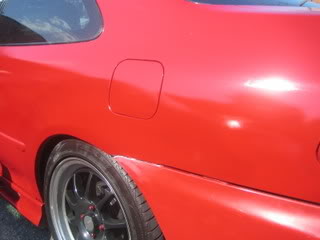
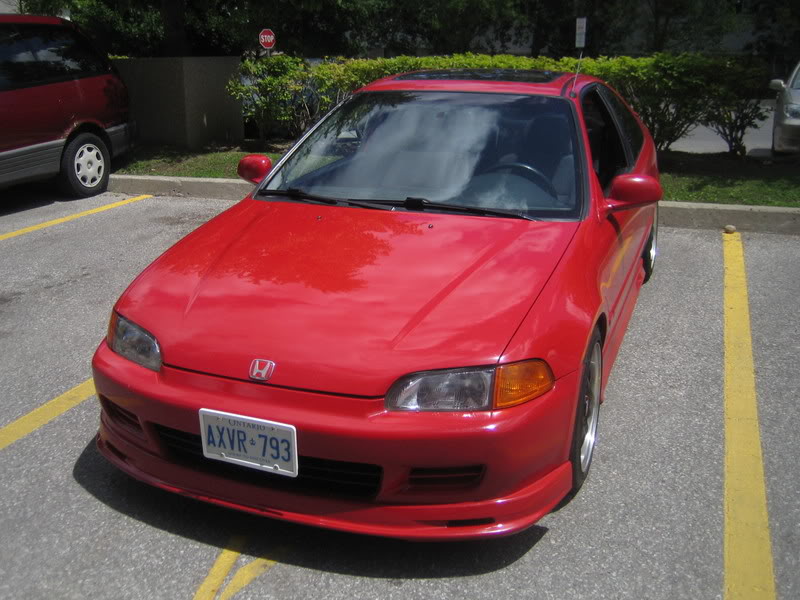
Now we are almost done, Take your swirl remover or Rubbing Compound similar to this one and use an amount and ****** it over a square foot area, start from top to bottom again. Do not press to hard or rub to hard or you can damage the paint and be patient while you work it in, after all the compound is rubbed and buffed in nicely there should be no more white smearing. At this point the project is complete, the paint should be visibly shinier and more reflective, If you have done a good job it should look about 80% as reflective as a factory paint job, not perfect but good enough for a DIY project which has saved you alot of money!
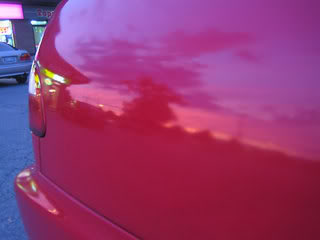
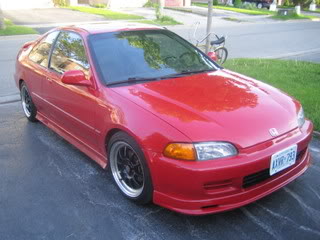
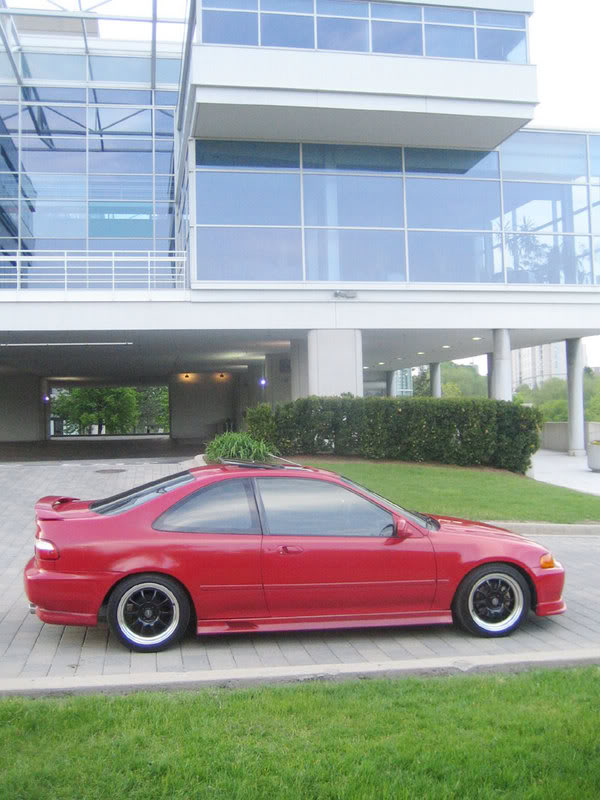
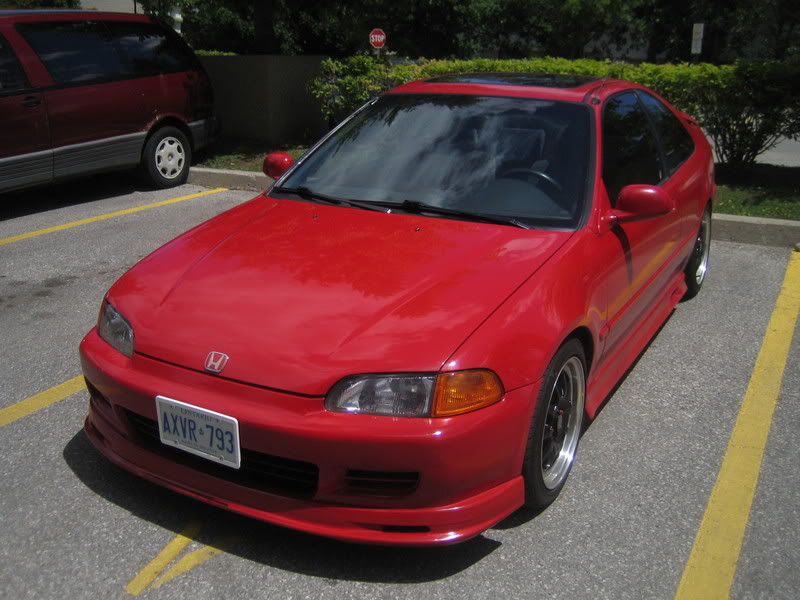
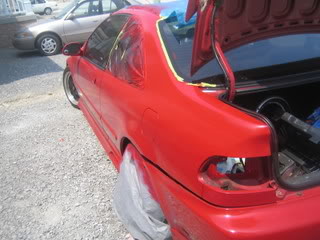
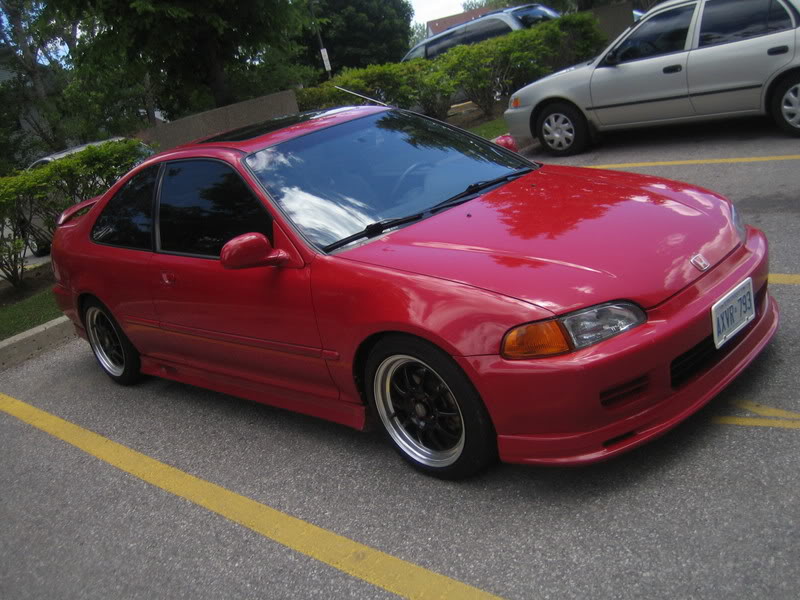
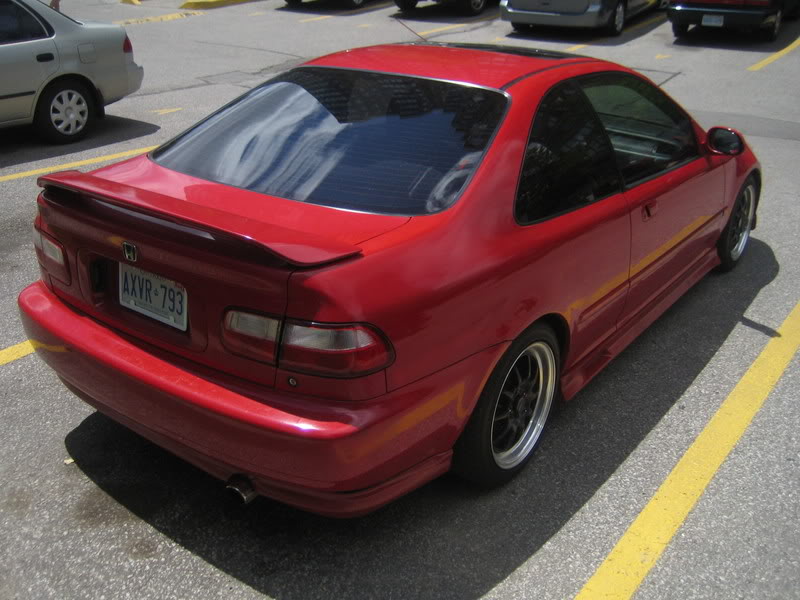
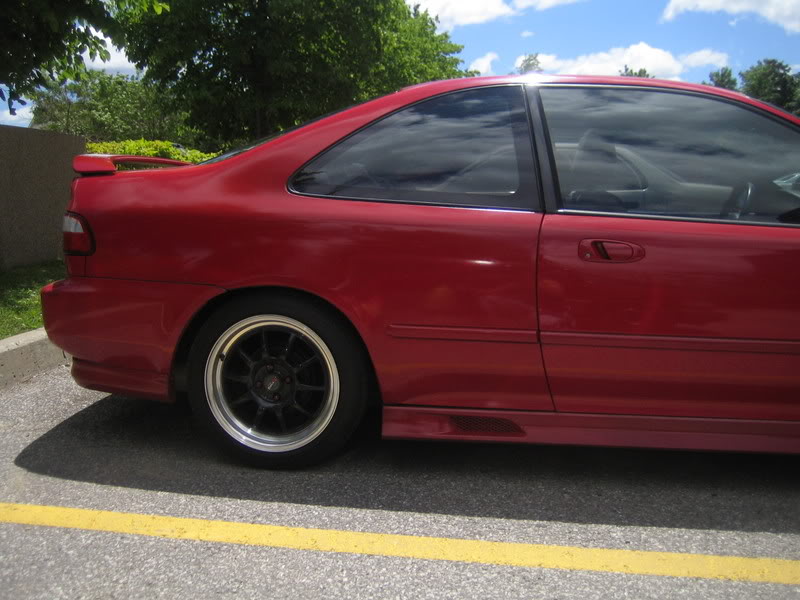
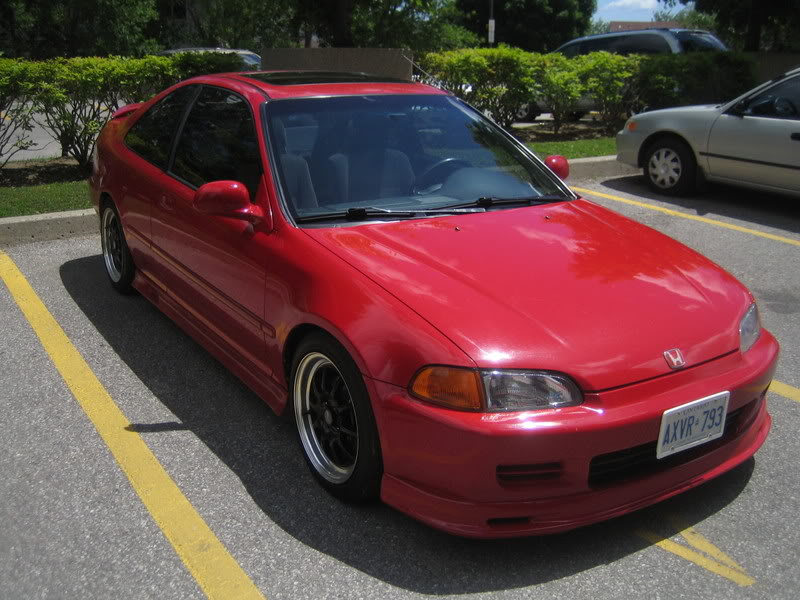
Heres a completed photo [attention to the door to quarter panel reflection difference]

 20-Jun-2007, 11:03 AM
#4
Registered User
Thread Starter
Join Date: Mar 2006
Location: Markham
Posts: 868
Originally posted by szuberi
sick writeup jeff and amazing work. but dont you think its a bad idea to paint all out in the open on dusty ground?
sick writeup jeff and amazing work. but dont you think its a bad idea to paint all out in the open on dusty ground?
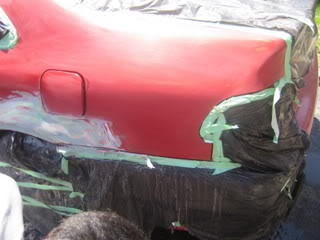
Of course it helps to paint in an enclosed environment but after my parents move and the garage packed up there was no other choice as my underground parking does not allow this type of spray work to be done. I also just wanted to get it done and after painting in both cold weather conditions and in windy dusty weather I have still managed to get painting done just with a little more pressure and patience.
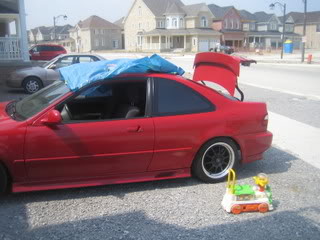
some more photos
 20-Jun-2007, 02:10 PM
#7
Registered User
Thread Starter
Join Date: Mar 2006
Location: Markham
Posts: 868
Originally posted by Gallagher
I would've thought you'd take off the back bumper.
Just a thought.
But great writeup and good job!
I would've thought you'd take off the back bumper.
Just a thought.
But great writeup and good job!
22-Jun-2007, 11:05 AM
#10
Registered User
Thread Starter
Join Date: Mar 2006
Location: Markham
Posts: 868
Originally posted by jdm2envy
yo..how long it took you to diz!!
yo..how long it took you to diz!!
painting on this occasion took about 5, bc of wetsanding the panel clear off, then masking and painting.
wesanding approx 45-1 hour
25-Jun-2007, 12:34 AM
#12
Registered User
Thread Starter
Join Date: Mar 2006
Location: Markham
Posts: 868
Originally posted by jdm2envy
did u paint the whole car or just the panel en bumpers..and how many paint cans did u use??
did u paint the whole car or just the panel en bumpers..and how many paint cans did u use??
- front lip
- rear lip
- side skirts
- spoiler
- door
- both quarter panels
- passenger fender spot painted
- front bumper spot painting
- rear bumper spot painting
so almost the whole car. it would take about 10-15 cans to paint the whole car i would say depending on color
I used 2 paint cans for the 2 full quarter panels and some spot are on the bumper
29-Jun-2007, 08:30 AM
#14
Registered User

Join Date: Jun 2007
Posts: 24
Hey jeff, i just recently painted my car..black and it was a big pain in the *** but it came out looking not as bad as i thought. The finish is kinda blotchy............would a buffer take that out and give it a professional look? thanks and great write up.
30-Jun-2007, 11:41 AM
#15
Registered User
Thread Starter
Join Date: Mar 2006
Location: Markham
Posts: 868
Sounds like orange peel when you mean blotchy??
Orange Peel Photo(attention to the darker primer underlayer around wheel well)
1. orange peel
A surface consistency defect resembling an orange peel due to weathering and time or poor application. Occurs in coated or finished products in varying degrees. May be the result of poor quality or manufacturing or poor maintenance.
the blotchiness is due most likely to the stock paint color underneathe, if it has not recieved a sufficient enough of paint in those areas it will bleed through looking like not so jet black you wanted. so the only elimation moethod is simply applying enough amount of coating.
- if you have this u need to, wetsand off the clear with 200-300grit until u get some black wetsand debris in the water and then after the parts of the car that are blotchy redo those panels, with a sufficient amount of new coating, reclear it and then 1 or 2 weeks later
- wetsand the car with the 1500-2000 grit, rinse car, add compound or swirl remover and buff it out with ur buffer or by hand.[it will definitely give it a more pro look]
05-Jul-2007, 01:53 PM
#16
Registered User
Thread Starter
Join Date: Mar 2006
Location: Markham
Posts: 868
Painting a Scratch
for spot painting, which is what I call it, I use a method in which
- sand the area of the scratch, about 2-3 inches aroudn the area.
- sand it down until it is smooth and u cannot feel it anymore, if its a really deep scratch u will probably need to use some filler, but most likely you can sand it down and get away with it.
- now for spraying the area that needs repair, you can use a thin coat or primer on jus that area which was sanded.
- u dont have to prime it, ive repaired without primer before as long as the surface area that was sanded is not a smooth layer of clearcoat.
- the basecoat, jus spray over the rough area of the sanded part in a a fading motion
- DO NOT TAPE DOWN the area to be painted, or mask off the sanded area you are about to paint, if you do, the area will cause a huge inaccurate levelling as it dries and it will look terrible. you can only mask of areas like for example where the trunk panel meets the bumper. or the hood meets the bumper or headlights.
- For masking of overspray, use a piece of cardboard to deflect the overspray of about 3 inches over the surface being painted and about 5 inches away from the spray can.
(this will help you to deflect the overspray which should leave a nice faded spot spray of the repaired area without causing alot of noticeable overpainting)
- clear coat the area the same way with quick fast sprays, let dry each time you do a coat as the clear is very liquidy.
- after the paint has dried for about 1 or 2 weeks, you can wetsand the area sprayed with 1500-2000 grit, and buff out with swirl remover.
05-Jul-2007, 07:24 PM
#18
Registered User
Thread Starter
Join Date: Mar 2006
Location: Markham
Posts: 868
Originally posted by Joker
can this DIY painting be done on the hood and rear/front bumper? i want a shiney finish .. not the matte like that teg red one above, or is it jus thte picture?
lmk
thanks
can this DIY painting be done on the hood and rear/front bumper? i want a shiney finish .. not the matte like that teg red one above, or is it jus thte picture?
lmk
thanks
15-Jul-2007, 07:22 PM
#19
Registered User
Join Date: May 2002
Location: .......
Posts: 4,572
right side near the rear, under the rear window, a long one like 10 inches but not really noticeable from far, i cant tell if its been pushed in or not, but the paint is a bit off there
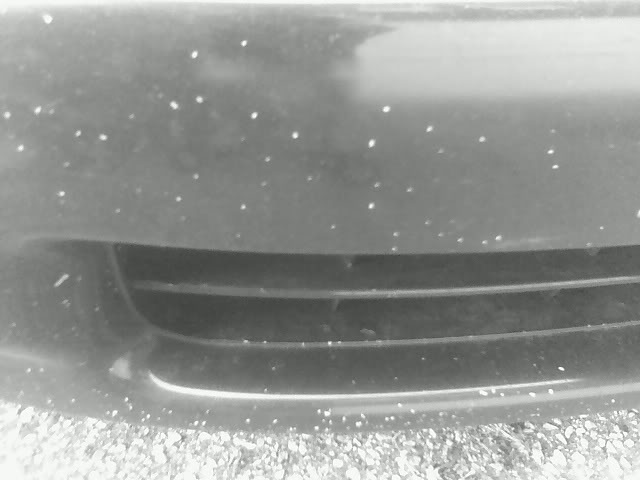
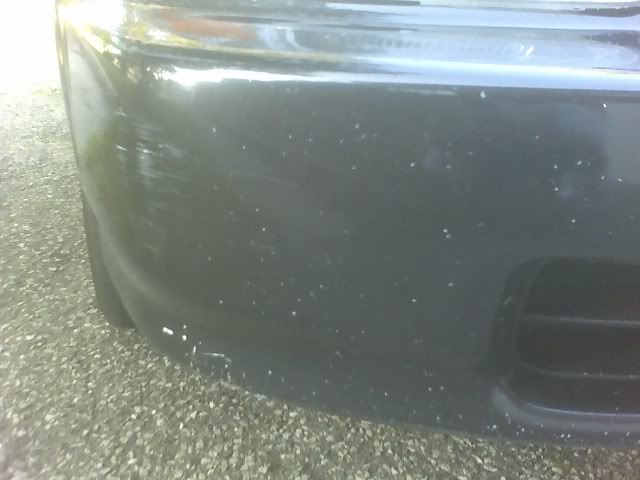
rear bumper
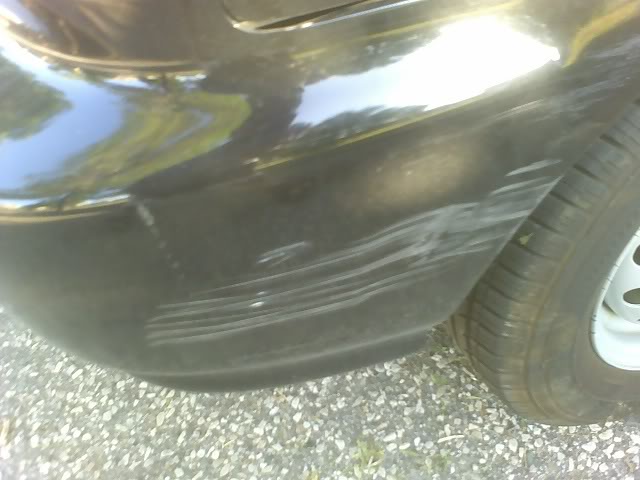
this is a little hard to see but there was a scratch and it was covered up by touchup paint
its the part in between the 2 reflections of the windows, that blotchy area.. this is on the hood, about 5 inches a squared off area
front bumper paint /rock chips

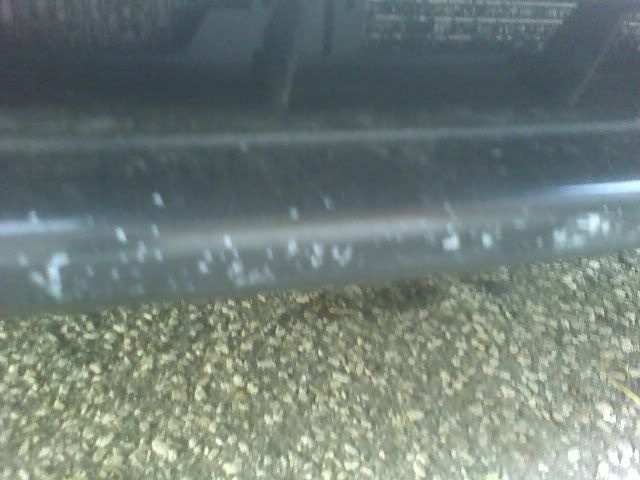
can this be fixed with your DIY?
sorry for the quality, its a phone pic
thanks

rear bumper
this is a little hard to see but there was a scratch and it was covered up by touchup paint
its the part in between the 2 reflections of the windows, that blotchy area.. this is on the hood, about 5 inches a squared off area
front bumper paint /rock chips
can this be fixed with your DIY?
sorry for the quality, its a phone pic
thanks
15-Jul-2007, 10:19 PM
#20
Registered User
Thread Starter
Join Date: Mar 2006
Location: Markham
Posts: 868
For the scrape on the quarter panel under the window - I cannot tell how it looks and so its probably better left unpainted, I would just wetsand it, buff it out and or use compound and swirl remover over it unless your prepared to repaint that whole panel which I wouldnt advise doing if its hardly noticeable'
the touchup paint spot - I would if it looks really uneven from the touchup paint, either spray it levelled, and then wet sand it smooth and buff it out. 1-2 inch diameter around the damage area
The rear bumper - if its paint from the other car or jus clear coat scraped off, jus do the same, wetsanding it away, if this doesnt work and ur bumper base coat is really scraped off than, I would recooment to paint it.
The front bumper - in the pics it looks likes hundreds of really bad rock chips, I would probably just leave it as it would be a hell of a sanding and prepping repaint job, if you can see primer in each rock chip than I personally would jus spray over the whole bumper without sanding. Then after painting buff it to a gloss. Otherwise if you wanan redo the whole bumper, wetsand prep the bumper Use spot putty to fill each lil rock chip, wetsand the whole bumper about 1 foot at a time and then spray a primer to see the eveness and then basecoat, clear. 1 week wetsand and buff out to a gloss. thats a hell of alot of work though.


