DIY - EM2 OEM Side Skirt Paint and Install on 2dr (2001-2005)
 22-May-2009, 05:14 PM
#1
Senior Member
Thread Starter
Join Date: May 2008
Location: Btown
Posts: 109
DIY - EM2 OEM Side Skirt Paint and Install on 2dr (2001-2005)
Painting:
Wet-sand the skirts with 1000 grit wet-sand paper to remove the glossy finish and to rough up the surface a bit. Once the sanding is all done, rinse off the pieces and I used a bucket of water with a bit of dish soap to wash the sides to remove and sanding dust and dirt then rinse thoroughly and let dry.
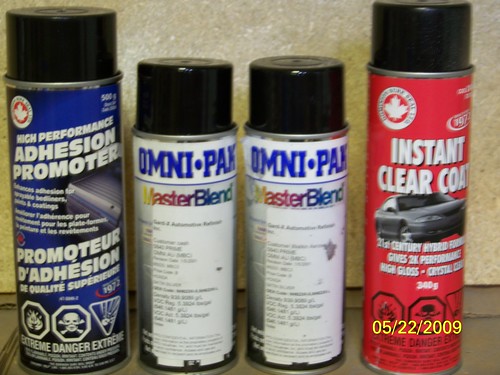
Here�s a list of the products I used:
-Adhesive Promoter (1)
-Gard-X Automotive Paint (2)
-Clear Coat (1)
Once the skirts are completely dry, I applied 1 medium coat of the Adhesive Promoter, follow the directions on the can applications can vary. Let that dry for about 20-30min. According to the directions, the top coat must be applied within 6hrs of application so be ready to paint same day. When ready, start painting the skirts, applying very light thin coats of paint to avoid the paint from running and causing blobs. Add another coat of paint every 15-20min or so, the coats won�t take long to dry.
Once satisfied with the paint, you can clear coat them. I did about 3-4 coats every 15min. Let dry a few hours at least and then you can install.
Install:
Please read entirely and thoroughly. The install was done on a 2001 Coupe.
Tools needed:
-Philips Head Screwdriver
-Measuring Tape
-China Marker (https://store.opusframing.com/sagro/...y&category=888)
-Rubbing Alcohol
I used the documentation that came with the skirts and a lot of tips and assistance from Geoff, board name - AutoTrader05SI. Once we actually knew what to do, the install took maybe 20-25min max. Enjoy!
Step 1:
Remove the mud flaps on both sides of the car, you may have to rotate your tires to get better access to the screws. There are 3 bolts to remove with a Philips screwdriver. The top most screw can be screwed back in after the flap is off, save the other 2 screws, you will need them later.
Step 2:
Wipe down the lower sides of the car where the adhesives will be applied for the skirts. I used a tiny bit of rubbing alcohol and went back and forth across the entire length of the lower panel on the side of the car.
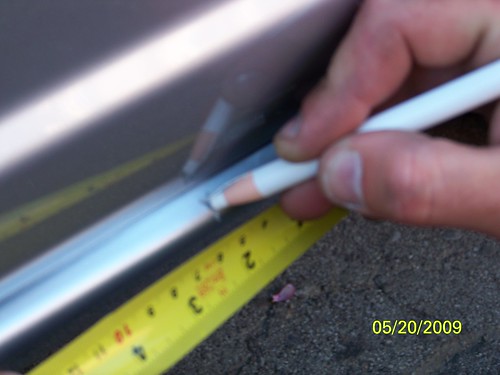
Step 3:
Using the china marker and the measuring tape, starting from the beginning edge of the door
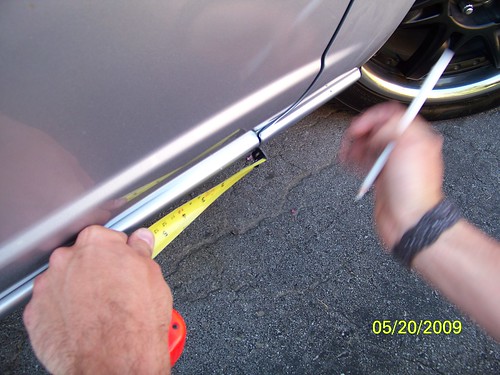
Mark off these 6 measurements:
2�
14�
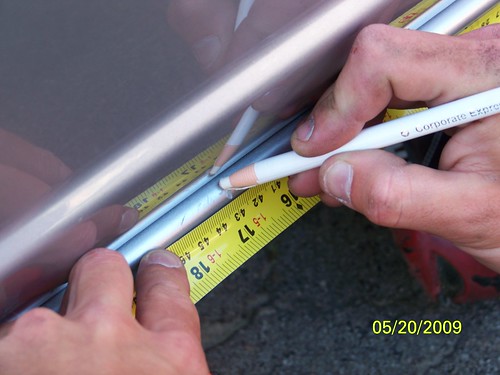
17�

29�
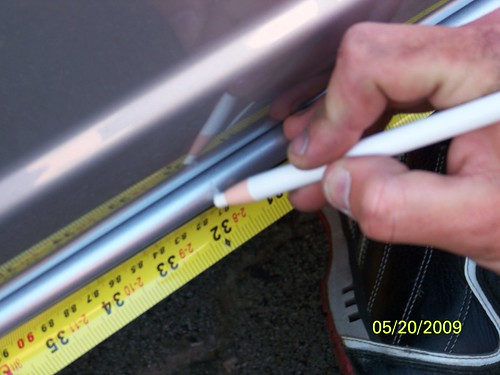
32�
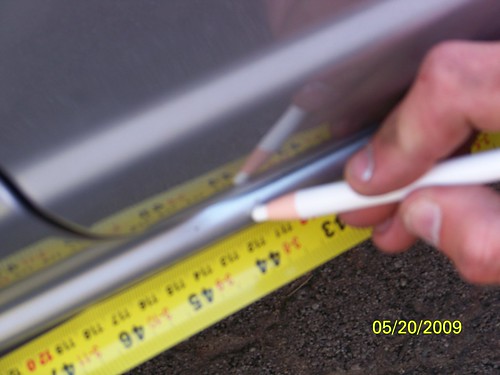
44�
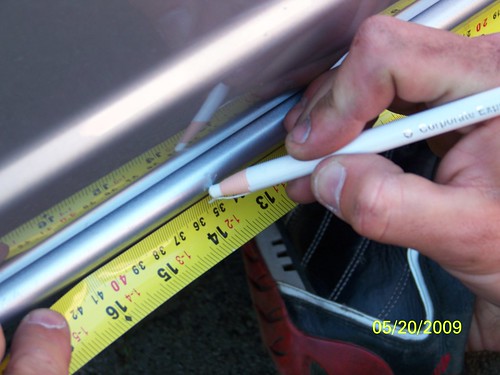
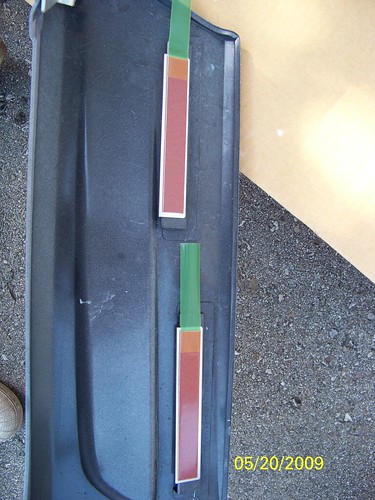
On each side, remove the adhesive tape from the back of each plate as you align and apply it to the marks you just made. 3 plates per side, 1 plate between 2�
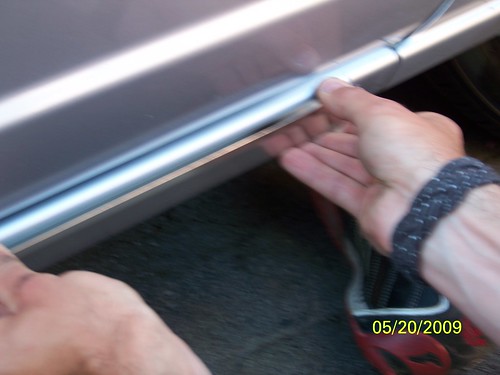
And 14�, another between 17� and 29�
And the third between 32� and 44�. When applying the plates press the plate firmly against the body using the palm of your hand. Repeat for the other side of the car.
Step 4:
All the markings have been made, and all 6 plates have been aligned and applied to the car. Now you can prep the skirts, grab the adhesive clips (6 � 4 long, 2 short) that came in the package and clip them to their respective tabs on the inside of the skirt with the adhesive side facing outwards. 2 long clips go on the tabs at the back of the skirt and a short clip goes on the tab at the front. DO NOT REMOVE the adhesive protector yet.
2 Long clips towards rear of skirt
Single short clip at the front of the skirt
At the base of each skirt there�s 4 mounting spots for the brackets. Align the brackets with the holes and only use a single screw on the outmost hole to hold the bracket. Do not tighten all the way. Rotate the brackets so they are parallel to the skirt as you attach them so they do not get in the way.
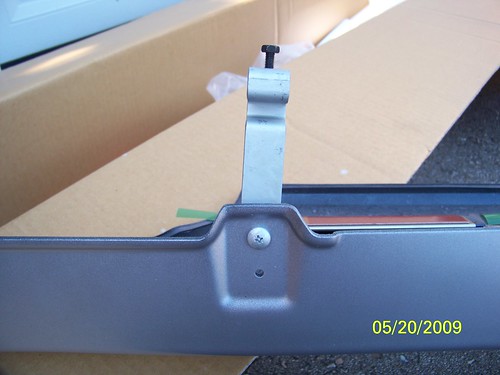
Also make sure the screws at the end of the clamp are loosened all the way, later on they will clamp to the underneath of the car.
Step 5:
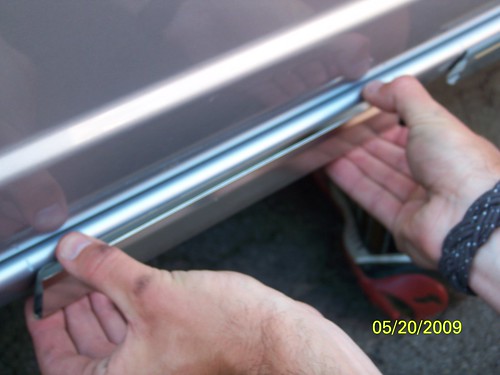
Now we can begin to attach the skirts to the body. Notice the 3 long hooks/tabs on the inside of the skirt roughly in the middle, those have to be hooked into those 3 plates we installed earlier. Be careful when hooking these in, it is very easy to break something if you�re not cautious. Repeat for the other side.
Step 6:
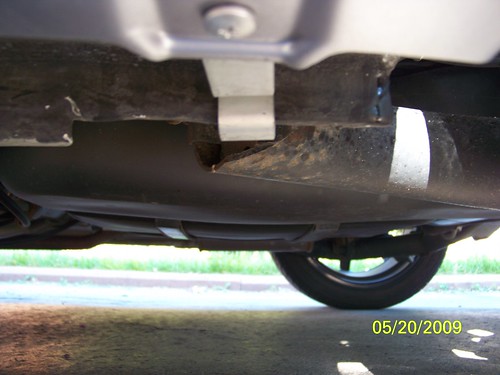
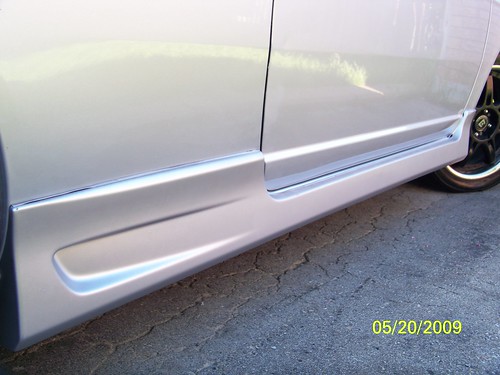
Both skirts have been hooked into the plates on either side. At this point you can gently slide the skirt to adjust it so it lines up the way you like it. When happy with the fit, reach underneath the car and align the 4 clamps so they fit over the rebar that runs underneath the car. Do not tighten them yet, do this at the very end.
Step 7:
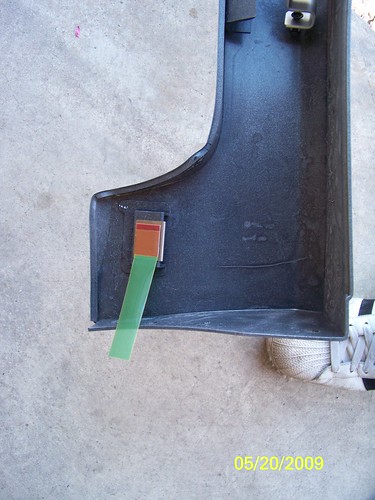
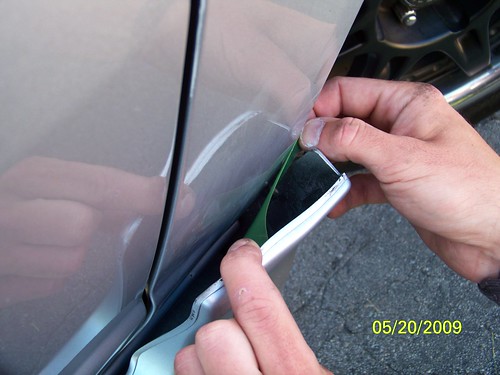
Time to apply the adhesive at the front of the skirt. It worked out really well having a second person to help out at this stage. Gently tilt the skirt away from the side of the car to get a grasp on the adhesive tape remover tab. DO NOT pull it yet.
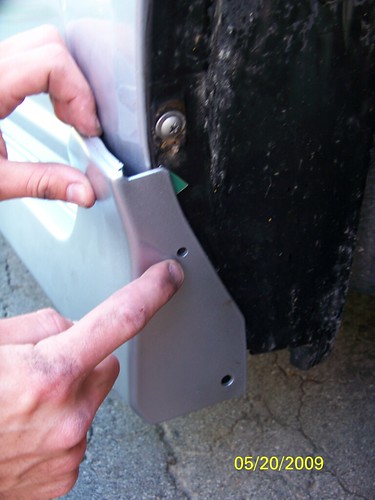
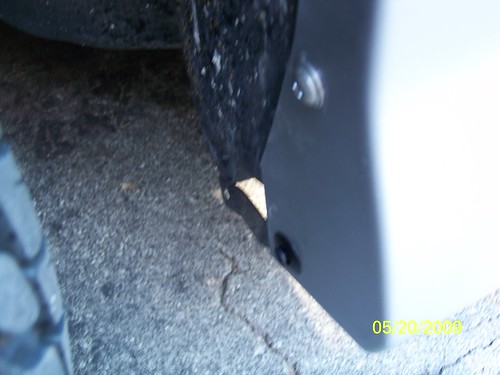
When it is time to remove the tape protector apply firm pressure over the front end of the skirt, while a buddy uses 1 of the mud flap bolts and screws it into the upper hole of the skirt that tucks into the wheel well, NOTE that the hole on the skirt will not line up with the pre-existing hole from the mud flap, just apply pressure to the screw driver when screwing it in; Reminder that the wheel may need to be rotated for easier access.
Now you can remove the tape protector by gently peeling the green tab back and removing it completely. As you�re about to stick it to the body be sure to check that the black rubber weather stripping is not going to be sandwiched between the car and the skirt.
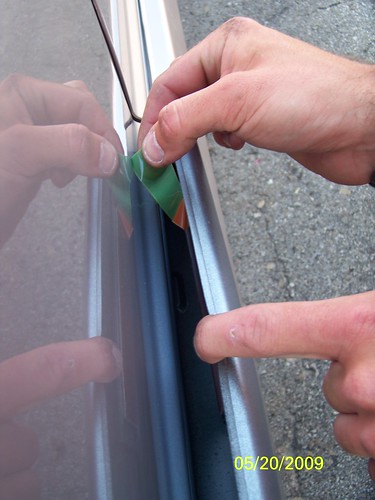
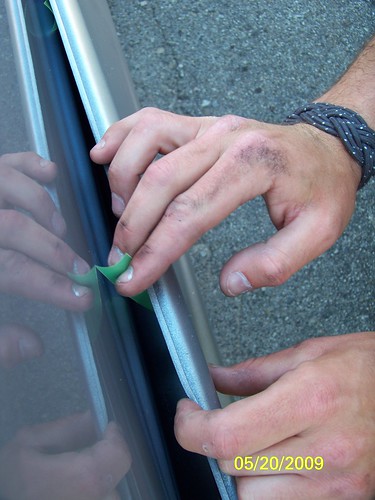
Now we can do the same to the back, gently tilt the skirt away from the body of the car, and grab a hold of those 2 green tabs. Gently peel them off and stick the skirt to the body applying firm pressure over that area of the skirt.
Step 8:
Now you may have 2 black brackets with the kit, looks like this:
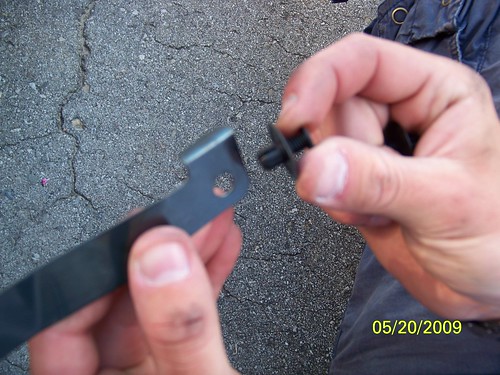
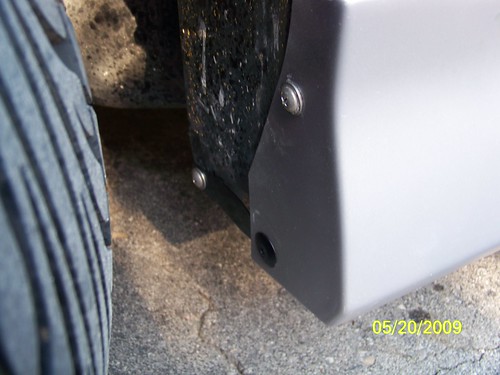
One end bolts into the second screw hole at the front of the skirt,
And using the third remaining screw from the mud flap screw it into that far hole adjacent to the one you just bolted
Step 9:
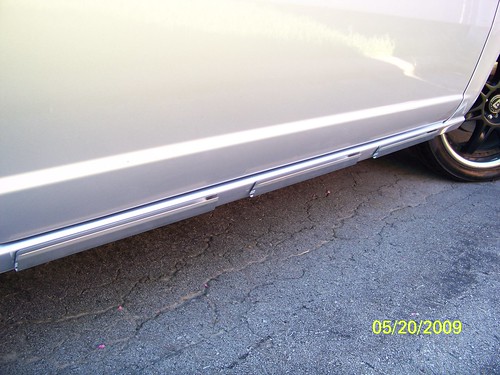
Now you can reach underneath and tighten all 4 of the clamps to the rebar, and that side is complete!
Step 10:
Repeat steps 7-9 for the other side.

This DIY should be used in correlation with your original documentation for a complete understanding of the directions.
Questions? Concerns? Comments?
Let me know, thanks for looking!
Wet-sand the skirts with 1000 grit wet-sand paper to remove the glossy finish and to rough up the surface a bit. Once the sanding is all done, rinse off the pieces and I used a bucket of water with a bit of dish soap to wash the sides to remove and sanding dust and dirt then rinse thoroughly and let dry.
Here�s a list of the products I used:
-Adhesive Promoter (1)
-Gard-X Automotive Paint (2)
-Clear Coat (1)
Once the skirts are completely dry, I applied 1 medium coat of the Adhesive Promoter, follow the directions on the can applications can vary. Let that dry for about 20-30min. According to the directions, the top coat must be applied within 6hrs of application so be ready to paint same day. When ready, start painting the skirts, applying very light thin coats of paint to avoid the paint from running and causing blobs. Add another coat of paint every 15-20min or so, the coats won�t take long to dry.
Once satisfied with the paint, you can clear coat them. I did about 3-4 coats every 15min. Let dry a few hours at least and then you can install.
Install:
Please read entirely and thoroughly. The install was done on a 2001 Coupe.
Tools needed:
-Philips Head Screwdriver
-Measuring Tape
-China Marker (https://store.opusframing.com/sagro/...y&category=888)
-Rubbing Alcohol
I used the documentation that came with the skirts and a lot of tips and assistance from Geoff, board name - AutoTrader05SI. Once we actually knew what to do, the install took maybe 20-25min max. Enjoy!
Step 1:
Remove the mud flaps on both sides of the car, you may have to rotate your tires to get better access to the screws. There are 3 bolts to remove with a Philips screwdriver. The top most screw can be screwed back in after the flap is off, save the other 2 screws, you will need them later.
Step 2:
Wipe down the lower sides of the car where the adhesives will be applied for the skirts. I used a tiny bit of rubbing alcohol and went back and forth across the entire length of the lower panel on the side of the car.
Step 3:
Using the china marker and the measuring tape, starting from the beginning edge of the door
Mark off these 6 measurements:
2�
14�
17�
29�
32�
44�
On each side, remove the adhesive tape from the back of each plate as you align and apply it to the marks you just made. 3 plates per side, 1 plate between 2�
And 14�, another between 17� and 29�
And the third between 32� and 44�. When applying the plates press the plate firmly against the body using the palm of your hand. Repeat for the other side of the car.
Step 4:
All the markings have been made, and all 6 plates have been aligned and applied to the car. Now you can prep the skirts, grab the adhesive clips (6 � 4 long, 2 short) that came in the package and clip them to their respective tabs on the inside of the skirt with the adhesive side facing outwards. 2 long clips go on the tabs at the back of the skirt and a short clip goes on the tab at the front. DO NOT REMOVE the adhesive protector yet.
2 Long clips towards rear of skirt
Single short clip at the front of the skirt
At the base of each skirt there�s 4 mounting spots for the brackets. Align the brackets with the holes and only use a single screw on the outmost hole to hold the bracket. Do not tighten all the way. Rotate the brackets so they are parallel to the skirt as you attach them so they do not get in the way.
Also make sure the screws at the end of the clamp are loosened all the way, later on they will clamp to the underneath of the car.
Step 5:
Now we can begin to attach the skirts to the body. Notice the 3 long hooks/tabs on the inside of the skirt roughly in the middle, those have to be hooked into those 3 plates we installed earlier. Be careful when hooking these in, it is very easy to break something if you�re not cautious. Repeat for the other side.
Step 6:
Both skirts have been hooked into the plates on either side. At this point you can gently slide the skirt to adjust it so it lines up the way you like it. When happy with the fit, reach underneath the car and align the 4 clamps so they fit over the rebar that runs underneath the car. Do not tighten them yet, do this at the very end.
Step 7:
Time to apply the adhesive at the front of the skirt. It worked out really well having a second person to help out at this stage. Gently tilt the skirt away from the side of the car to get a grasp on the adhesive tape remover tab. DO NOT pull it yet.
When it is time to remove the tape protector apply firm pressure over the front end of the skirt, while a buddy uses 1 of the mud flap bolts and screws it into the upper hole of the skirt that tucks into the wheel well, NOTE that the hole on the skirt will not line up with the pre-existing hole from the mud flap, just apply pressure to the screw driver when screwing it in; Reminder that the wheel may need to be rotated for easier access.
Now you can remove the tape protector by gently peeling the green tab back and removing it completely. As you�re about to stick it to the body be sure to check that the black rubber weather stripping is not going to be sandwiched between the car and the skirt.
Now we can do the same to the back, gently tilt the skirt away from the body of the car, and grab a hold of those 2 green tabs. Gently peel them off and stick the skirt to the body applying firm pressure over that area of the skirt.
Step 8:
Now you may have 2 black brackets with the kit, looks like this:
One end bolts into the second screw hole at the front of the skirt,
And using the third remaining screw from the mud flap screw it into that far hole adjacent to the one you just bolted
Step 9:
Now you can reach underneath and tighten all 4 of the clamps to the rebar, and that side is complete!
Step 10:
Repeat steps 7-9 for the other side.
This DIY should be used in correlation with your original documentation for a complete understanding of the directions.
Questions? Concerns? Comments?
Let me know, thanks for looking!


Thread
Thread Starter
Forum
Replies
Last Post
blak_lude
Custom Honda Civic Exterior - Lighting
1
27-Apr-2010 12:33 AM
R3dLine
Civic DIY Tutorials - Info
13
07-Jul-2009 03:51 PM
SIKCIVIC
Honda Civic (+ other) Parts/Accessories for Sale or Trade
0
22-Jun-2009 03:02 PM
Flame02
Civic DIY Tutorials - Info
3
29-Jun-2006 08:54 PM
imported_mikepasini
Custom Honda Civic Exterior - Lighting
0
27-May-2005 10:22 AM


