Rear Disc Brake Pad change
 22-Oct-2007, 01:36 PM
#1
Senior Member
Thread Starter
Join Date: Aug 2002
Location: Mississauga
Posts: 13,184
Rear Disc Brake Pad change
So I changed my rear brake pads over the weekend and took some pics for those of you that haven't before.
Changing the rears IS different from the fronts because of the parking brake feature.
This was done on a 2006 TSX, but most of this stuff is applicable to other cars with rear disc brakes. (sorry for those of you with rear drums )
)
I apologize in advance for the rotation of these pics, I'll try to change them when I get home but stupid photobucket doesn't give you an option once they're uploaded :annoyed: and I was in a rush this morning before I left for work.
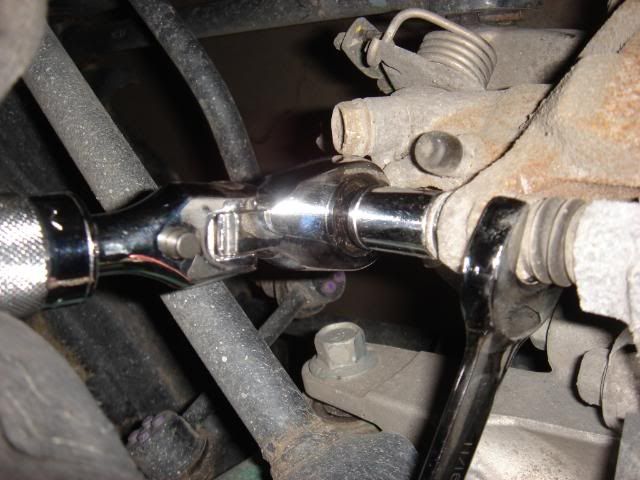
Here is the rear caliper - you'll have to remove both bolts pictured. It doesn't swing up like the fronts do.
Make sure you hold the part in front of the rubber boot with a wrench when you're removing and reinstalling the bolt so you don't mess anything up.
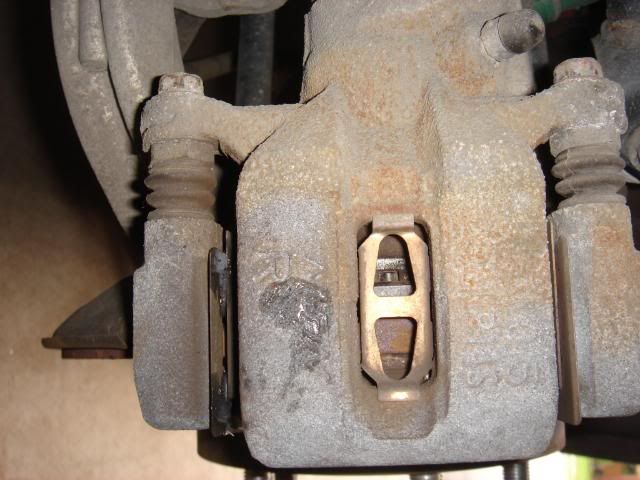
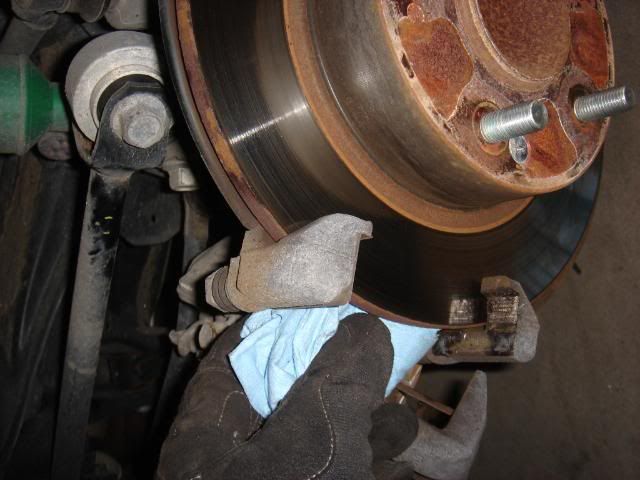
Here you can see the piston for the rear brakes. Looks much different from the one in the front.
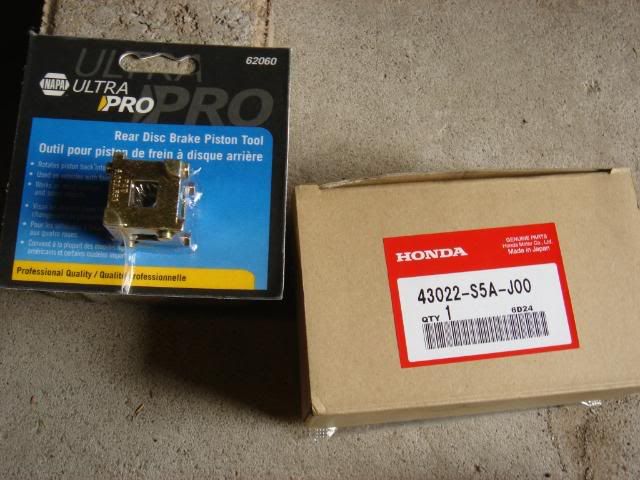
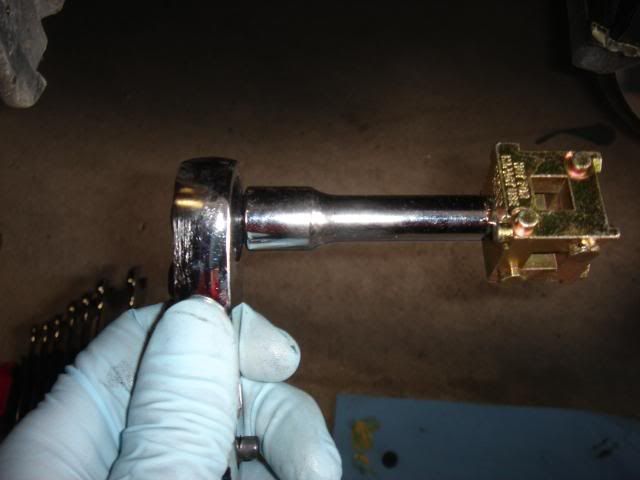
The 'cube' ... found it @ NAPA for $9 - I would DEFINITELY 100% recommend getting this, it was enough of an annoyance to do this with the cube, nevermind with a screwdriver I would go insane.
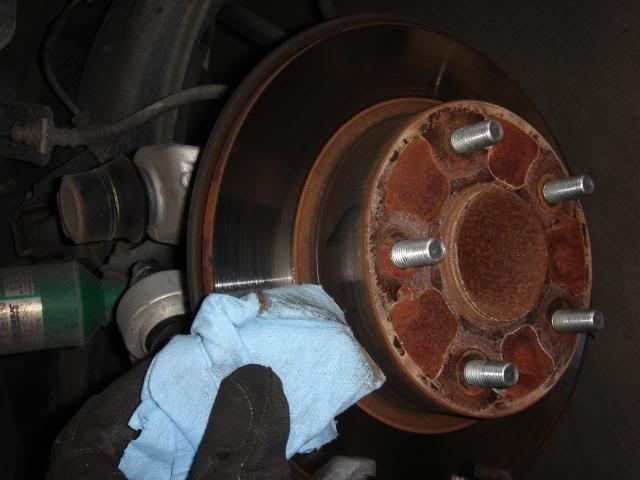
Old Pads & New Pads - 47,000 KM

I cleaned the brake rotors before installing the new pads - sprayed on brake cleaner and then wiped off the excess residue after it dried (put something underneath your brakes at this point unless you like stains on your garage floor I just used a shop towel)
I also cleaned the rear side by turning the axle while spraying lightly and then turning while holding a shop towel there.
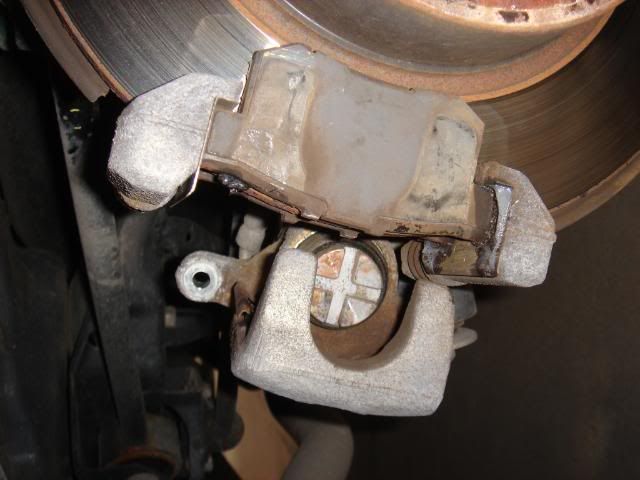
Picture of the 'cube' on a short extension which is how I retracted the piston.
Sorry I don't have any picture of actually retracting the piston as I only had two hands and the damn thing wouldn't stay put for me to be able to take a pic. Basically you hold the caliper with one hand, and set the tool into the piston with the other and then in a clockwise direction turn the piston while applying pressure. Easy to do with one hand if you're using a ratchet.
I found the hardest part at first was applying enough pressure, you definitely have to push on it - not only to make sure it goes in, but if you don't the cube will jump out of the grooves and at one point I ended up with it sorta wedged in the caliper and had to get it loose. Not fun.
Hope these pics help a bit.
EDIT:
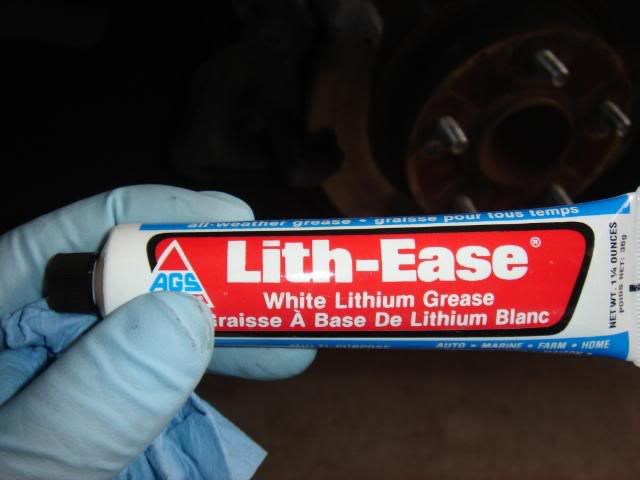
Also if you buy the genuine honda part they include shims for the inside pads which they apparently don't install from the factory just do the same by using the grease they give you between the pad and the shim.
I used a different kind of lube for the edges of the pads, but you can use the same stuff if you want.
Changing the rears IS different from the fronts because of the parking brake feature.
This was done on a 2006 TSX, but most of this stuff is applicable to other cars with rear disc brakes. (sorry for those of you with rear drums
)I apologize in advance for the rotation of these pics, I'll try to change them when I get home but stupid photobucket doesn't give you an option once they're uploaded :annoyed: and I was in a rush this morning before I left for work.
Here is the rear caliper - you'll have to remove both bolts pictured. It doesn't swing up like the fronts do.
Make sure you hold the part in front of the rubber boot with a wrench when you're removing and reinstalling the bolt so you don't mess anything up.
Here you can see the piston for the rear brakes. Looks much different from the one in the front.
The 'cube' ... found it @ NAPA for $9 - I would DEFINITELY 100% recommend getting this, it was enough of an annoyance to do this with the cube, nevermind with a screwdriver I would go insane.
Old Pads & New Pads - 47,000 KM
I cleaned the brake rotors before installing the new pads - sprayed on brake cleaner and then wiped off the excess residue after it dried (put something underneath your brakes at this point unless you like stains on your garage floor I just used a shop towel)
I also cleaned the rear side by turning the axle while spraying lightly and then turning while holding a shop towel there.
Picture of the 'cube' on a short extension which is how I retracted the piston.
Sorry I don't have any picture of actually retracting the piston as I only had two hands and the damn thing wouldn't stay put for me to be able to take a pic. Basically you hold the caliper with one hand, and set the tool into the piston with the other and then in a clockwise direction turn the piston while applying pressure. Easy to do with one hand if you're using a ratchet.
I found the hardest part at first was applying enough pressure, you definitely have to push on it - not only to make sure it goes in, but if you don't the cube will jump out of the grooves and at one point I ended up with it sorta wedged in the caliper and had to get it loose. Not fun.
Hope these pics help a bit.
EDIT:
Also if you buy the genuine honda part they include shims for the inside pads which they apparently don't install from the factory just do the same by using the grease they give you between the pad and the shim.
I used a different kind of lube for the edges of the pads, but you can use the same stuff if you want.


 30-Oct-2007, 11:15 AM
#8
Senior Member
Thread Starter
Join Date: Aug 2002
Location: Mississauga
Posts: 13,184
^ not a fan of machining rotors unless i'm having problems with them...
I cleaned out the part of the cradle where the pads sit after I took those pics - I just didn't take any pictures of cleaning that part out as it's not 'necessary'.
I cleaned out the part of the cradle where the pads sit after I took those pics - I just didn't take any pictures of cleaning that part out as it's not 'necessary'.
21-Nov-2007, 08:30 AM
#11
Senior Member
Thread Starter
Join Date: Aug 2002
Location: Mississauga
Posts: 13,184


Thread
Thread Starter
Forum
Replies
Last Post
boostedb18eg
Honda Civic (+ other) Parts/Accessories for Sale or Trade
3
22-Aug-2012 01:27 PM
imported_94EG6HB
Honda Civic Performance - JDM Discussion
6
11-May-2002 02:35 AM


