DIY: wetsanding headlight plastic - 56k warning
 13-Jun-2005, 09:18 PM
#1
Registered User
Thread Starter
Join Date: Mar 2005
Location: Toronto
Posts: 1,498
wetsanding headlights [56K go for dinner]
Full DIY is located down a few replies with lots of pictures.
hey, one of my headlights is hazy while the other is very clear. so my plan is to wetsand both headlights (to keep them equal, but obviously less sanding on the clear one) using 800, 1000, 1500, 2000, buff (with buffer) with 3M rubbing compound, and then clearcoat to protect.
just wanted to ask, anyone done this before?
meguiars plastix will not save this one headlight, its that hazed because my ride was in an accident before i bought it and i guess they only replaced the drivers side headlight.
 13-Jun-2005, 11:48 PM
#2
Registered User
Join Date: Jan 2005
Location: North York
Posts: 2,254
never heard of it being done before but if it turns out post a diy cause im sure many others would want to do the same.....
by the way sweet ride.... looks ten times better in person then it does in the pics....
by the way sweet ride.... looks ten times better in person then it does in the pics....
13-Jun-2005, 11:58 PM
#3


I've done it on my saturn... skip the clearcoat tho, that's just silly.
maintain your headlighs with Plastix from Meguiars at least once every 3 months and it won't happen again (unless you use high wattage bulbs, in which case the heat will discolor the plastic from the inside out)
maintain your headlighs with Plastix from Meguiars at least once every 3 months and it won't happen again (unless you use high wattage bulbs, in which case the heat will discolor the plastic from the inside out)
14-Jun-2005, 12:02 AM
#4
Registered User
Thread Starter
Join Date: Mar 2005
Location: Toronto
Posts: 1,498
JDMman i will post a DIY forsure, when did ya see me, thanks for the compliment
bbarbulo thanks for the tip, i've heard of using plastix to maintain it, so i think i'll go with that.
i'm gonna be doing this soon, if it rains all day tomorrow i'll do it then, otherwise early next week when i get back from drinkin JD with my buddies, hehe.
bbarbulo thanks for the tip, i've heard of using plastix to maintain it, so i think i'll go with that.
i'm gonna be doing this soon, if it rains all day tomorrow i'll do it then, otherwise early next week when i get back from drinkin JD with my buddies, hehe.
14-Jun-2005, 12:32 AM
#5
yeah man, just expect to put a lotta muscle into it ahaha... be patient and the end result will look like new headlights (assuming they're not discolored right through) also, remember the more you remove the more distortion you introduce, so remove only the material you HAVE to remove.... and use one of those spongey sanding boards to keep pressure even on the whole sanding area.
14-Jun-2005, 03:21 PM
#6
Registered User
Thread Starter
Join Date: Mar 2005
Location: Toronto
Posts: 1,498
one is done, holy **** it looks so much better, i'm just getting the condensation out of the other and i'll post a full DIY for others considering this. its easier then DIY CTR style smoked headlights 
14-Jun-2005, 03:45 PM
#7
Guest
Posts: n/a
14-Jun-2005, 04:56 PM
#8
Registered User
Thread Starter
Join Date: Mar 2005
Location: Toronto
Posts: 1,498
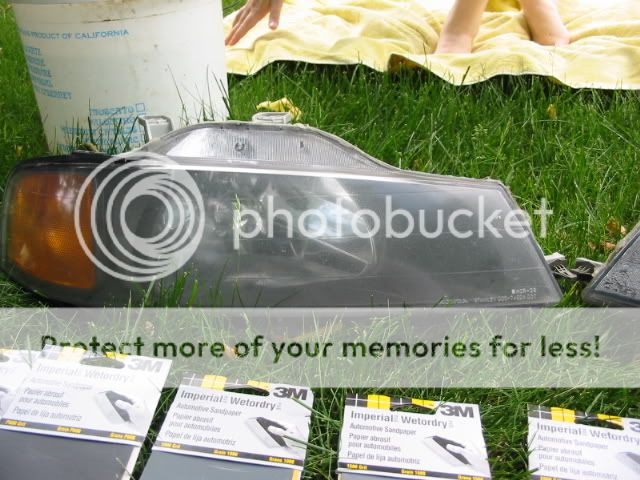
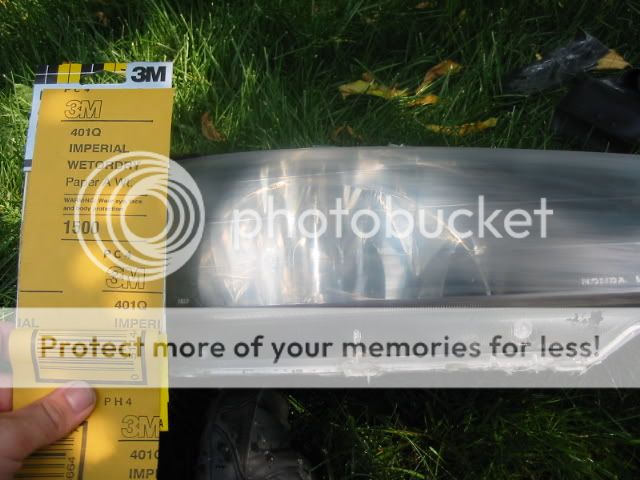
for this i went with the following grits of automotive sandpaper and wetsand using water with soap in it to lubricate:
HERES WHAT YOU NEED:
all this sandpaper is $2.79ea at CDN tire.
180 (only if really, really, REALLY bad)
400
800
1000
1500
2000
Meguairs Plastx
Sanding block
bucket of water with soap in it
cloth x 3 (1 to keep area wet, 1 to dry area to see your progress, 1 for plastx)
buffer (orbital or highspeed if you have it, if not use cloth)
SANDING (gets as smooth as a baby's butt)
sand for about 5 minutes per grit in a smooth steady motion, each grit will erase all lines from the previous, so when i got to 1500 and 2000, i used those just a tad longer.
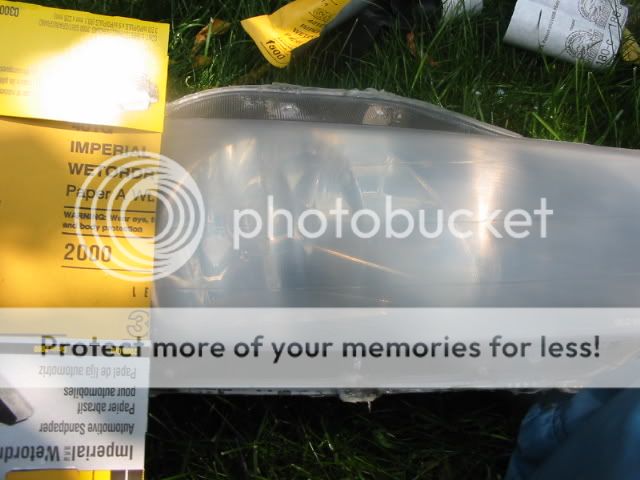
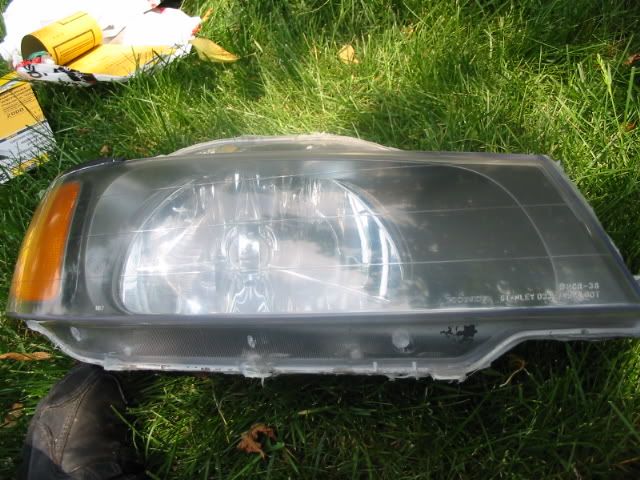
START (look at that pitting and hazyness)
180/400
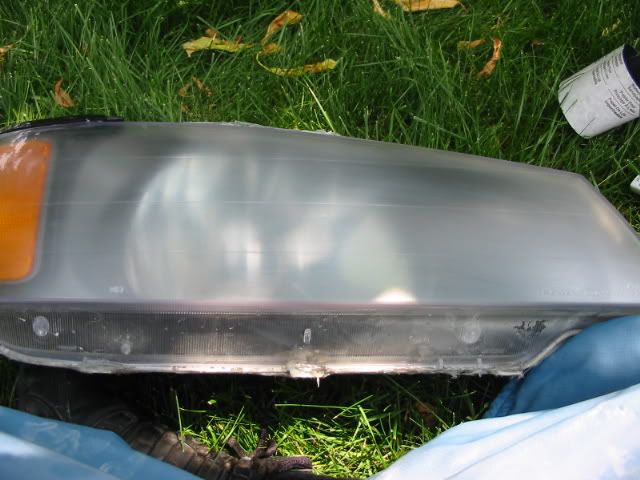
800
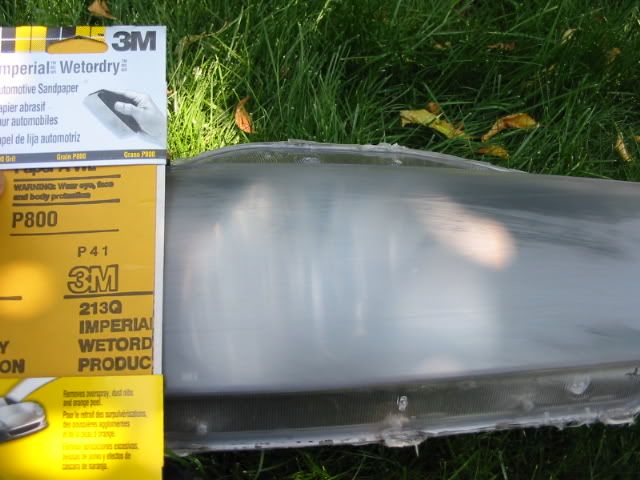
1000
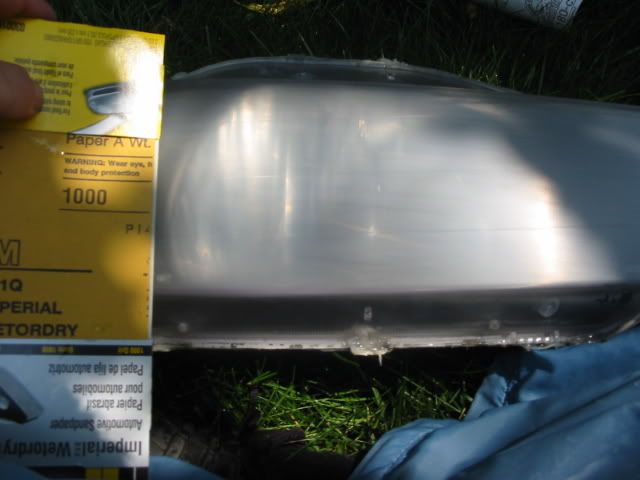
1500
2000
then orbital buffer and meguairs plastx (or other buffing/polishing compound) which removes the cloudy part from all the sanding and leaves it crystal clear. did this for about 15 minutes and really worked it in the best i could applying about 3 coats of plastx.
NOTE: a highspeed buffer would have removed all lines and make it shiny as hell, but i don't have access to a highspeed buffer. i'd probably go 1800-2500rpm since its plastic and if it heats up it won't be pretty. move it around alot and stop to feel how hot its getting, highspeed buffing makes alot of heat and if you melt a part of the lens, your ****ed. another trick to this is to use spray water to cool it down, i wouldn't recommend this way unless you know what your doing and have done it before.
Why 180 grit, thats pretty heavy isn't it?
yes, one of my headlights was so bad, it looks like it was from a 1990 civic that has never been washed. after this its crystal clear and you cannot see any scratches unless your like 1ft away, then you can see some small lines from wetsanding, this is because i had to go down to 180 grit to get all the pitting out. the drivers headlight was started at 400 and there are virtually no lines at all, but it was replaced at somepoint before, so it was much newer.
HERES WHAT YOU NEED:
all this sandpaper is $2.79ea at CDN tire.
180 (only if really, really, REALLY bad)
400
800
1000
1500
2000
Meguairs Plastx
Sanding block
bucket of water with soap in it
cloth x 3 (1 to keep area wet, 1 to dry area to see your progress, 1 for plastx)
buffer (orbital or highspeed if you have it, if not use cloth)
SANDING (gets as smooth as a baby's butt)
sand for about 5 minutes per grit in a smooth steady motion, each grit will erase all lines from the previous, so when i got to 1500 and 2000, i used those just a tad longer.
START (look at that pitting and hazyness)
180/400
800
1000
1500
2000
then orbital buffer and meguairs plastx (or other buffing/polishing compound) which removes the cloudy part from all the sanding and leaves it crystal clear. did this for about 15 minutes and really worked it in the best i could applying about 3 coats of plastx.
NOTE: a highspeed buffer would have removed all lines and make it shiny as hell, but i don't have access to a highspeed buffer. i'd probably go 1800-2500rpm since its plastic and if it heats up it won't be pretty. move it around alot and stop to feel how hot its getting, highspeed buffing makes alot of heat and if you melt a part of the lens, your ****ed. another trick to this is to use spray water to cool it down, i wouldn't recommend this way unless you know what your doing and have done it before.
Why 180 grit, thats pretty heavy isn't it?
yes, one of my headlights was so bad, it looks like it was from a 1990 civic that has never been washed. after this its crystal clear and you cannot see any scratches unless your like 1ft away, then you can see some small lines from wetsanding, this is because i had to go down to 180 grit to get all the pitting out. the drivers headlight was started at 400 and there are virtually no lines at all, but it was replaced at somepoint before, so it was much newer.


 18-Jun-2005, 11:28 AM
#14
Registered User
Thread Starter
Join Date: Mar 2005
Location: Toronto
Posts: 1,498
didn't clearcoat. just used meguairs plastx and it polishes it nice and smooth and repells water too, so i'd just give em a good polish rather then clearcoat.
yes light output is greatly improved over the way it was, definately something to do if your lights are hazy or pitted
yes light output is greatly improved over the way it was, definately something to do if your lights are hazy or pitted
26-Jun-2005, 12:02 AM
#16
Registered User

Join Date: Aug 2003
Posts: 962
bump...did it to mine today
96 HB with DIY black housing headlights
its still not 100% tho
I went from 400-600-1500 grit papers and then used plastix or whatever its called, with a waxing buffer machiene and after 3 coats or so it was greatly improved over what it was...but its not 100%....is this the best it iwll get? any tips>
 i've seen other DIY's and they look better than brand new...
26-Jun-2005, 12:28 PM
i've seen other DIY's and they look better than brand new...
26-Jun-2005, 12:28 PM
#18
Registered User
Thread Starter
Join Date: Mar 2005
Location: Toronto
Posts: 1,498
2000 grit would have helped alittle, but after that its basically scrub like hell with plastx. i still need to do mine more too as you can see some lines in person. there should not be any big lines at all, just a few minor ones that look like scratches.
another option is to you 3m compounds, they have a polish and another extremely light cutting one that may help if the lines are deeper then 1500 grit.
another option is to you 3m compounds, they have a polish and another extremely light cutting one that may help if the lines are deeper then 1500 grit.


