DIY - Mugen Lip and Mugen Zero Side Install
 16-Mar-2006, 12:11 AM
#1
Registered User
Thread Starter
Join Date: Mar 2006
Location: Markham
Posts: 868
DIY - Mugen Lip and Mugen Zero Side Install
Basically I was looking for a DIY on insalling a Mugen Front Lip and Mugen Zero Sides, since I dont plan on spending thousands of bucks on my car and I enjoy doing small things that I can do myself I needed a tutorial. I searched asked and nothing, so when it came time to doing mine since im impatient and like to get things done, I gatheres a few tips from here and there.
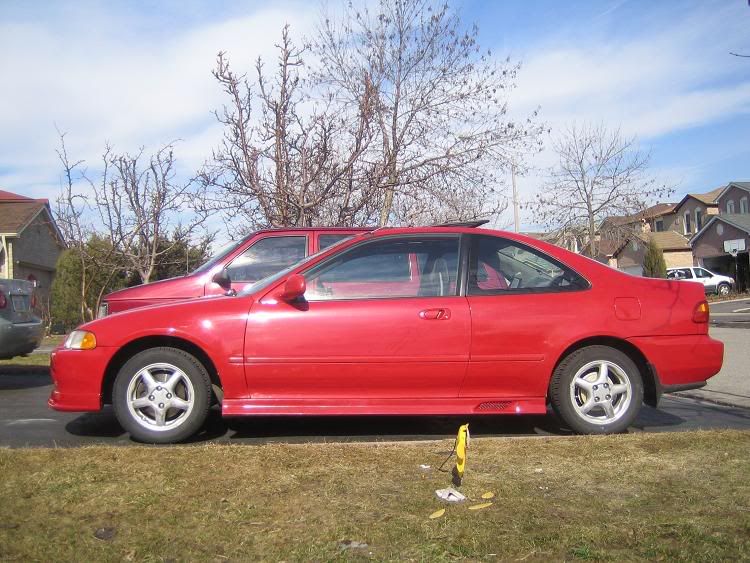
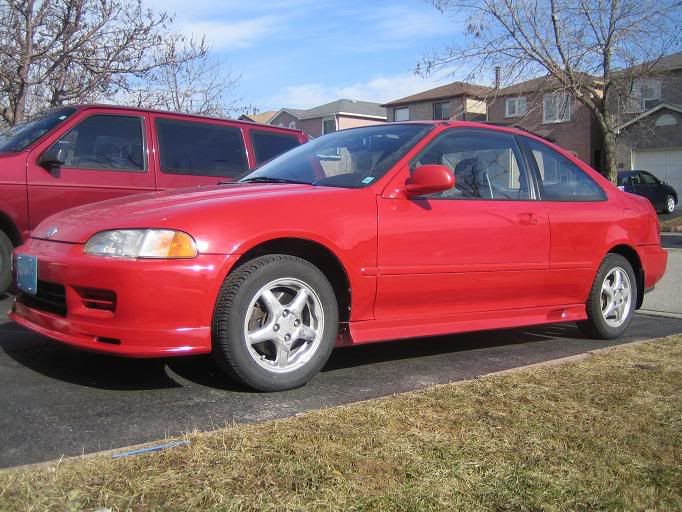
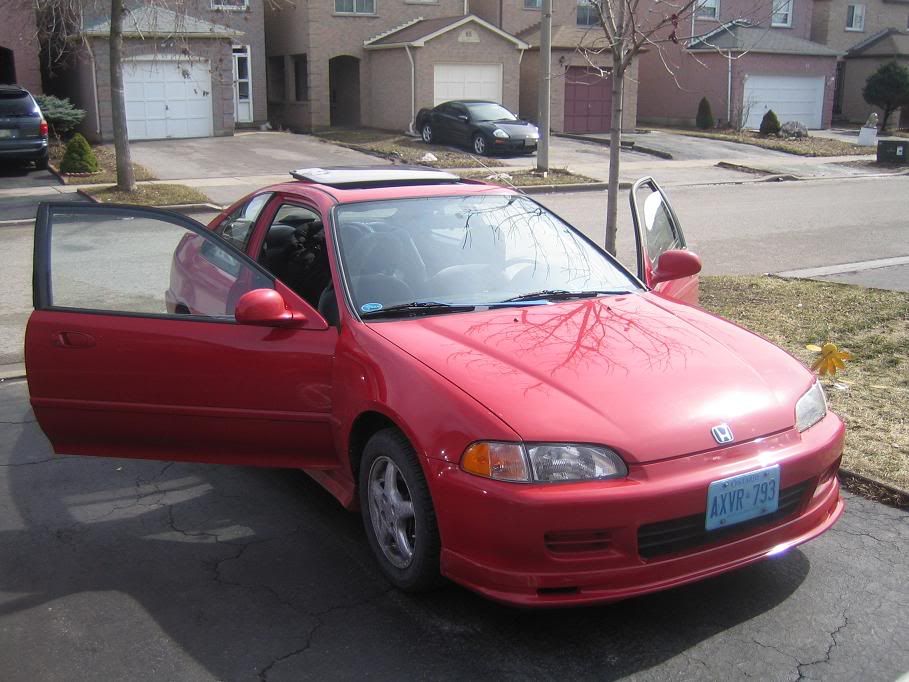
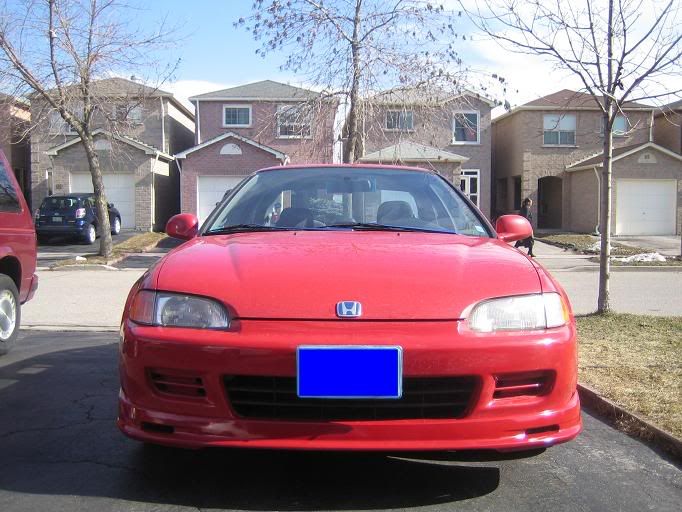
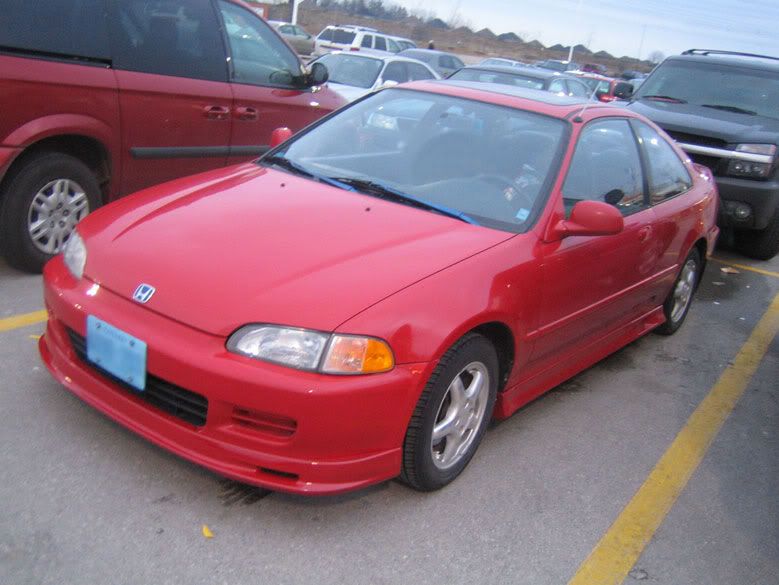
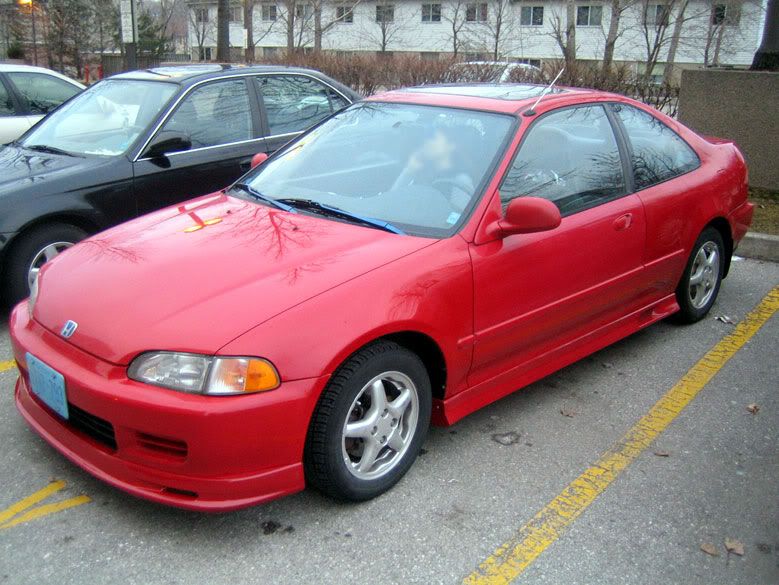
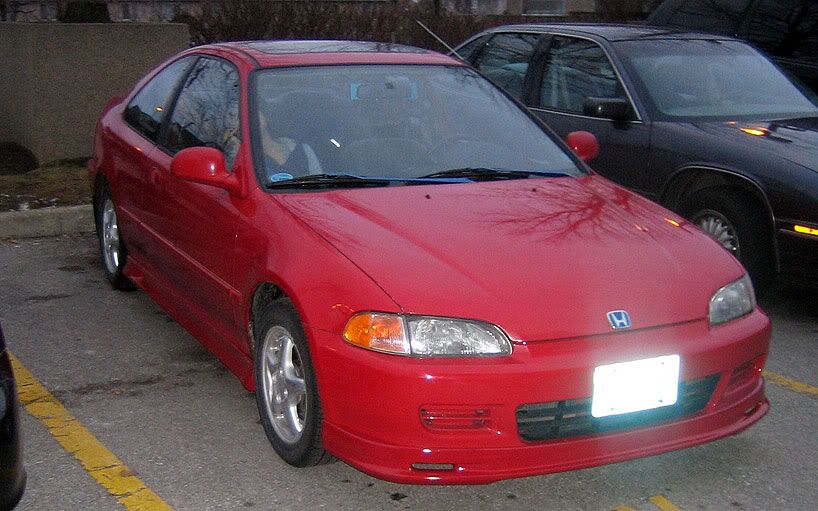
I did mine and wanted to help others with theirs or perhaps give some tips that I learned along the way. My car is a 95 Honda Civic Si Coupe.
Basically I did it MY way Im not a pro and its up to you if you want to do it my way but atleast it will help somewhat in the installation. if you have any questions please feel free to pm me. and remember i aint no pro I just was brave enough to do it myself.
This project took me 12 hours, or from 8am-8pm roughly, but I also had to run out to get paints and more supplies in between times.
OUTLINE OF PROJECT
Purchase Supplies
Car wash
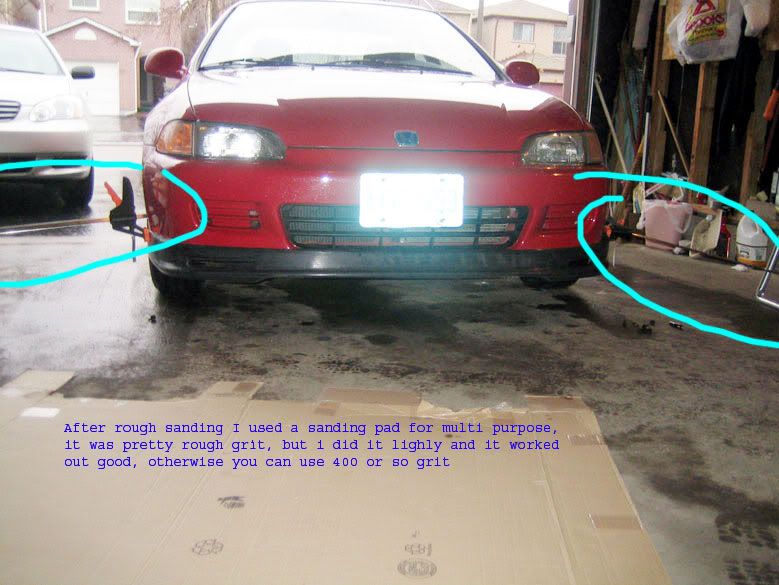
Sand Mugen Lip and Skirt
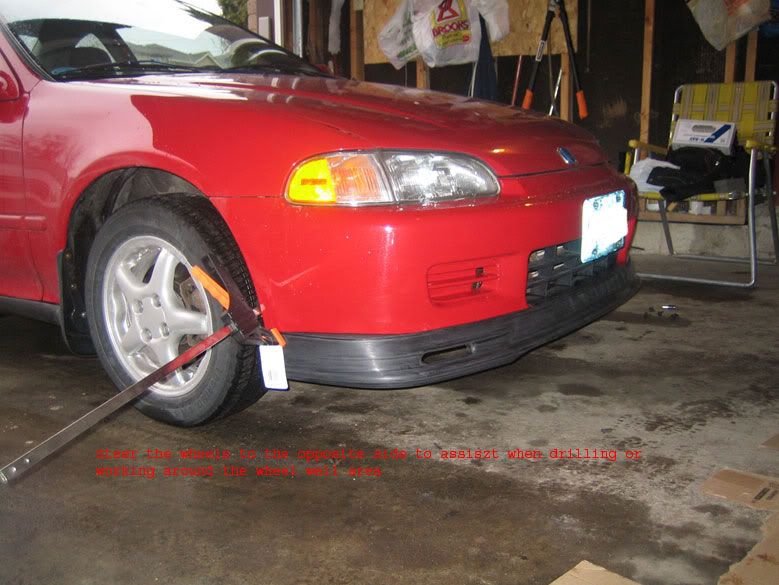
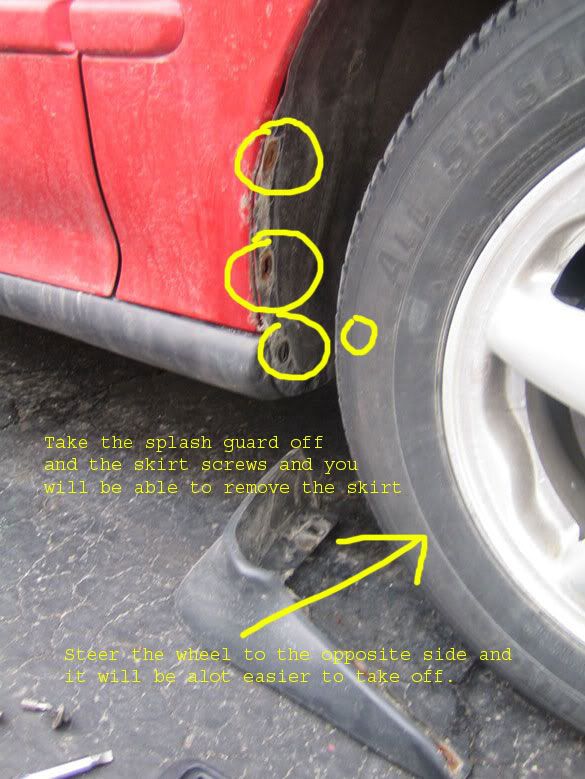
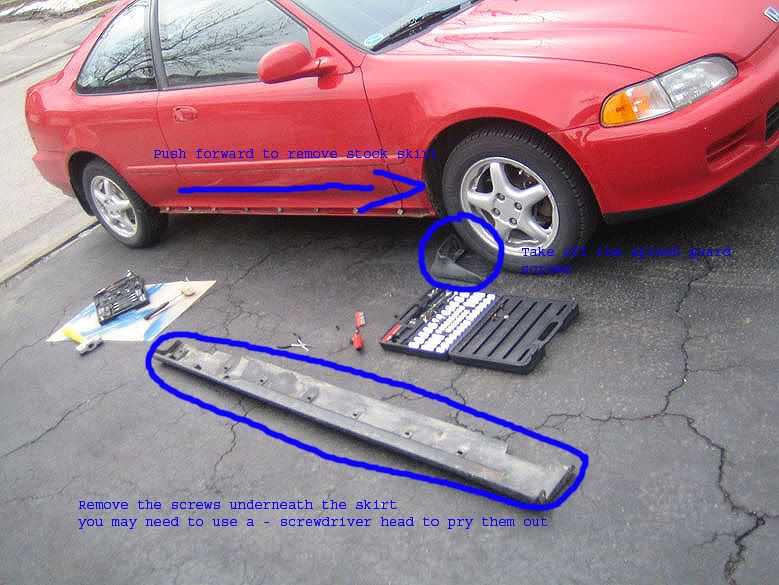
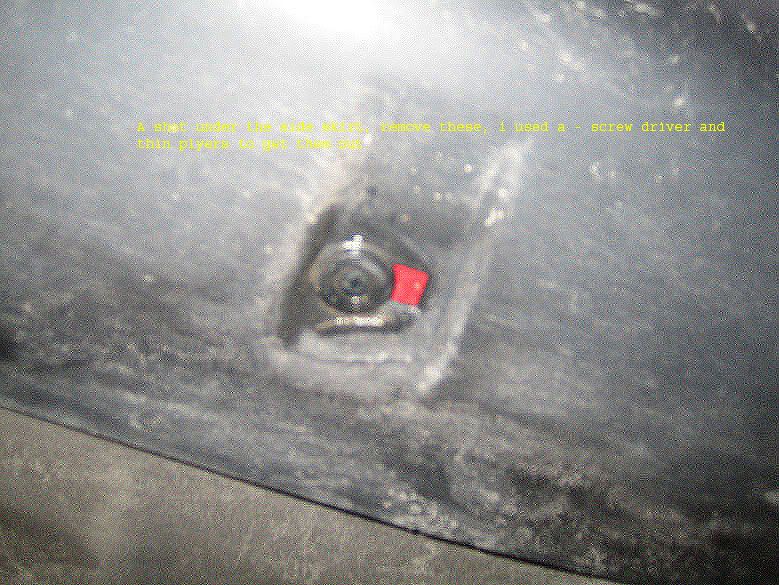
Remove Stock Parts
Rough Fit of Lip
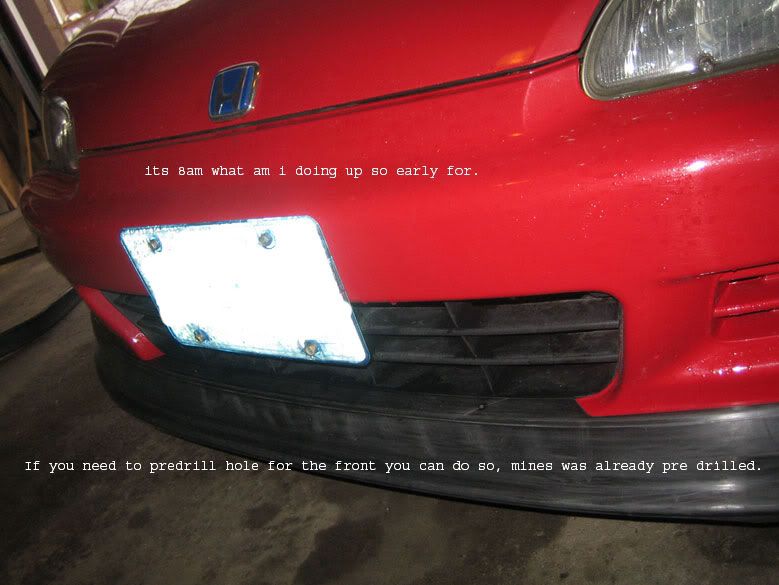
Pre Drill Lip
Wash and Clean
Primer
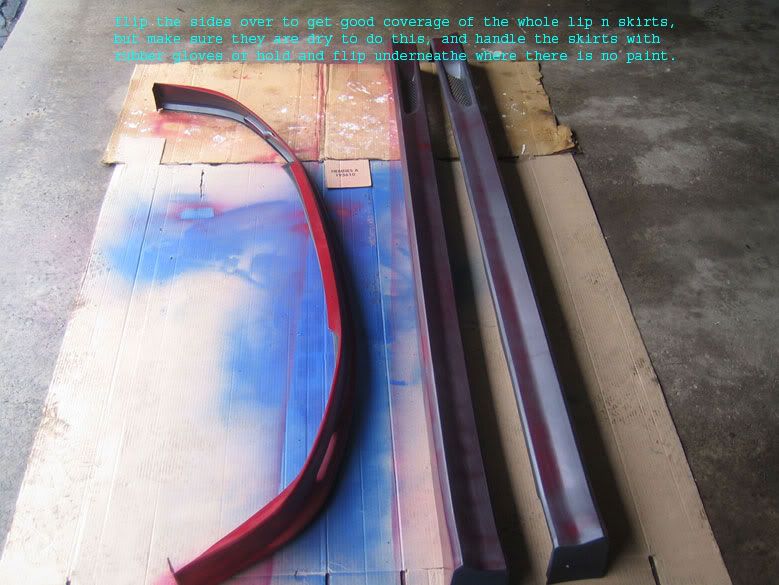
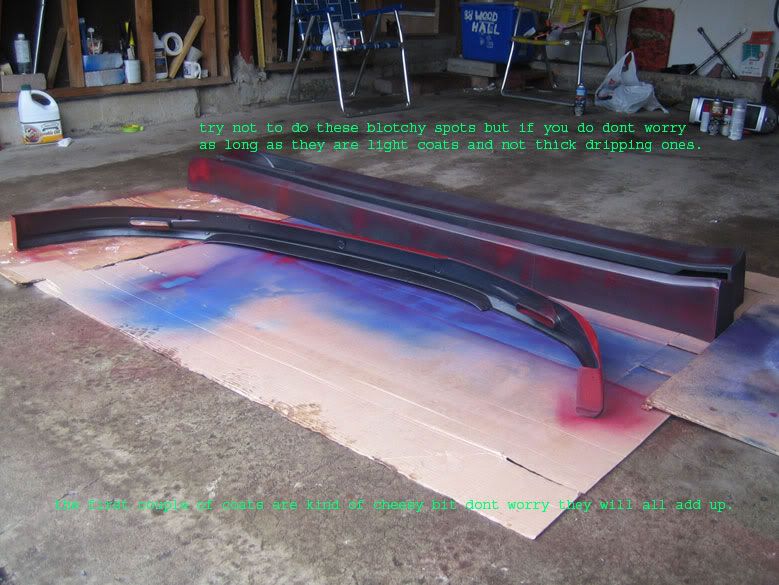
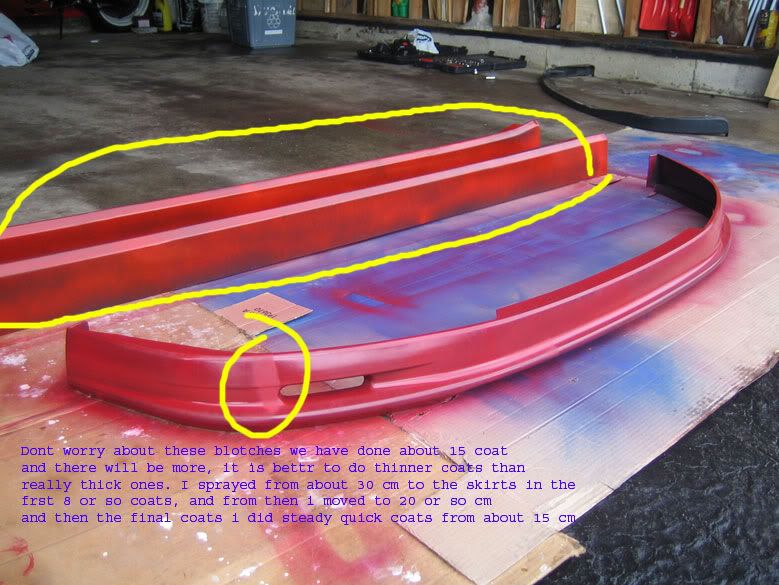
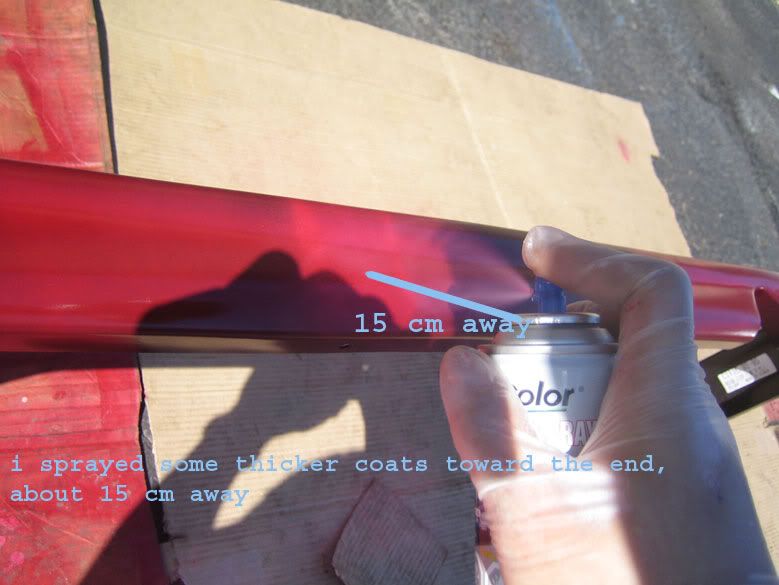
Paint in thin coats
Paint with a little but thicker coat
Top Coat
Install of Lip
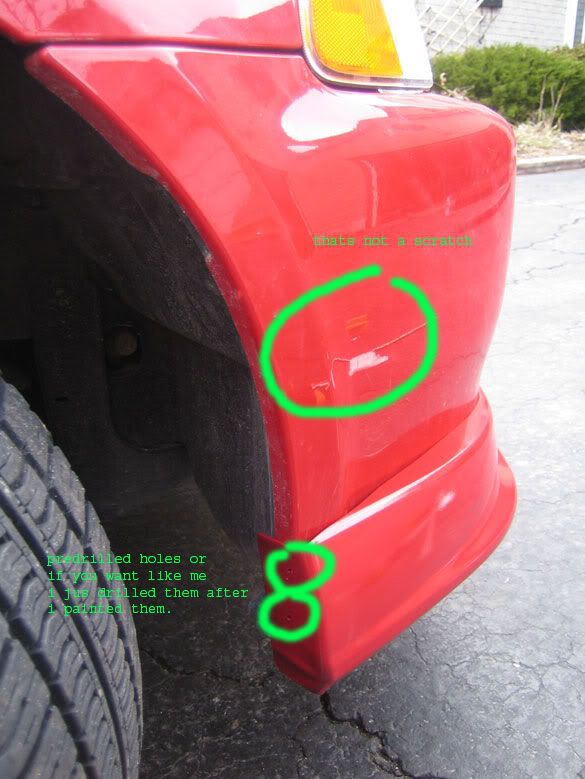
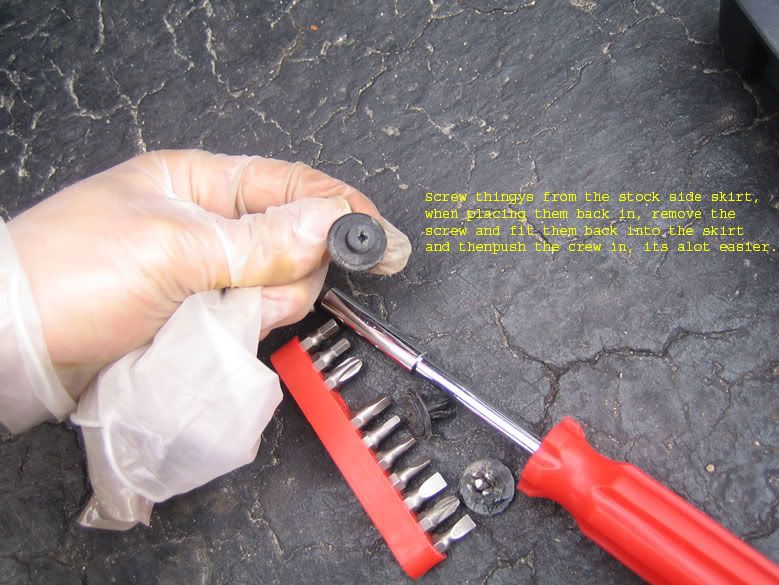
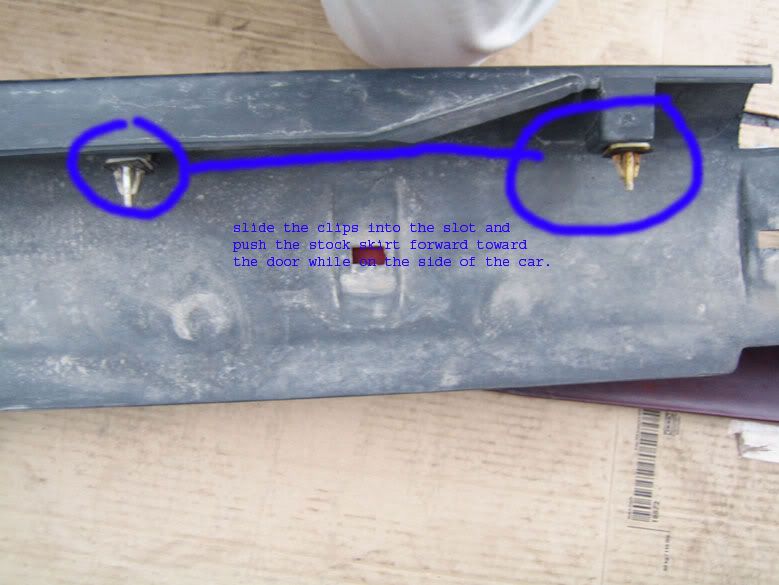
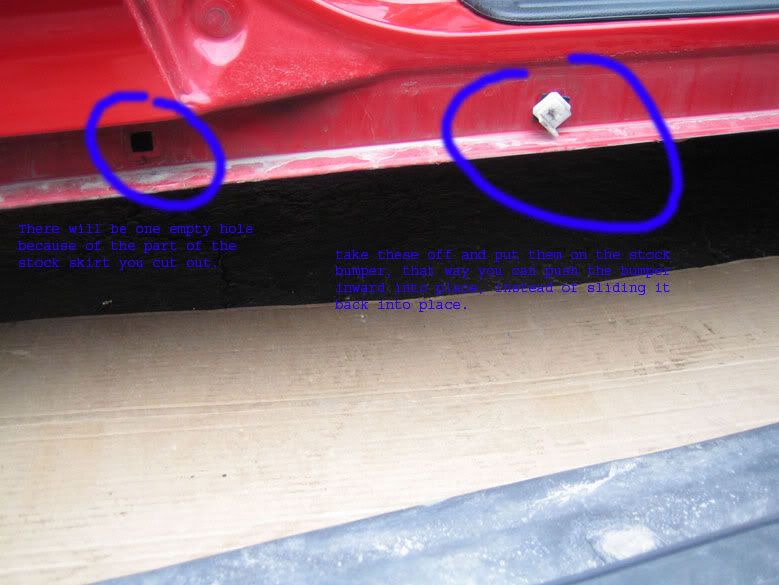
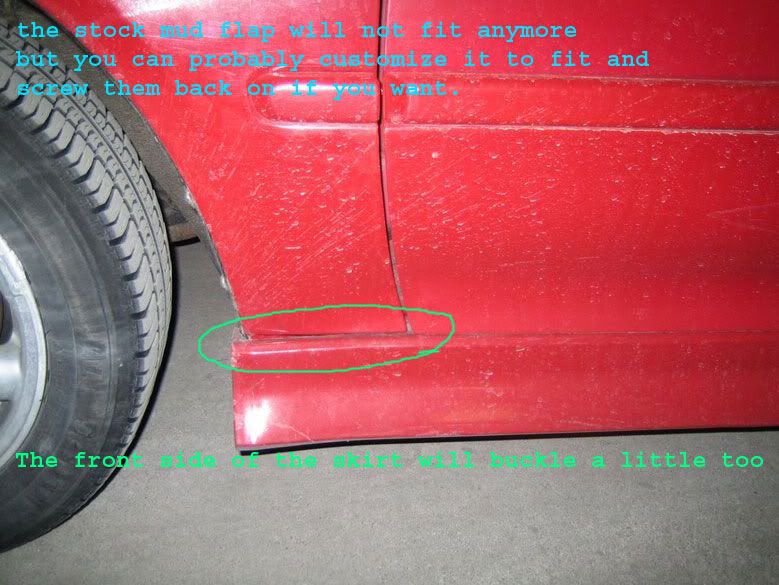
Remove Stock Skirt
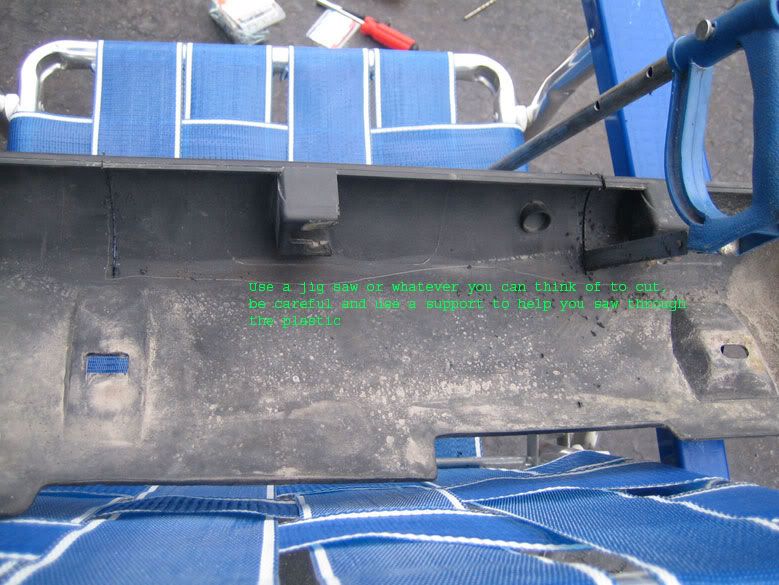
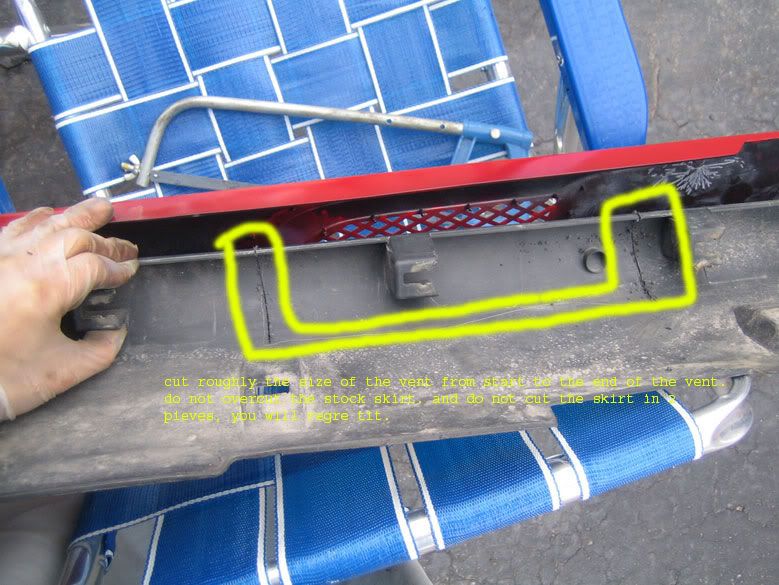
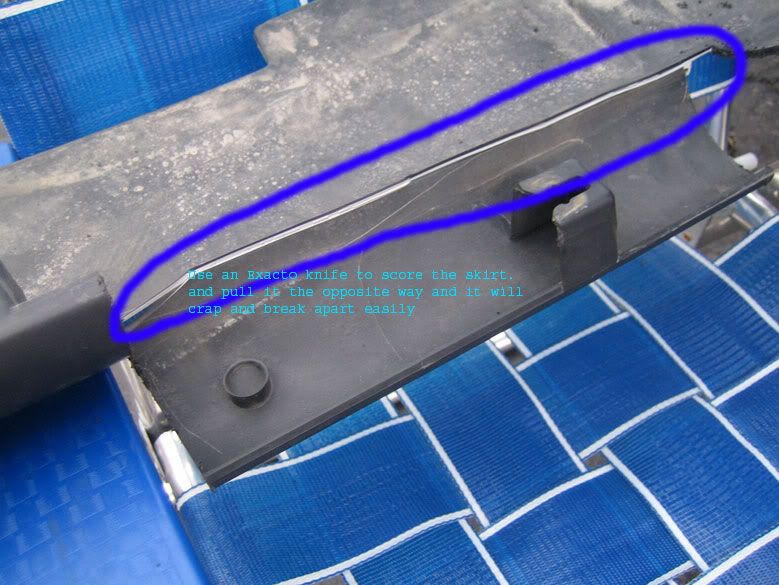
Cut and fit Stock Skirt with Mugen on top
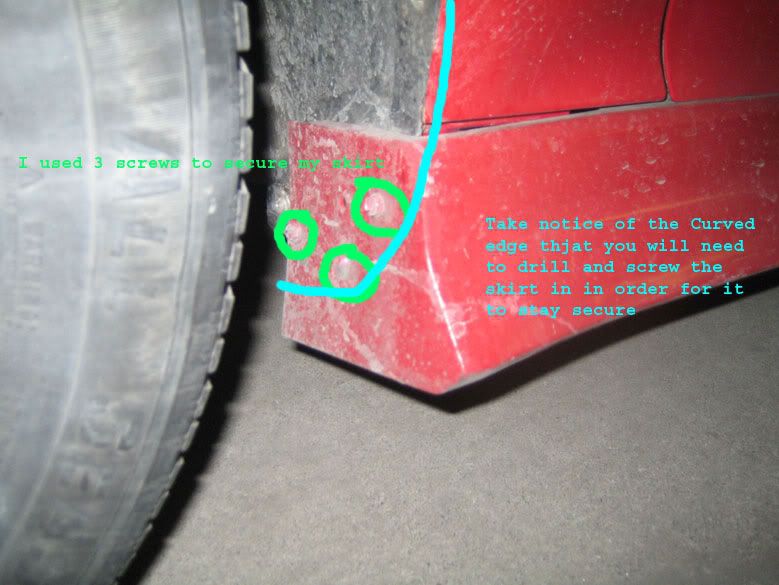
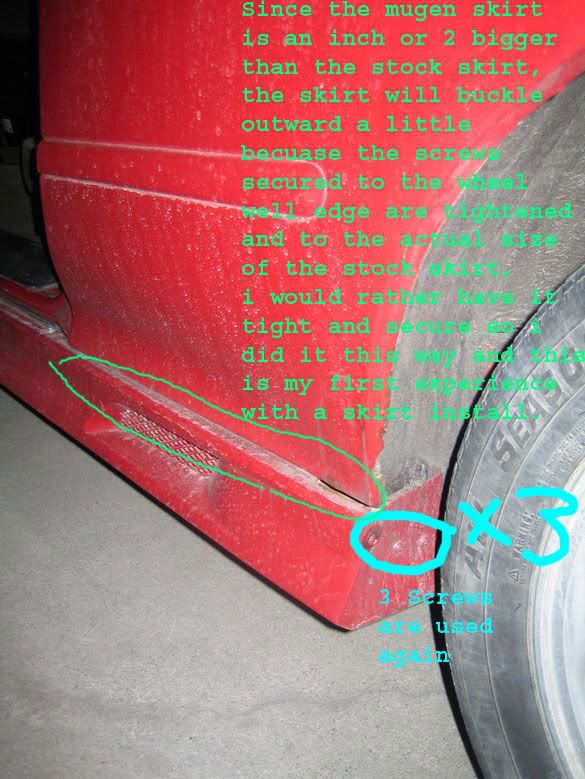
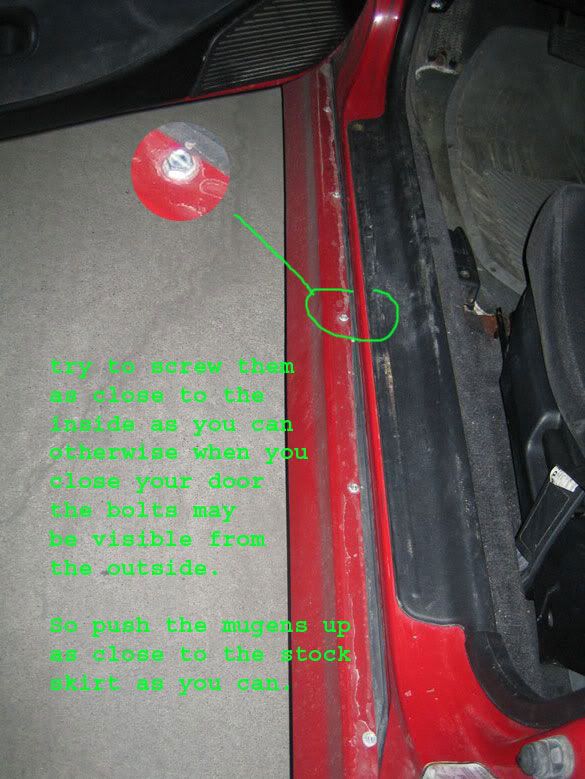
Install of Mugen Side Skirt
Take Pictures
Supplies
Knife
Screwdrivers or multiple Driver heads
Mallet or Hammer
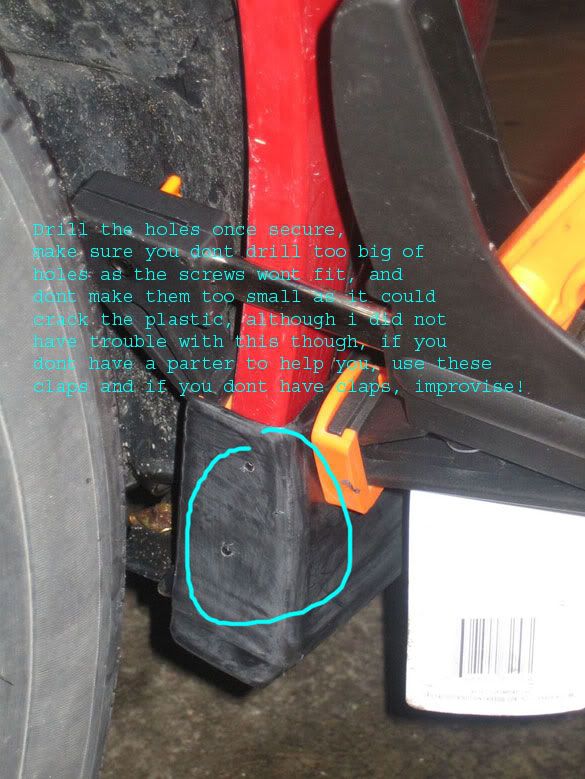
Set of Screws and Bolts(I will try to get the type or bolt pecs of mine)
You can use Pop Rivets but you need to find one that is nive big and long, I couldnt find any and I thought the screws would work better
Drill with different size drill bits
Clamps
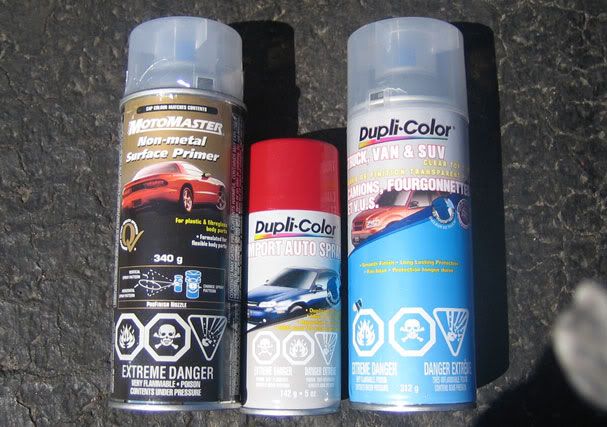
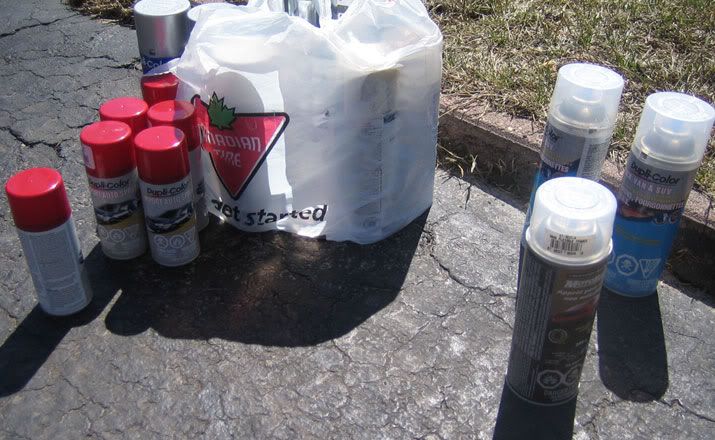
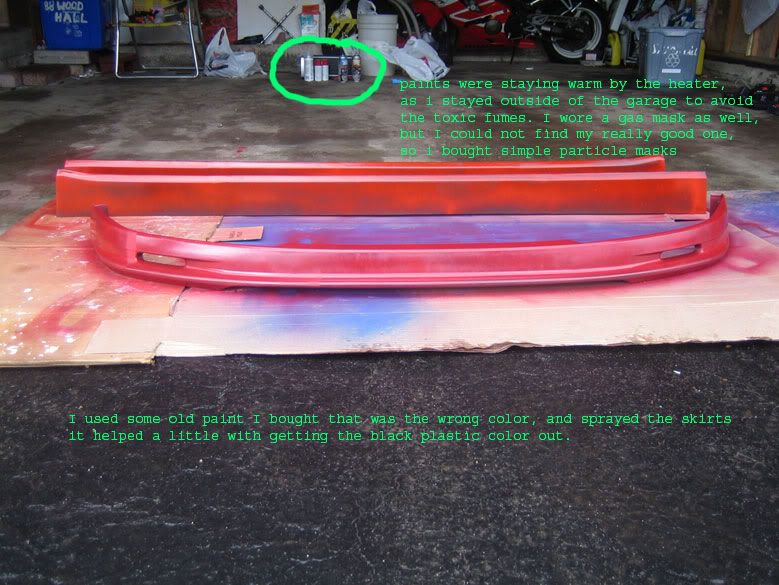
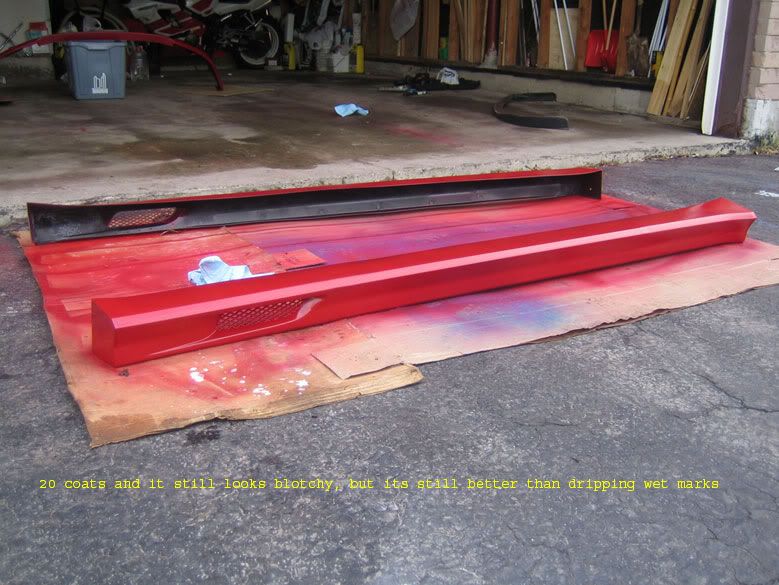
10-15 cans of Spray paint(in my case I used about 13 or so small cans so probably 6 or so cans, get exact match paint)
1 Can of Primer Spray Paint Can
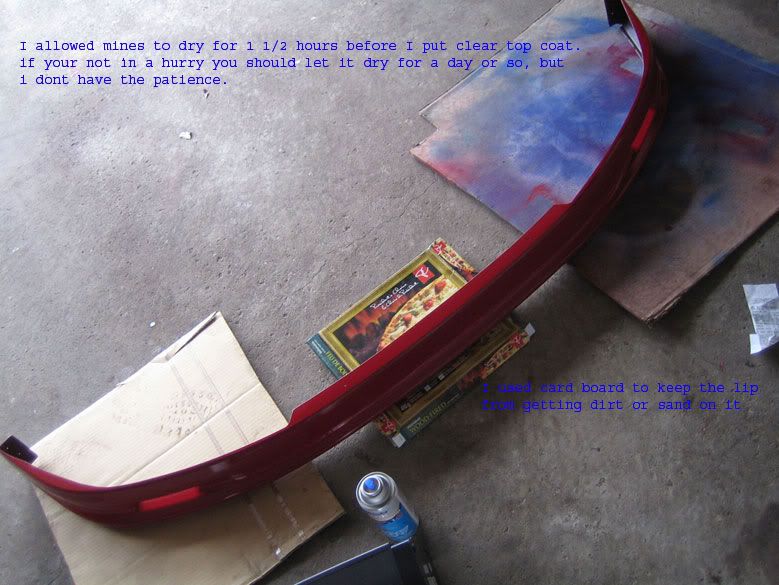
1 Can of Top Coat, Gloss Spray Paint Can
Paint Thinner of some sort for those accidents
Blue Shop Towels
Gas Mask or breathing protection
Water - to wash away and clean sanded plastic
Hand Saw or Jigsaw
Sandpaper 400 and 300 grit is what i used Im not sure what you want to use but
if you are using rough paper dont sand to hard if you have streaks of lines on your lip or
skirt urdoing it too hard or just use finer sandpaper.
Cardboard or floor covering
I did mine and wanted to help others with theirs or perhaps give some tips that I learned along the way. My car is a 95 Honda Civic Si Coupe.
Basically I did it MY way Im not a pro and its up to you if you want to do it my way but atleast it will help somewhat in the installation. if you have any questions please feel free to pm me. and remember i aint no pro I just was brave enough to do it myself.
This project took me 12 hours, or from 8am-8pm roughly, but I also had to run out to get paints and more supplies in between times.
OUTLINE OF PROJECT
Purchase Supplies
Car wash
Sand Mugen Lip and Skirt
Remove Stock Parts
Rough Fit of Lip
Pre Drill Lip
Wash and Clean
Primer
Paint in thin coats
Paint with a little but thicker coat
Top Coat
Install of Lip
Remove Stock Skirt
Cut and fit Stock Skirt with Mugen on top
Install of Mugen Side Skirt
Take Pictures
Supplies
Knife
Screwdrivers or multiple Driver heads
Mallet or Hammer
Set of Screws and Bolts(I will try to get the type or bolt pecs of mine)
You can use Pop Rivets but you need to find one that is nive big and long, I couldnt find any and I thought the screws would work better
Drill with different size drill bits
Clamps
10-15 cans of Spray paint(in my case I used about 13 or so small cans so probably 6 or so cans, get exact match paint)
1 Can of Primer Spray Paint Can
1 Can of Top Coat, Gloss Spray Paint Can
Paint Thinner of some sort for those accidents
Blue Shop Towels
Gas Mask or breathing protection
Water - to wash away and clean sanded plastic
Hand Saw or Jigsaw
Sandpaper 400 and 300 grit is what i used Im not sure what you want to use but
if you are using rough paper dont sand to hard if you have streaks of lines on your lip or
skirt urdoing it too hard or just use finer sandpaper.
Cardboard or floor covering


 .
23-Mar-2006, 12:55 AM
.
23-Mar-2006, 12:55 AM
#16
Registered User
Thread Starter
Join Date: Mar 2006
Location: Markham
Posts: 868
Originally posted by kwasley
Im doing this as soon as it gets warm.
Where did you get your paint from???
What type of clear coat did you use??
Im doing this as soon as it gets warm.
Where did you get your paint from???
What type of clear coat did you use??
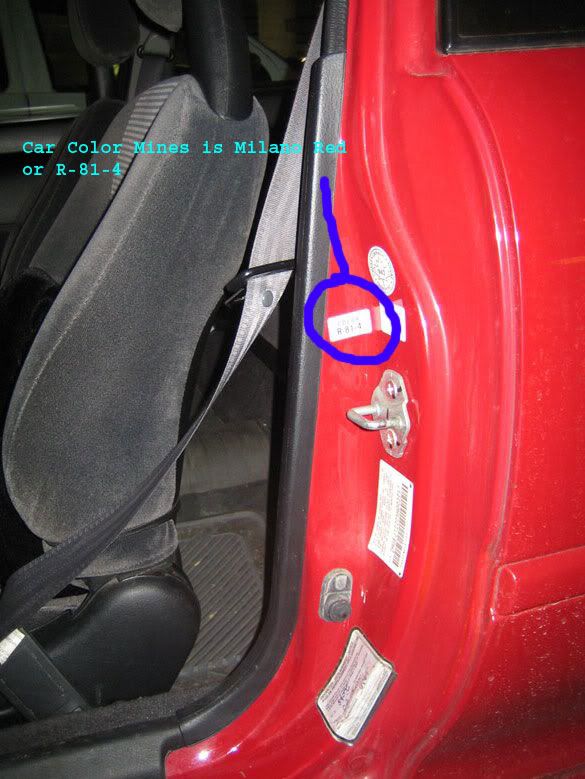
used car spray can flexible clear primer,
and milano red paint
then clear coat gloss
23-Mar-2006, 12:57 AM
#17
Registered User
Thread Starter
Join Date: Mar 2006
Location: Markham
Posts: 868
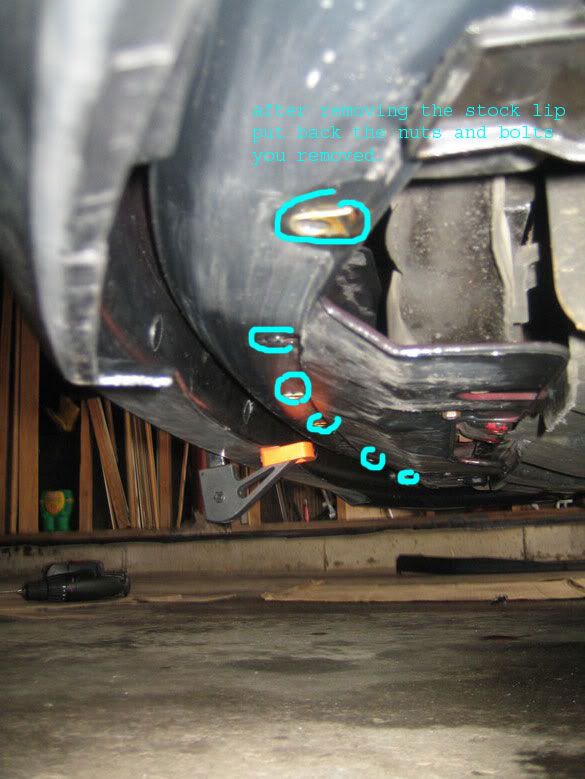
Originally posted by Gallagher
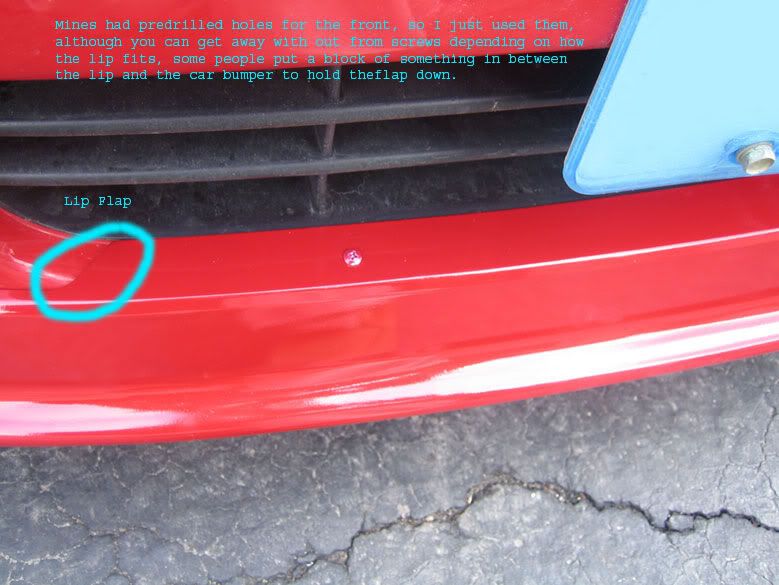
Stock front lip......why in the world would you have to put the nuts and bolts back in?
Stock front lip......why in the world would you have to put the nuts and bolts back in?
23-Mar-2006, 11:22 AM
#18
Senior Member
Join Date: Jan 2003
Location: Your sisters bedroom
Posts: 30,142
Originally posted by crazydragonclk
the bolts not only hold the stock skirt, there is an underlapping plastic protector underneath the engine bay of the front area under the car. so if you dont screw them back, you will have a plastic sheet hanging off your car
the bolts not only hold the stock skirt, there is an underlapping plastic protector underneath the engine bay of the front area under the car. so if you dont screw them back, you will have a plastic sheet hanging off your car
I guess my 94 hatch is totally different from your car then.....never ever heard of that
25-Mar-2006, 02:02 PM
#20
Registered User
Thread Starter
Join Date: Mar 2006
Location: Markham
Posts: 868
cost for supplies in my case bc i jus got small half cans of exact color match which are about 8 bucks, so i used like 10 or so cans so i would say
$100 for paint
20 for sandpaper, masks, misc supplies.
300 for mugen front and sides.
there are no signs of wear, the only time the paint was removed is because of hard scratches like lip scraping asphalt or driveway, and even when some of the lip cracked against a driveway mishap there was no flaking or cracking of the paint not even on the cracked edges, and ive tried scratching it with my nail and its still really durable.

Thread
Thread Starter
Forum
Replies
Last Post
imported_jj2ii3344
Honda Civic (+ other) Parts/Accessories for Sale or Trade
2
31-Mar-2007 06:37 PM


