DIY:92-95 civic TSX retrofit in oem STYLE housing
 16-Apr-2008, 12:52 PM
#1
Senior Member
Thread Starter

Join Date: Sep 2007
Posts: 110
DIY:92-95 civic TSX retrofit in oem STYLE housing
Alright I tried to take as many pics as possible, so hopefully this will explain clearly how to retro-fit TSX
Projectors into an OEM style civic housing.
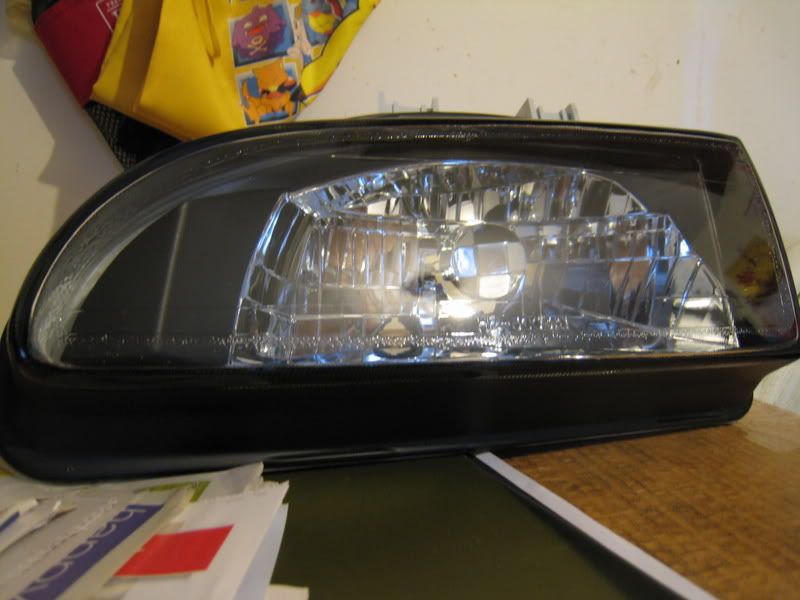
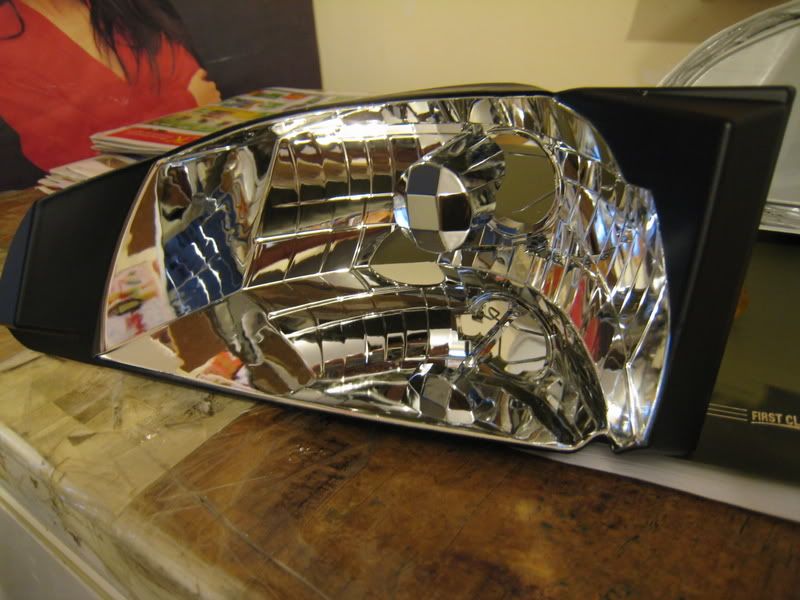
First go get one of these clear lenses OEM STYLE housing. Which will give you the best possible output from your projectors.
Pre-heat the oven at 350 and turned it off and put the lights in the oven for about 10 mins. You can also use a heat gun around the edges if that�s not enough.
Then get a flat head screwdriver and pry out the glass out a little.
Then take a sharp knife and cut the glue while you are prying it. I find this method very fast and easy, took me only 10 mins for both headlights.
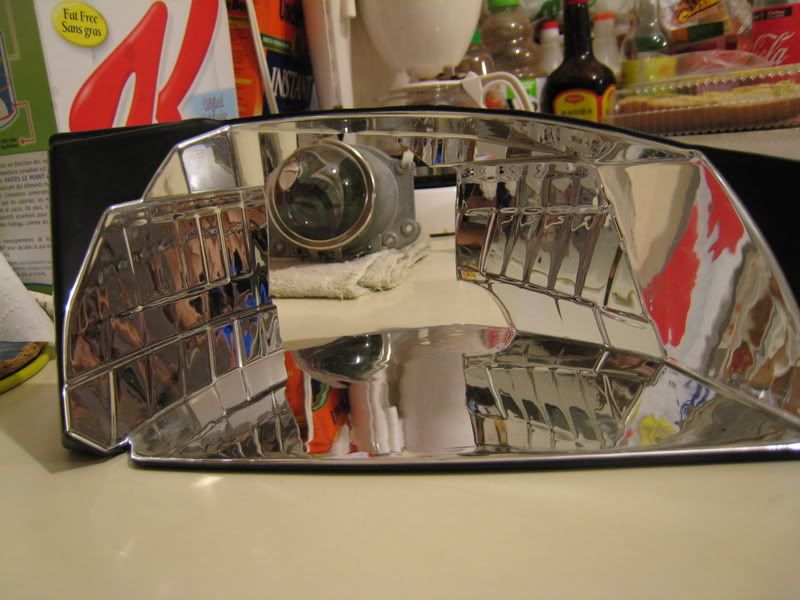
Then you�ll have this
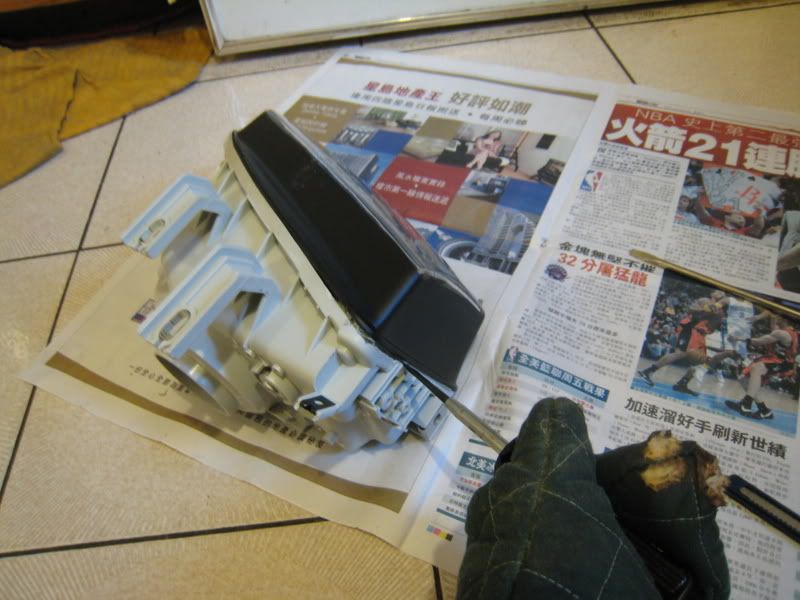
To take the reflector part out, just unscrew the adjustment screws.
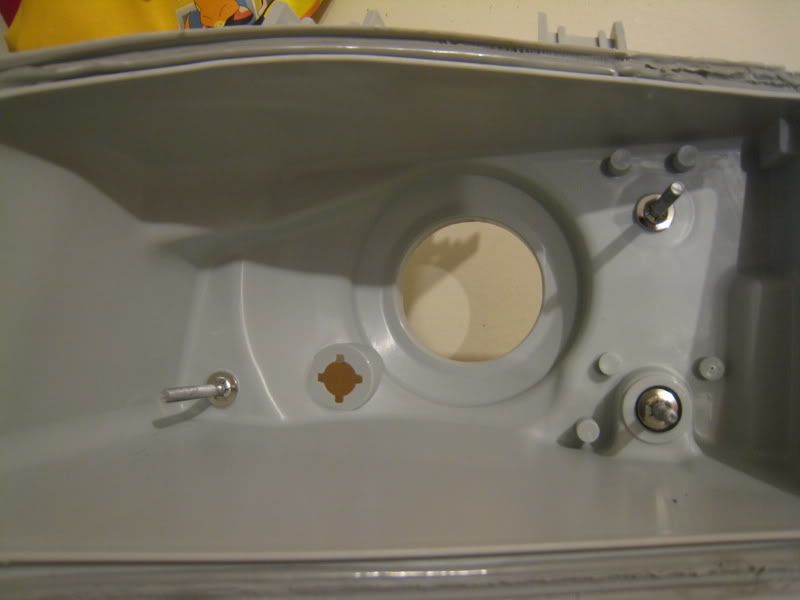
Get a marker and put a line in the centre where the h4 hole was.
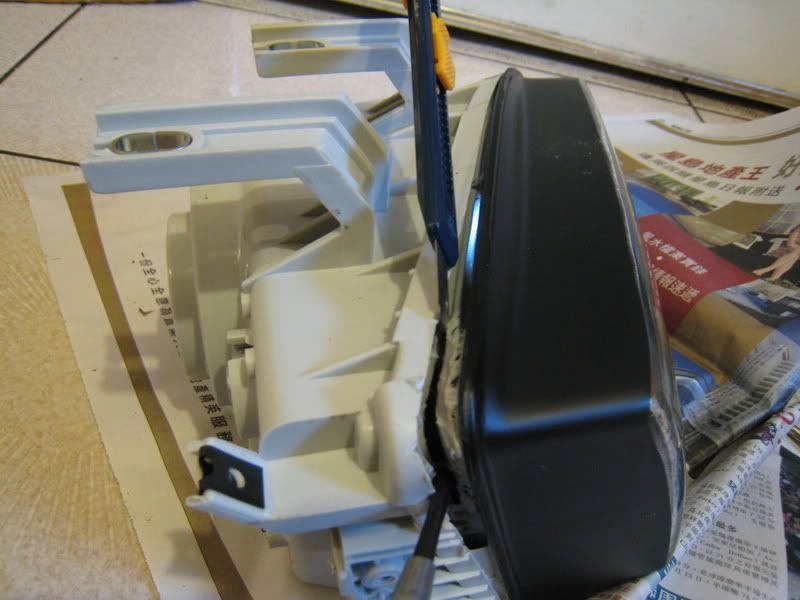
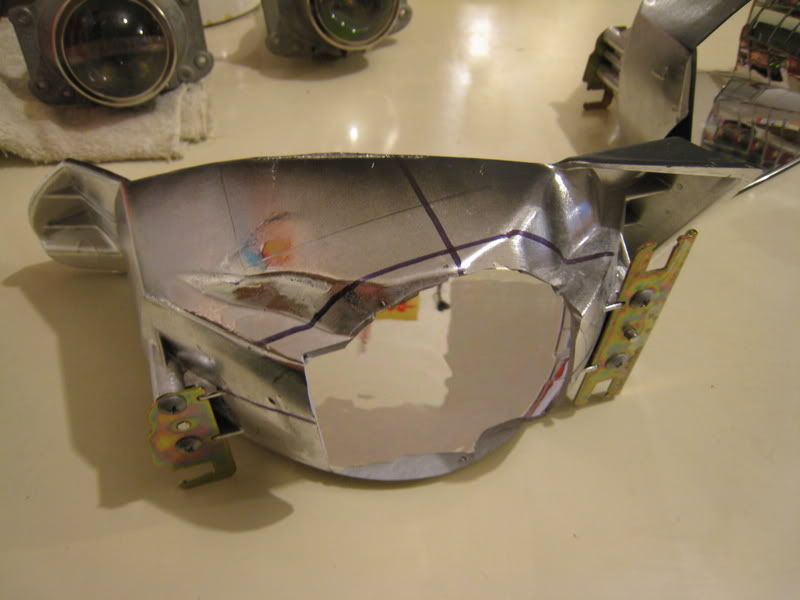
Then get a dermal and cut the back of the reflector out for your new projectors from this
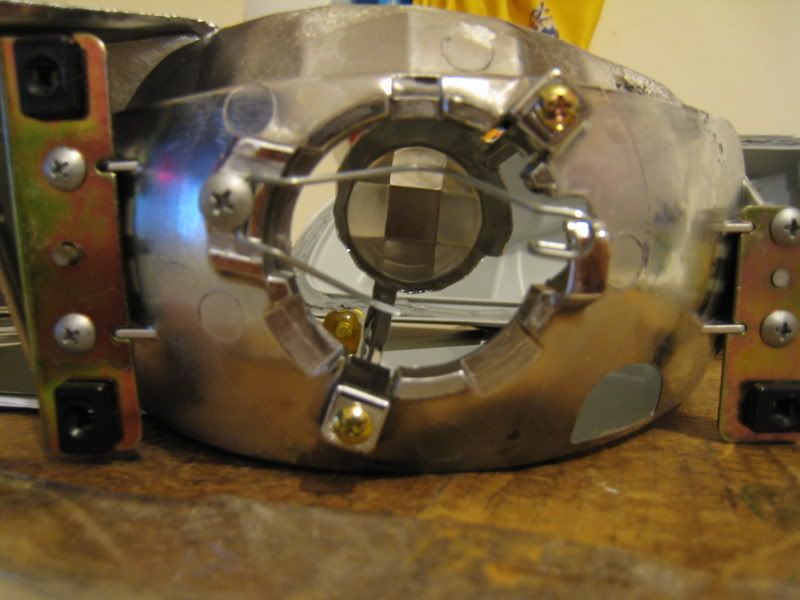
To this
Get 4 L mounting brackets from home depot and cut them like this so it can fit onto the projectors

Mount it up to the TSX projectors and place it into the reflector housing.
Make sure it lines up wit the centre marking you did with the marker earlier.
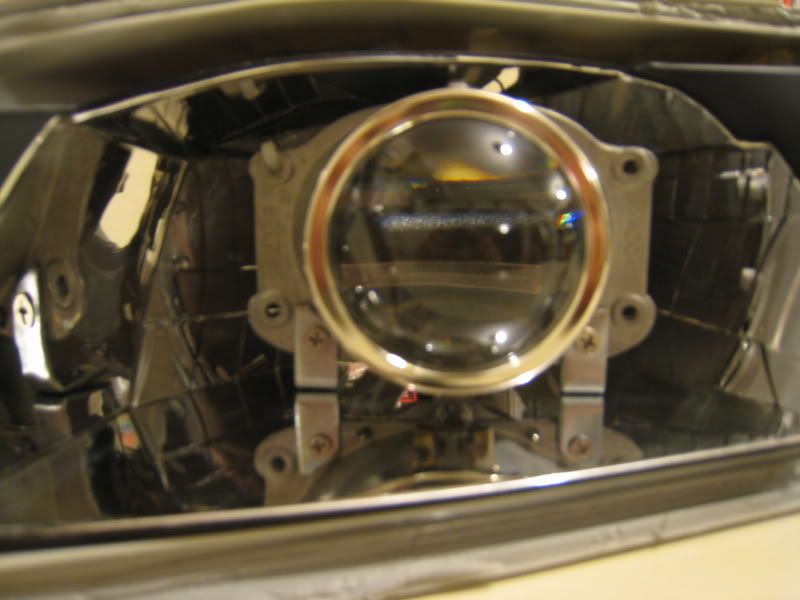
After that just mark the holes where you need to drill and mount it up.
Chances are the horizontal aiming will need to be adjusted. So in order to do that,
You need to put it on the car and see if it�s straight.
If you need to adjust it just throw on some washers under one of the L brackets between the L bracket and reflector.
That way it raises it up or down.
I think this takes the longest, as you will have to take the reflector piece on and off.
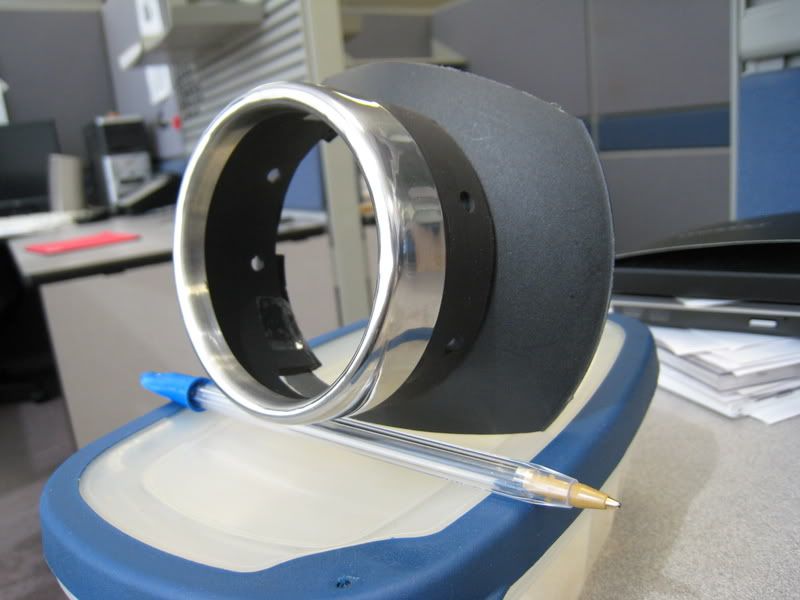
After that�s done you will need to make a shroud for it. You can use anything to your imagination, or buy some E46 shrouds but they are expensive.
So here�s mine I made
Chrome ring from a travel mug (you can buy this at Wal-Mart)
3� PVC pipe (Home Depot)
Garden light plastic top. (Canadian tire)
And this bendable metal bracket from the plumbing section
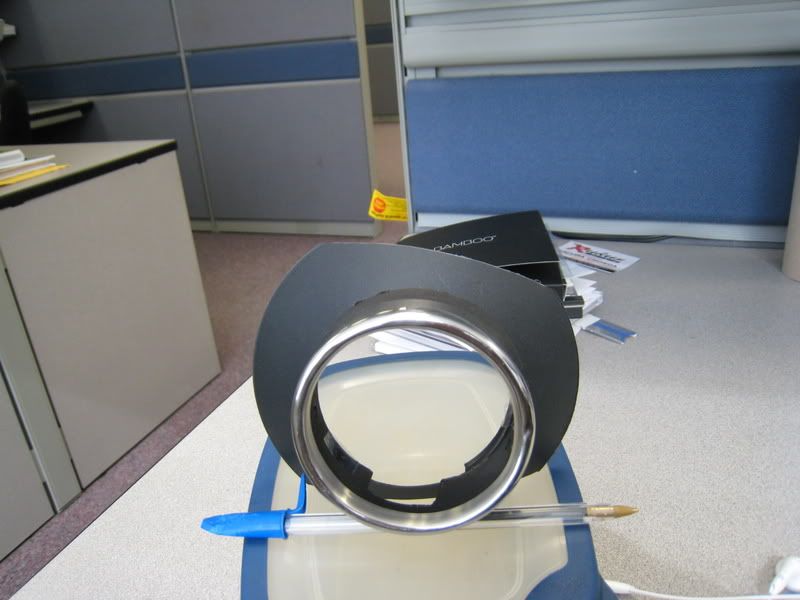
I just drilled the wholes on the PVC pipe
And put a bolt there for the bendable bracket to mount onto the tsx projector.
Put the bracket on the inside.
Sorry didn�t take any pics. Got to use your imagination.
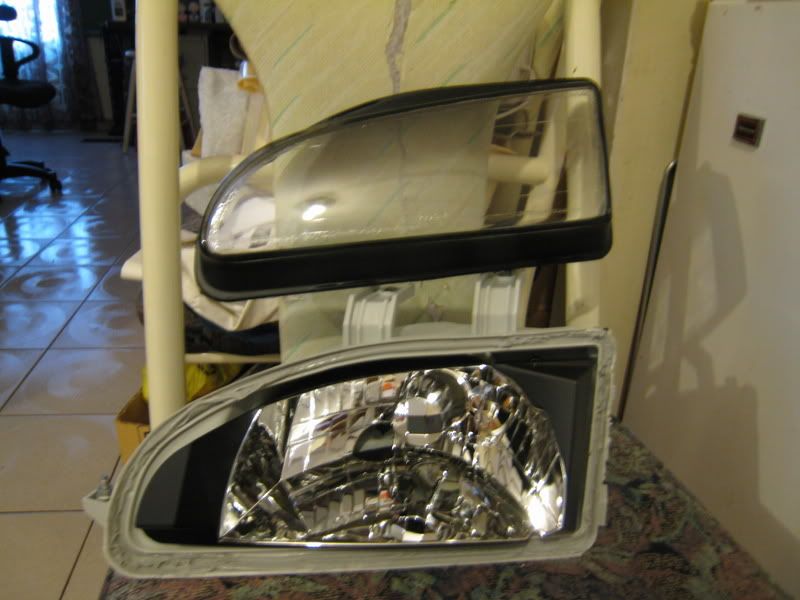
After the horizontal is straight, you can now seal up the headlight.
I sealed it up by using the heat gun around the old glue to make it soft again.
And put a nice bead of silicone around it. That should be good enough.
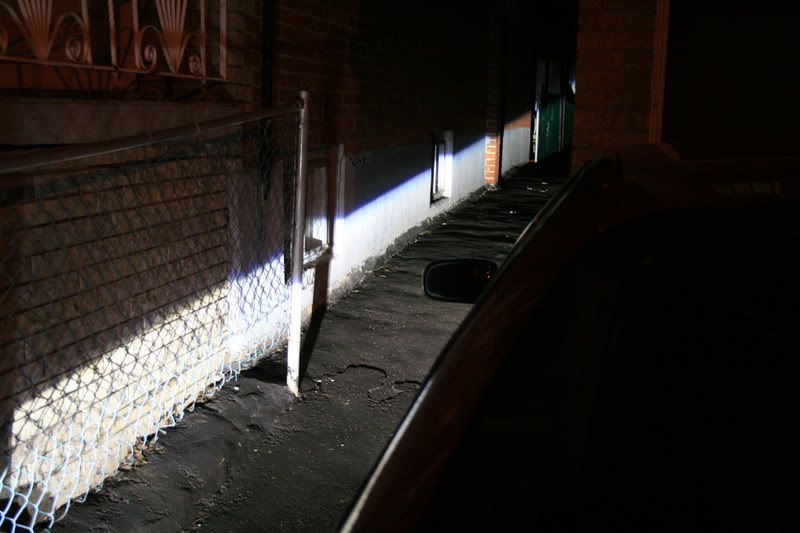
Then you get something like this,
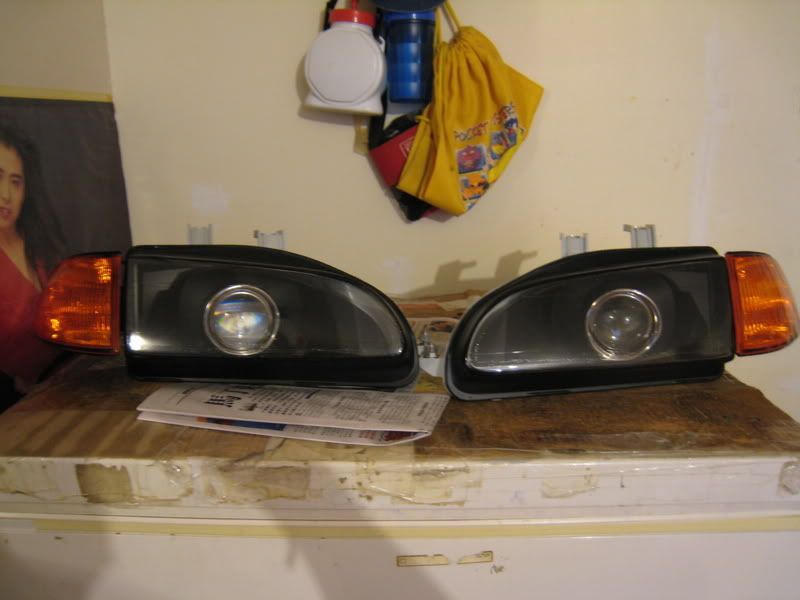
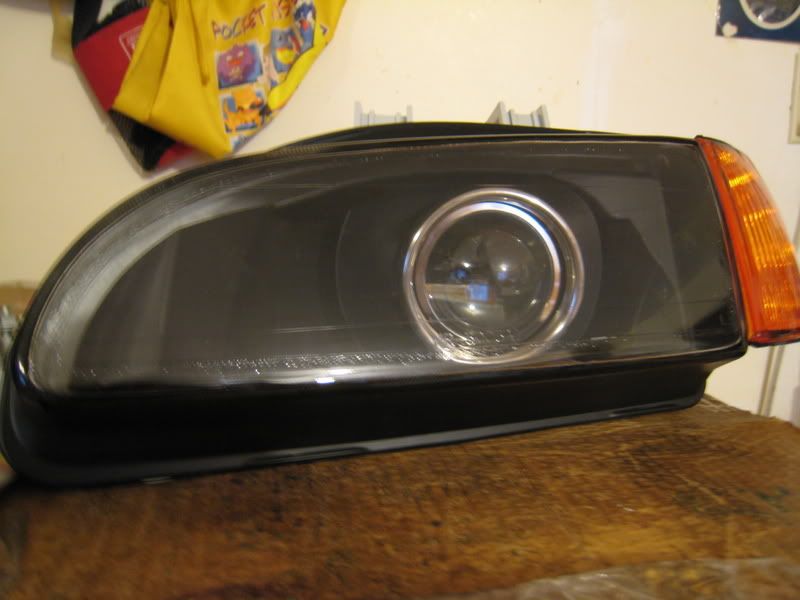
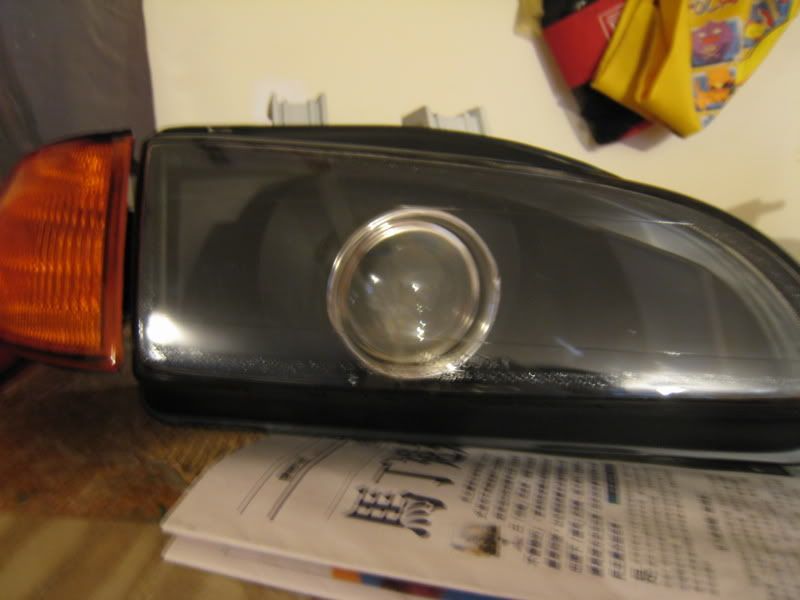
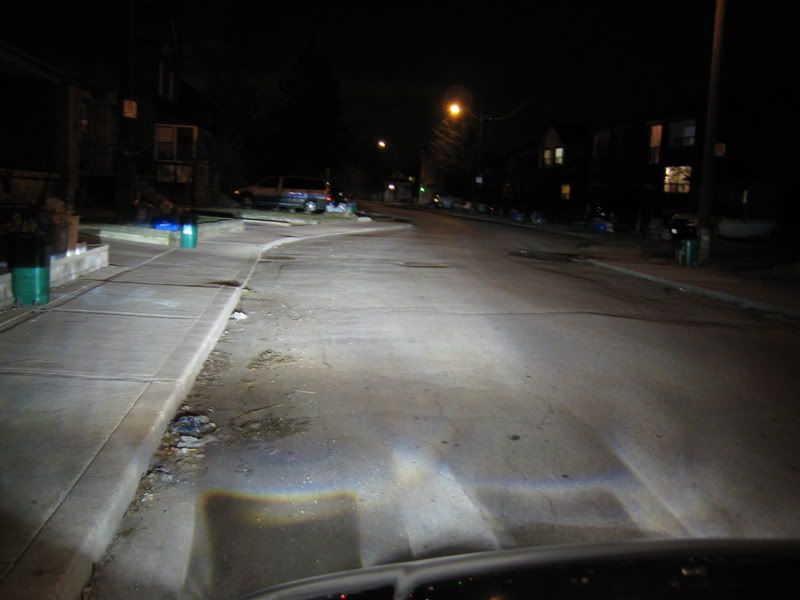
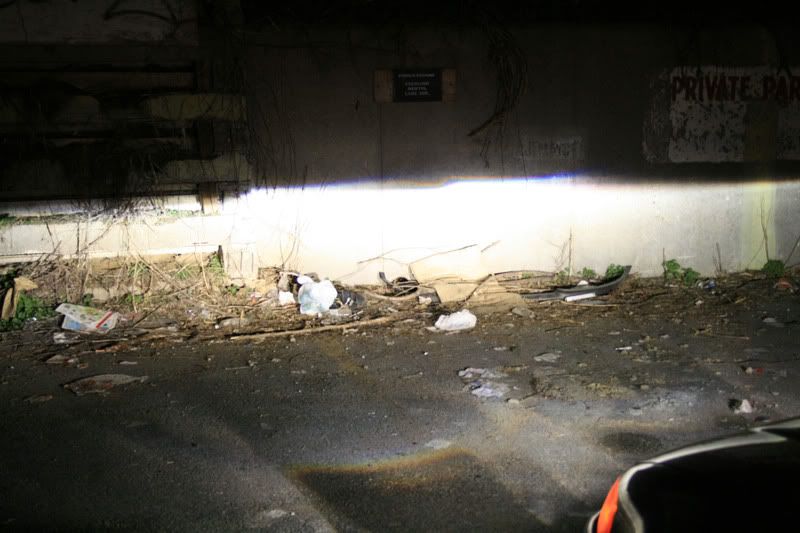
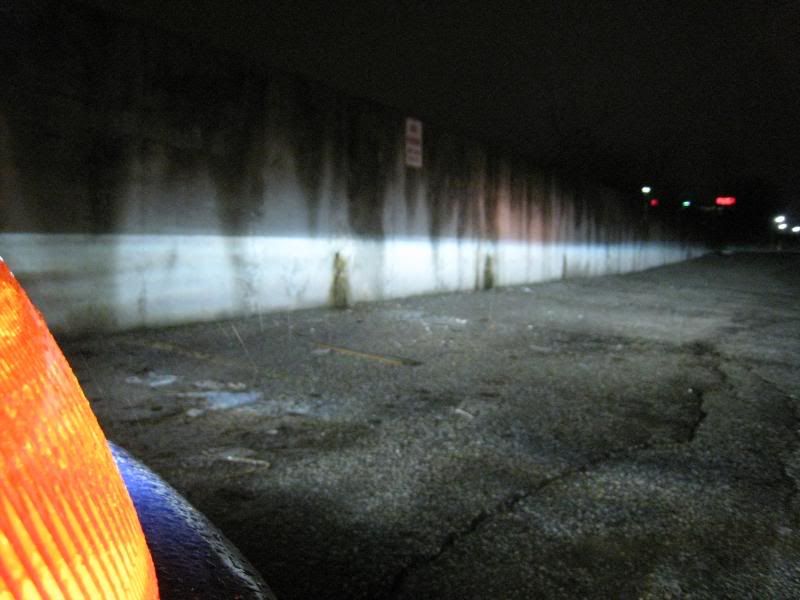
This one is on a little incline
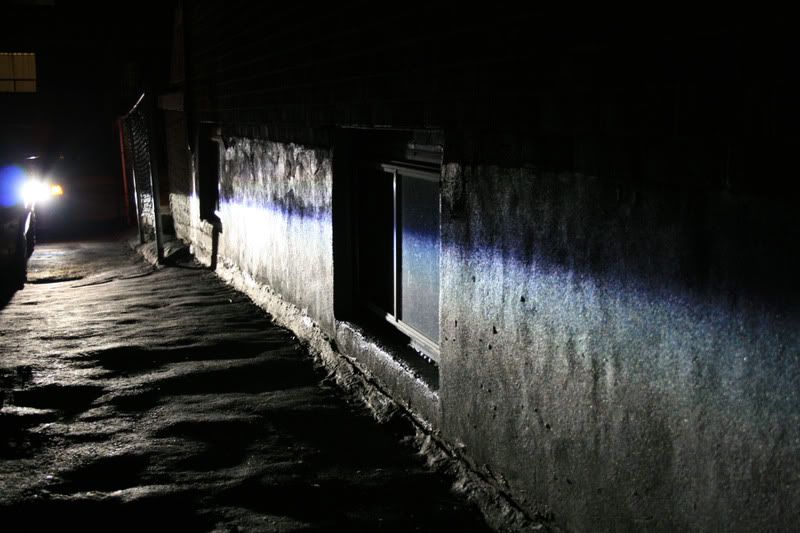
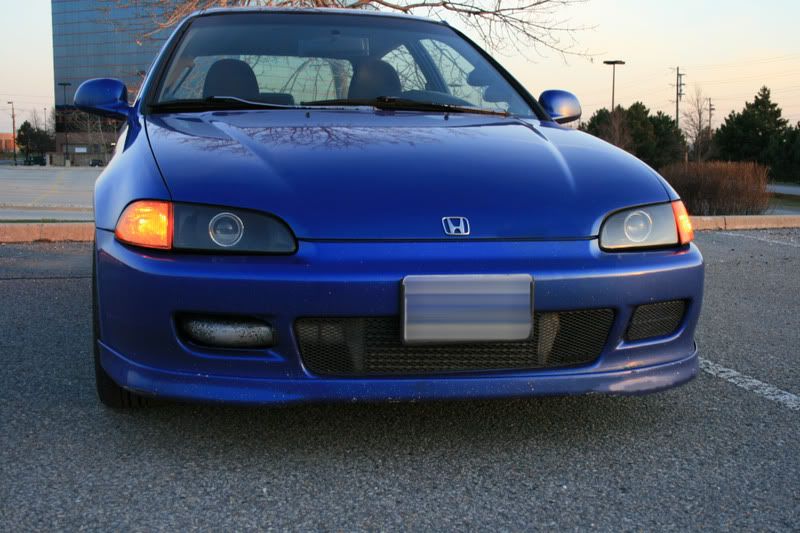
More better pics of output coming soon.
Happy retrofitting
Projectors into an OEM style civic housing.
First go get one of these clear lenses OEM STYLE housing. Which will give you the best possible output from your projectors.
Pre-heat the oven at 350 and turned it off and put the lights in the oven for about 10 mins. You can also use a heat gun around the edges if that�s not enough.
Then get a flat head screwdriver and pry out the glass out a little.
Then take a sharp knife and cut the glue while you are prying it. I find this method very fast and easy, took me only 10 mins for both headlights.
Then you�ll have this
To take the reflector part out, just unscrew the adjustment screws.
Get a marker and put a line in the centre where the h4 hole was.
Then get a dermal and cut the back of the reflector out for your new projectors from this
To this
Get 4 L mounting brackets from home depot and cut them like this so it can fit onto the projectors
Mount it up to the TSX projectors and place it into the reflector housing.
Make sure it lines up wit the centre marking you did with the marker earlier.
After that just mark the holes where you need to drill and mount it up.
Chances are the horizontal aiming will need to be adjusted. So in order to do that,
You need to put it on the car and see if it�s straight.
If you need to adjust it just throw on some washers under one of the L brackets between the L bracket and reflector.
That way it raises it up or down.
I think this takes the longest, as you will have to take the reflector piece on and off.
After that�s done you will need to make a shroud for it. You can use anything to your imagination, or buy some E46 shrouds but they are expensive.
So here�s mine I made
Chrome ring from a travel mug (you can buy this at Wal-Mart)
3� PVC pipe (Home Depot)
Garden light plastic top. (Canadian tire)
And this bendable metal bracket from the plumbing section
I just drilled the wholes on the PVC pipe
And put a bolt there for the bendable bracket to mount onto the tsx projector.
Put the bracket on the inside.
Sorry didn�t take any pics. Got to use your imagination.
After the horizontal is straight, you can now seal up the headlight.
I sealed it up by using the heat gun around the old glue to make it soft again.
And put a nice bead of silicone around it. That should be good enough.
Then you get something like this,
This one is on a little incline
More better pics of output coming soon.
Happy retrofitting
Last edited by mooshu; 17-Apr-2008 at 12:54 PM.


 thanks, keep up the good work!


 18-Apr-2008, 07:39 AM
#13
Senior Member

Join Date: Oct 2007
Location: Hamilton, ON
Posts: 413
very nice and clean install! the way it should be done ...
is the headlight housing still air-tight? from what i've heard, after retrofitting there could be some condensation in the housing ... and also after a while the lenses become yellow-ish?
have you experienced this so far?
is the headlight housing still air-tight? from what i've heard, after retrofitting there could be some condensation in the housing ... and also after a while the lenses become yellow-ish?
have you experienced this so far?
18-Apr-2008, 09:15 AM
#14
Senior Member
Thread Starter
Join Date: Sep 2007
Posts: 110
Thanks everyone,
The headlights isn’t' air tight as you need some circulation for it NOT to have condensation. But of course you will need most of it covered up to keep out water, dust and dirt.
Condensation will appear only if you don't seal up the headlight good and water will leak in causing the moisture to evaporate from the heat giving you condensation.
But for now my current setup, it doesn't even have a back yet and I’ve been through about 4 heavy rainstorms and no condensation at all. Even driven on the highway with the storm.
But I will get something to cover it up, I'm going to make it out of a pop can and aluminum tape, ghetto but it does the job good on budget.
Haven’t seen any yellow on any of my setups.
Last edited by mooshu; 21-Apr-2008 at 02:36 PM.
26-Aug-2009, 06:47 PM
#17
Senior Member
Join Date: Dec 2007
Location: High Park
Posts: 291

Thread
Thread Starter
Forum
Replies
Last Post
8AV8OR2
Honda Civic (+ other) Parts/Accessories for Sale or Trade
0
01-Mar-2012 07:19 PM
Blackwind
Honda Civic (+ other) Parts/Accessories for Sale or Trade
6
04-Jan-2012 10:52 AM
blak_lude
Custom Honda Civic Exterior - Lighting
1
27-Apr-2010 12:33 AM
tommygunnz
Civic DIY Tutorials - Info
5
08-Jul-2008 10:25 AM
Si98
Honda Civic (+ other) Parts/Accessories for Sale or Trade
1
11-Aug-2005 07:07 PM


