DIY - 7th gen lower ball joint replacement
 17-Apr-2011, 01:01 AM
#1
Member
Thread Starter

Join Date: Apr 2011
Posts: 43
DIY - 7th gen lower ball joint replacement
First I wanna say this is just a guide, I'm not responsible if you attempt this job and eff it up. ANY JOB suspension wise you should know what your doing and the risks involved. This is how I would do it, not necesarilly the right way so keep this in mind while doing it. This guide does not require you to have air tools to complete the job, though they do help. That being said, on with the DIY.
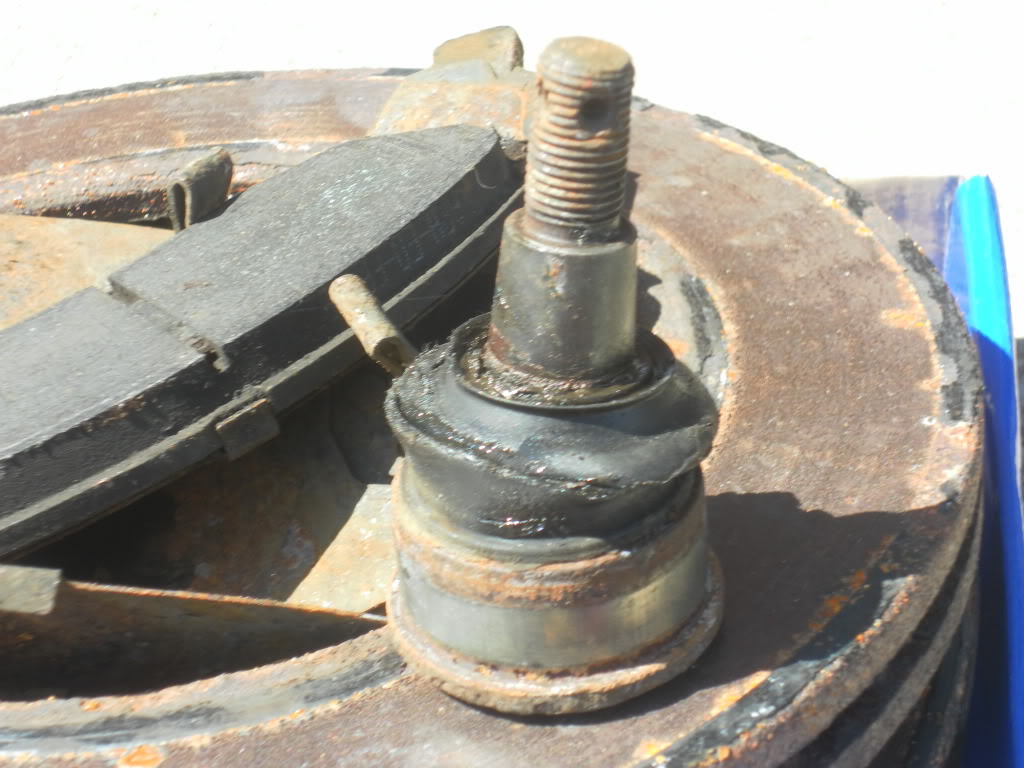
Here is my ball joint after it was pulled out, obviously toast:
This is what your going to want to have when you start the job:
A new ball joint
A hydraulic jack
JACKSTANDS, USE THEM
A ratchet set including 10mm, 17mm, 19mm, and 22mm ratchets.
An axle nut impact socket
A good 3' breaker bar helps A LOT
A torque wrench
Some extensions will be necessary for your ratchets.
A 22mm impact socket for use with the ball joint press tool
A hammer
A good set of needlenose pliers, mine had a nice bend in them.
A flathead screwdriver
A bungeeee cord
Anti seize paste
An impact gun helps but is not necessary, obviously a compressor too.
2 Brand Spankin' New Axle Nuts
latex gloves help keep your hands clean.
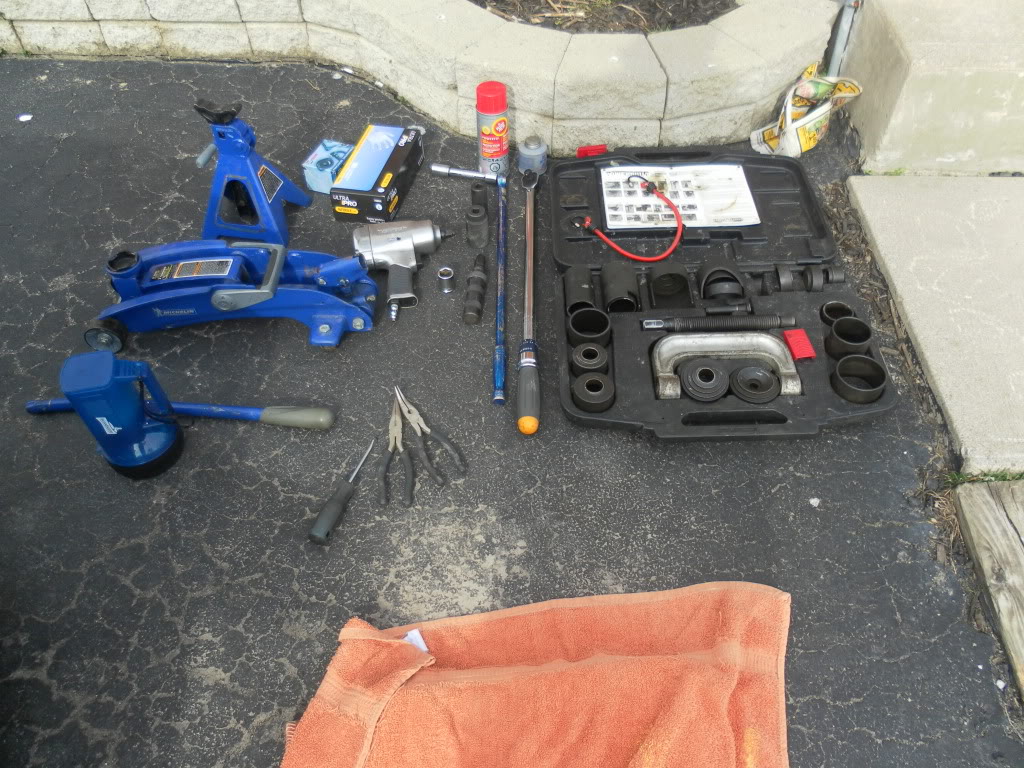
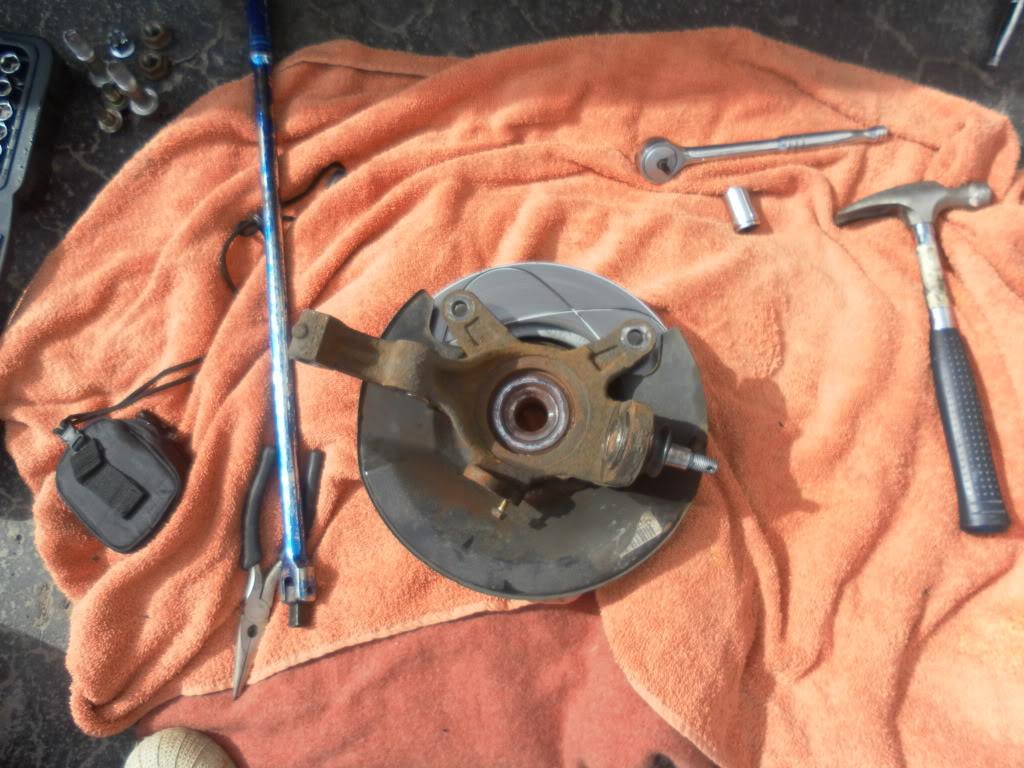
Here is what I had on hand:
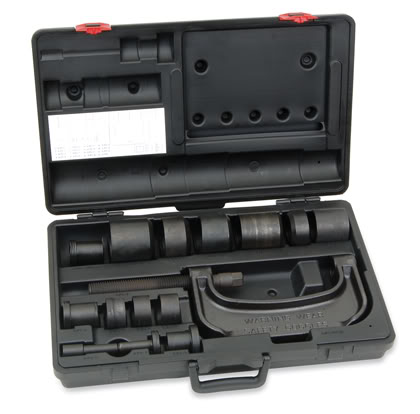
Most importantly: A Ball joint press tool I'm showing this twice because you NEED it if your doing this at home.
Okay, let's have some fun. I'm going to deviate from the service manual right away because I'm assuming you don't have access to air tools.
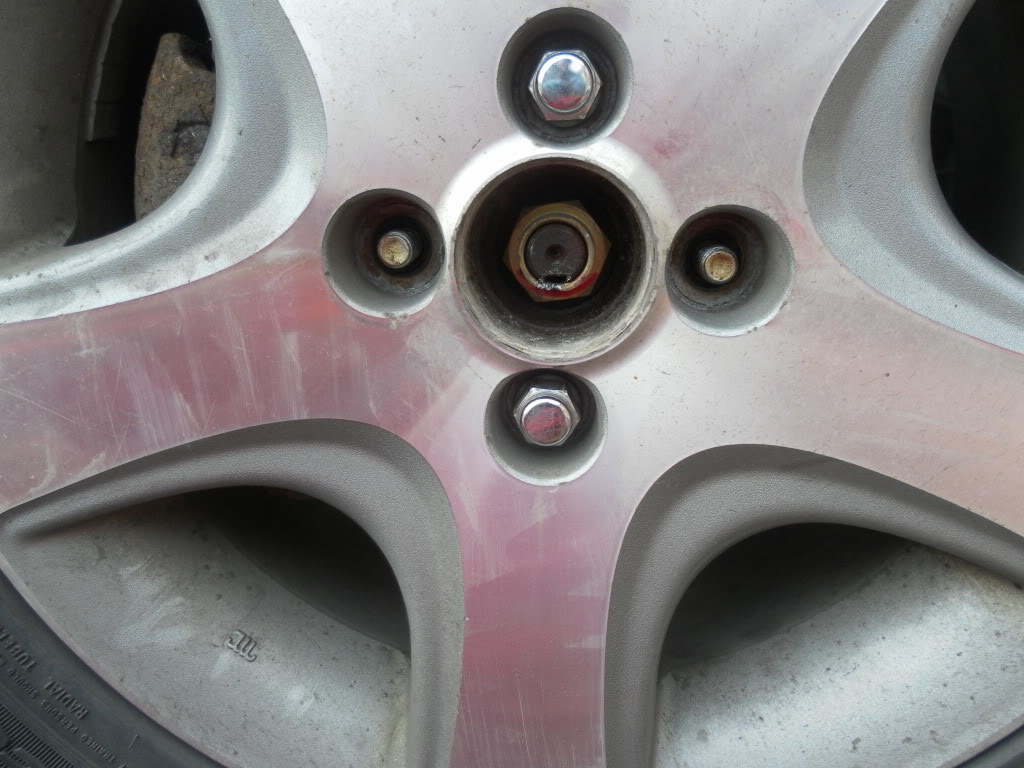
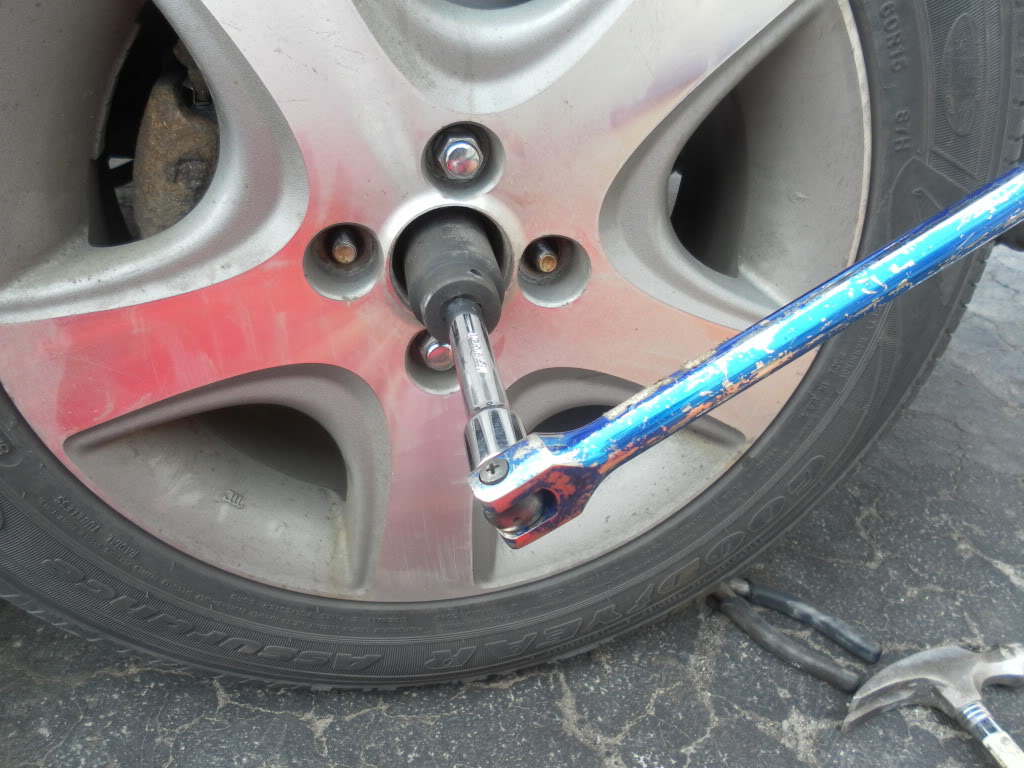
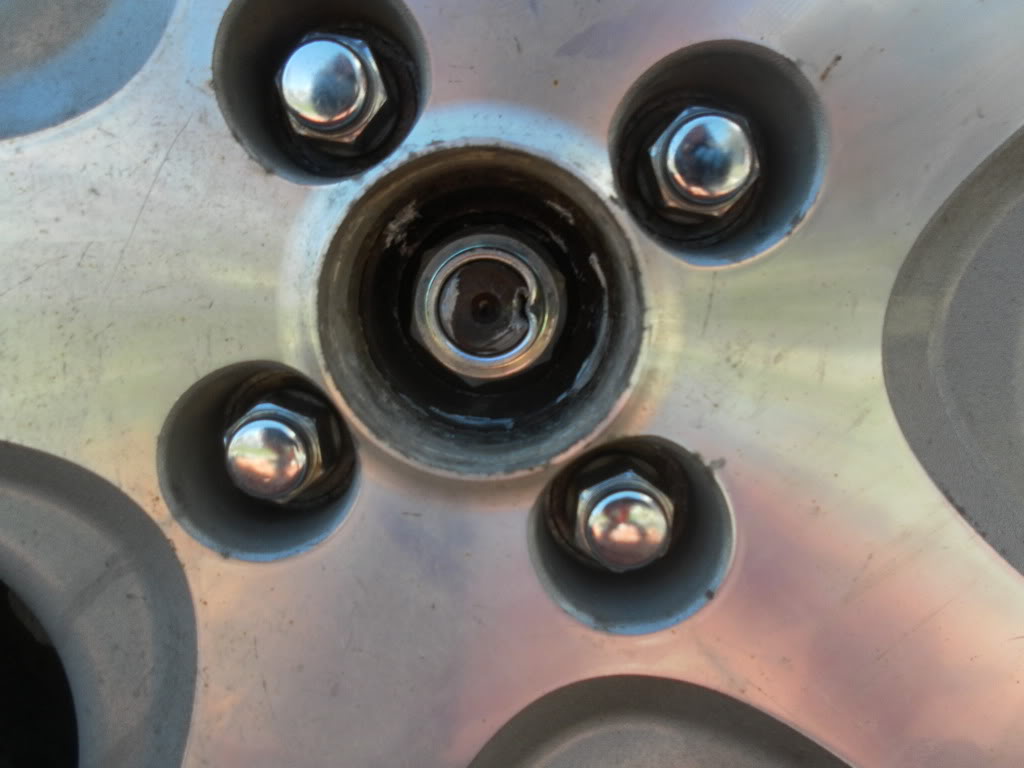
1. Loosen your lug nuts, jack up the car safely and remove the tire. Knock the centercap out from the inside of the rim. You can pry the centercap off with the wheel on the ground but you risk damaging it. There is almost no way to damage it if you knock it off from the inside. After the centercap is knocked out, use your flathead screwdriver and carefully pry the notch out of the axle nut. Be careful doing this I broke two screwdrivers. Here is a picture of the axle nut.
2. Great, now put the wheel back on the car and just snug up the lug nuts. Put the car back on the ground and grab your breaker bar, an extension, and the massive axle nut socket. Get that baby in there and break the 134 ft/lbs of seized on torque off the nut free. If you can't get the nut free this way, you will need an impact gun. Here is what the socket looks like passing through the rim:
3. Great, now take your stupid wheel back off the stupid car ( a bit repetative I know, if you have access to air tools you can remove the axle nut with the wheel off to begin with which makes it a lot easier. ) After the wheel is removed take these two 17mm bolts off of the caliper, and hang it up out of the way all nice like. DO NOT REMOVE THE BRAKE LINE BOLT!!!:
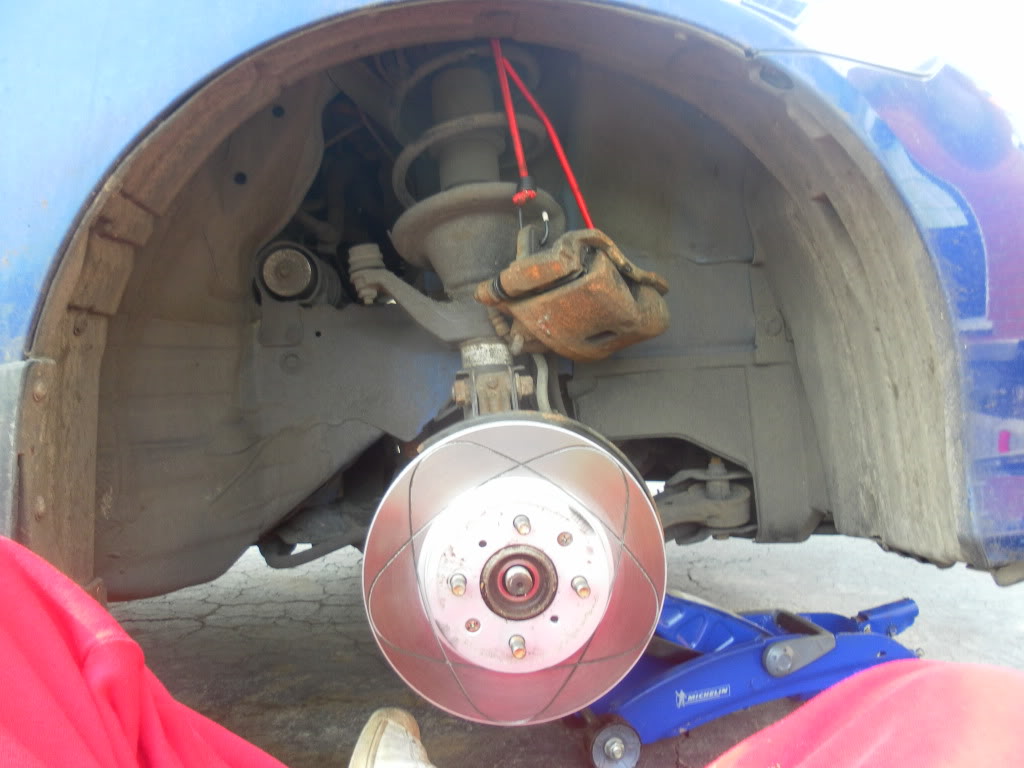
4. Now, remove the two 22mm nuts off the strut assembly, these are attached at 71ft/lbs and are probably seized a bit so it might be a bit of a battle to get them out. LEAVE the bolts on, you will need them there to break the balljoint free from the lower control arm:
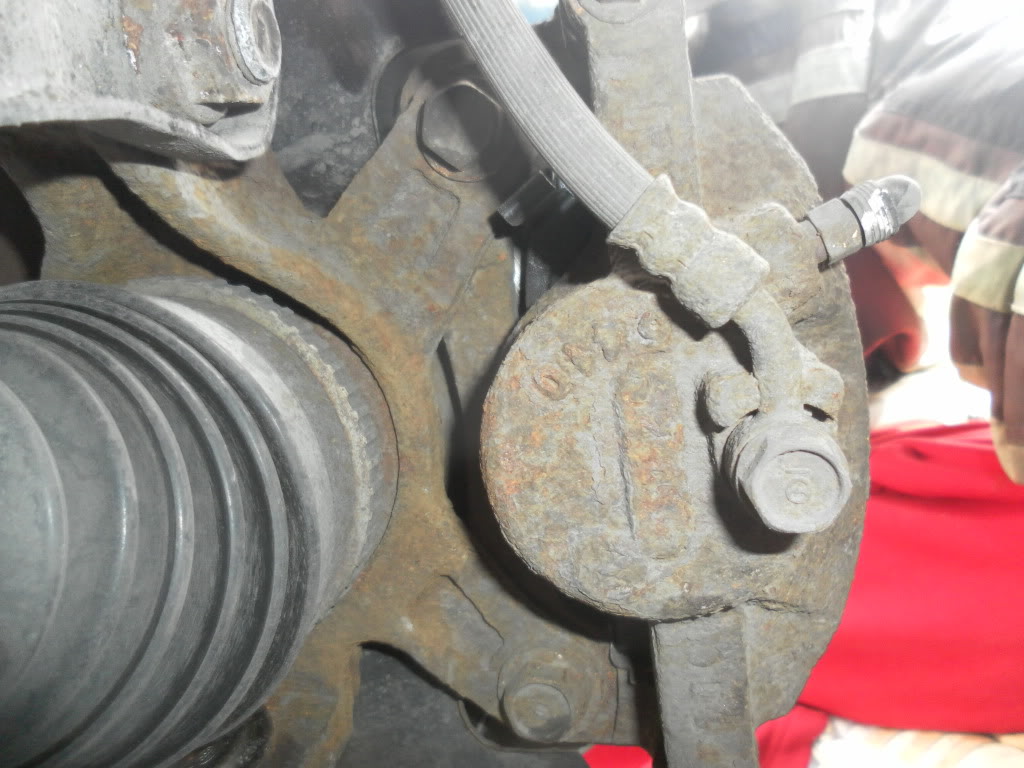
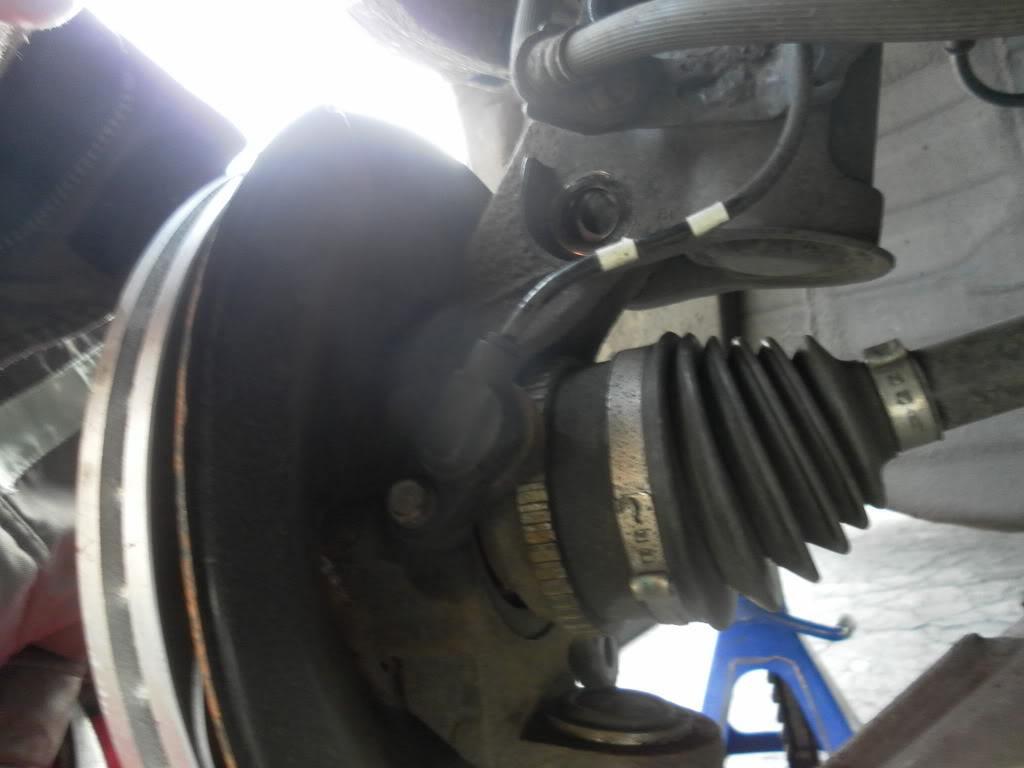
5. Now your well on your way, and it's time to remove the vehicle speed sensor. This was a ROYAL bitch because I was terrified to destroy the sensor and it was seized in. Remove the 10mm bolt, then I ended up having to get a pair of vice grips and attached them tightly to the sensor. Then I slowly started to spin the sensor until it came free. DO NOT disconnect the sensor connector, remove the entire sensor as a whole
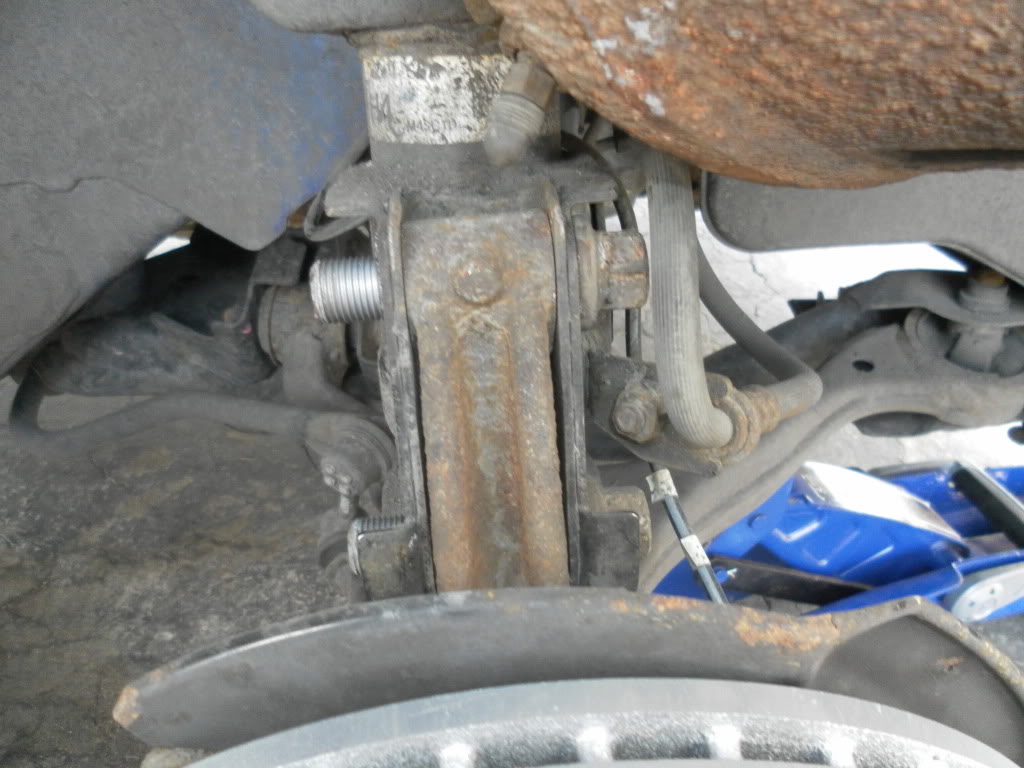
6. Now you have to remove the cotter pin off the 17mm castle nut. You can cut it off or pry it straight with plyers and pull it out. Even if you manage to "Save" the cotter pin, use a new one. It should have come with the ball joint anyway. Here is a picture of the castle nut before and after removal.
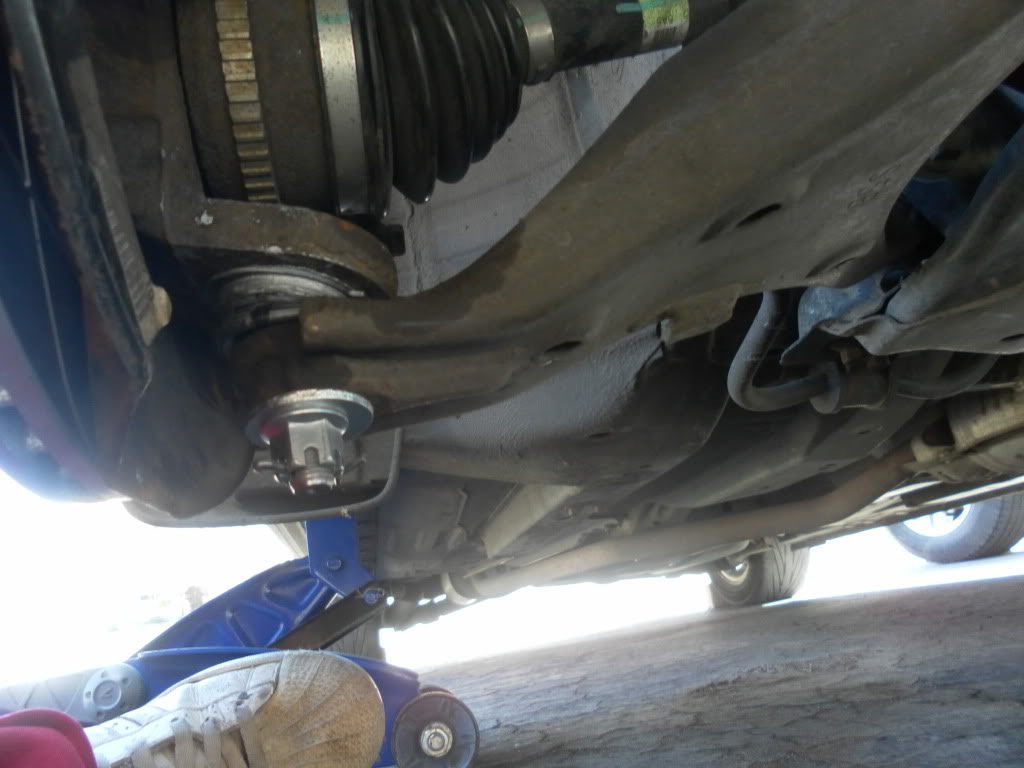
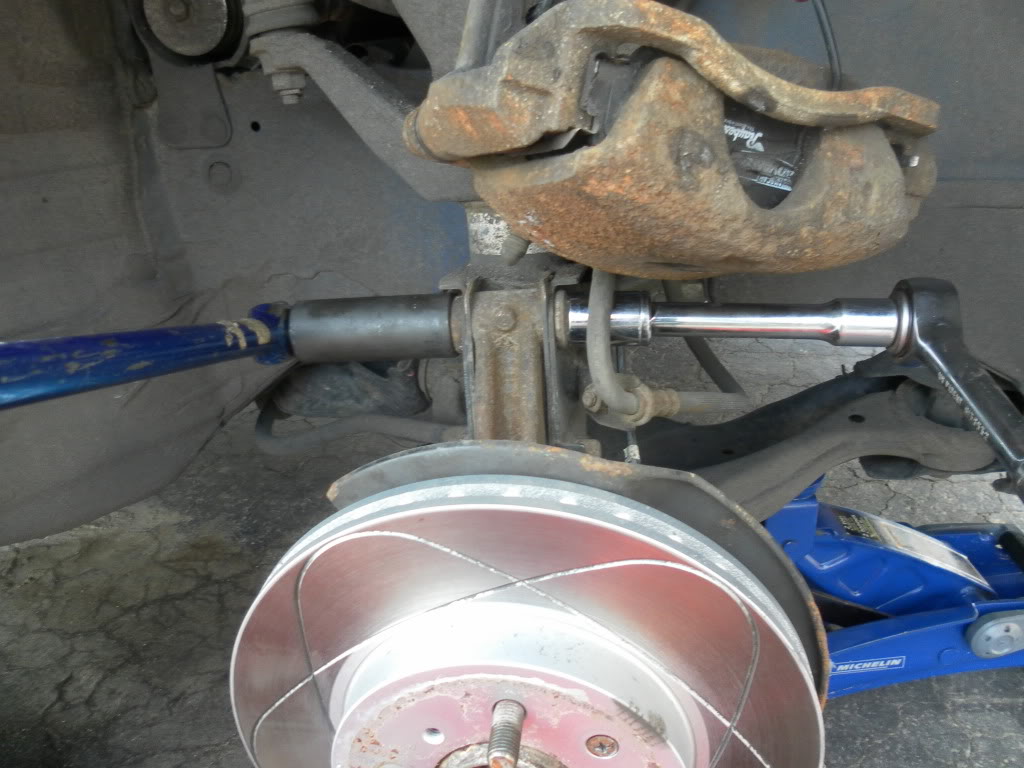
7. Now its time to break the balljoint free from the lower control arm. There is a very simple method to doing this that will save you LOTS of time if you do it this way. It involves your hydraulic jack and a ratchet. What you do is jack up the lower control arm until you can fit a ratchet between the knuckle and arm itself:
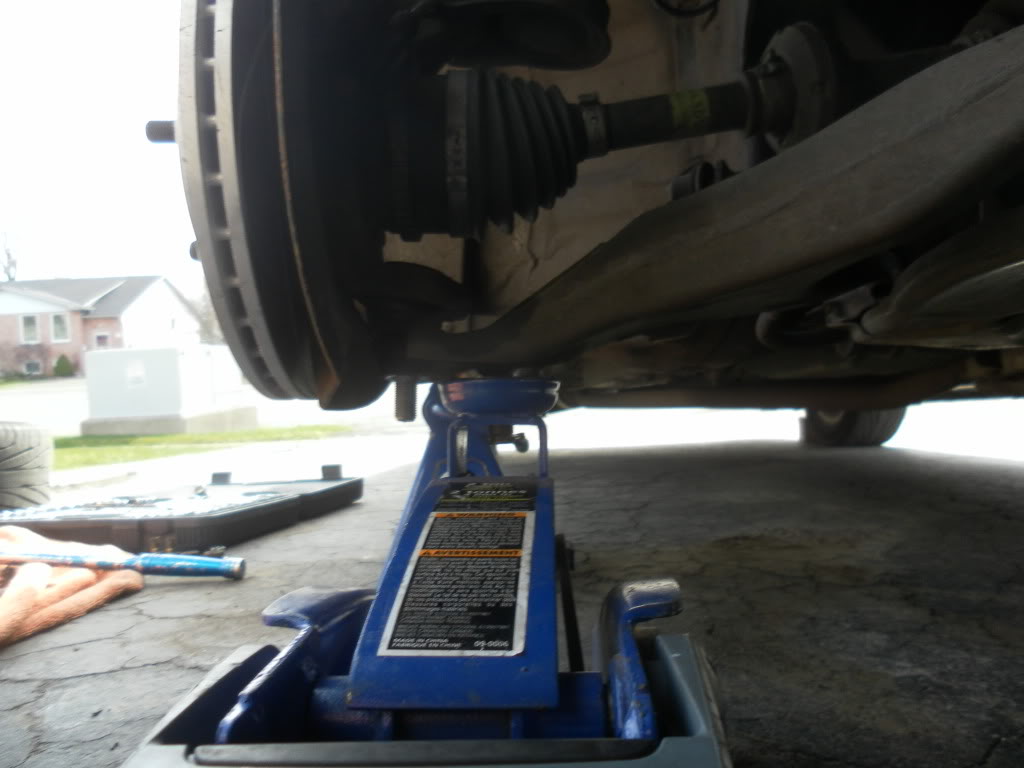
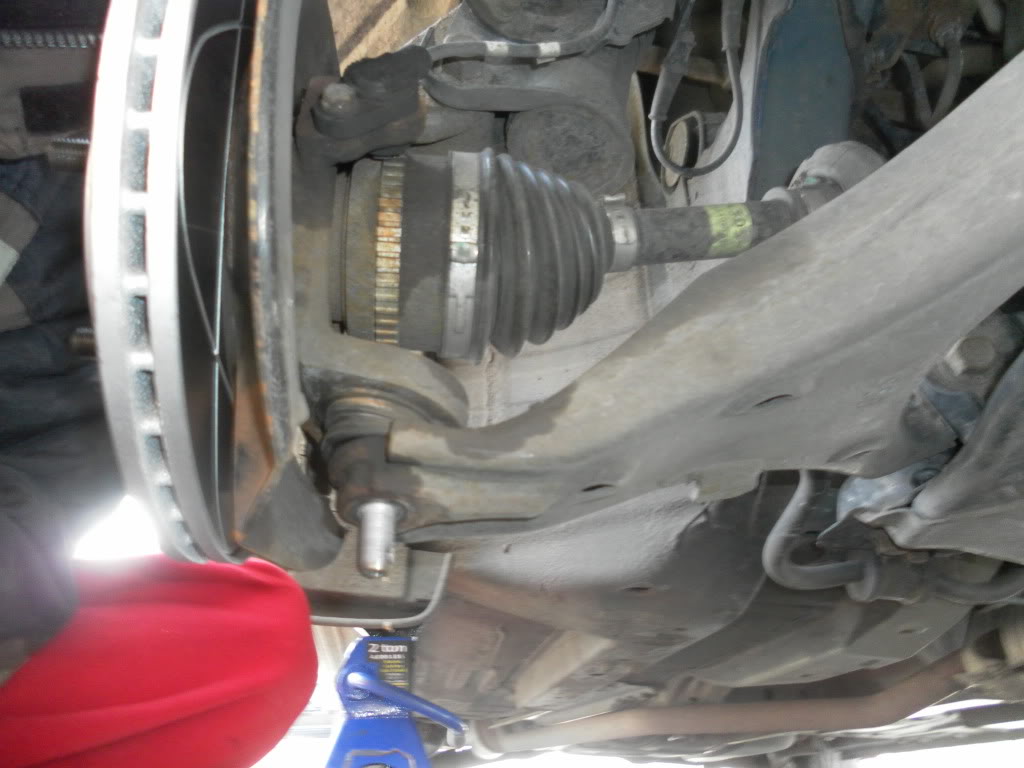
8. Fit the ratchet inbetween the LCA and knuckle.

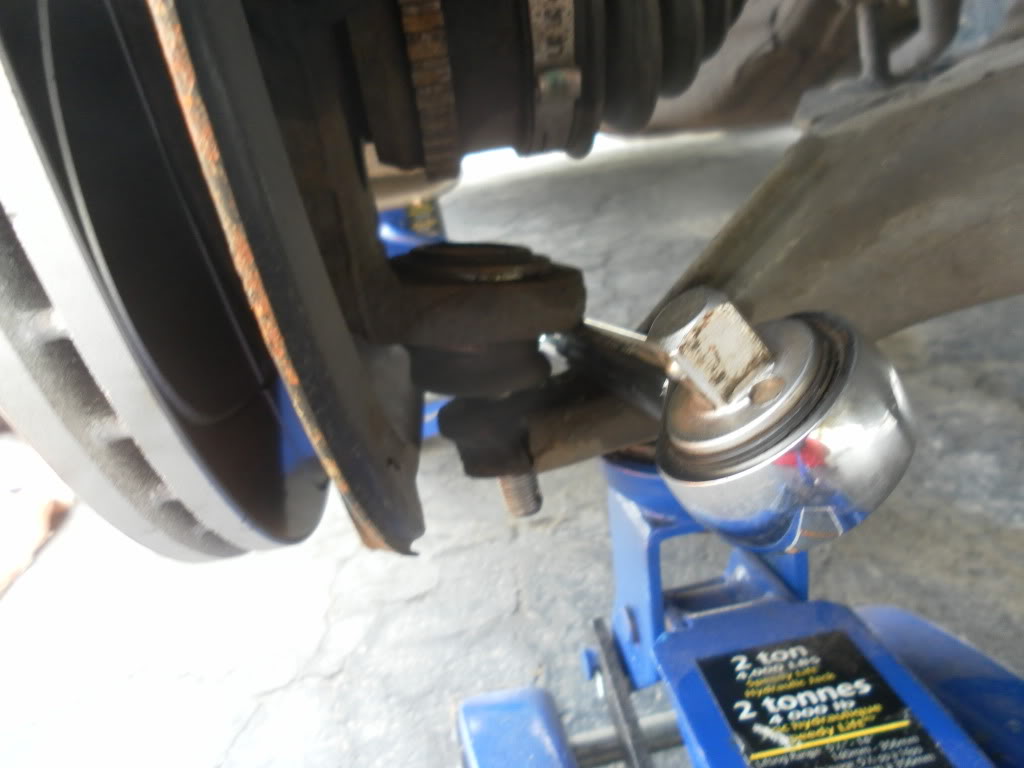
9. After its in place, simply lower the jack all the way down and you will hear a "POP" sound. If you look the ball joint should be seperated from the control arm:
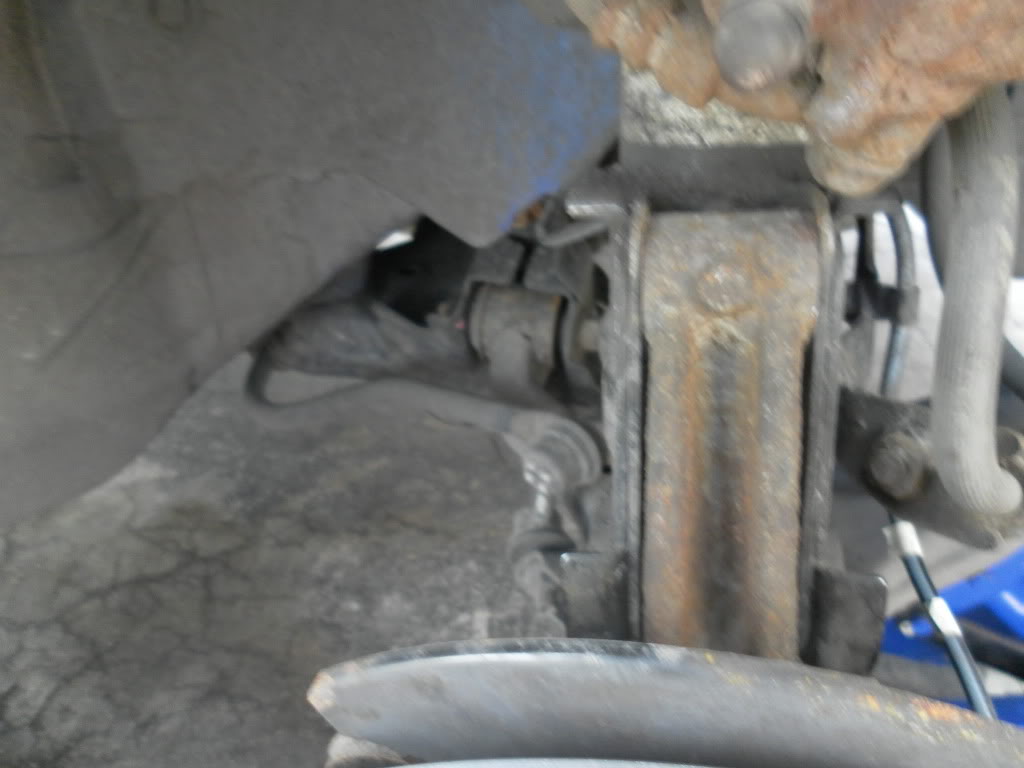
10. Now you can use a hammer to drive the axle (spindle) back into the knuckle, you can use a regular hammer as long as you don't smash on it. You really shouldn't have to hit it very hard. If you cant get the axle fully out from behind you can get it when you remove the last two bolts off the knuckle.
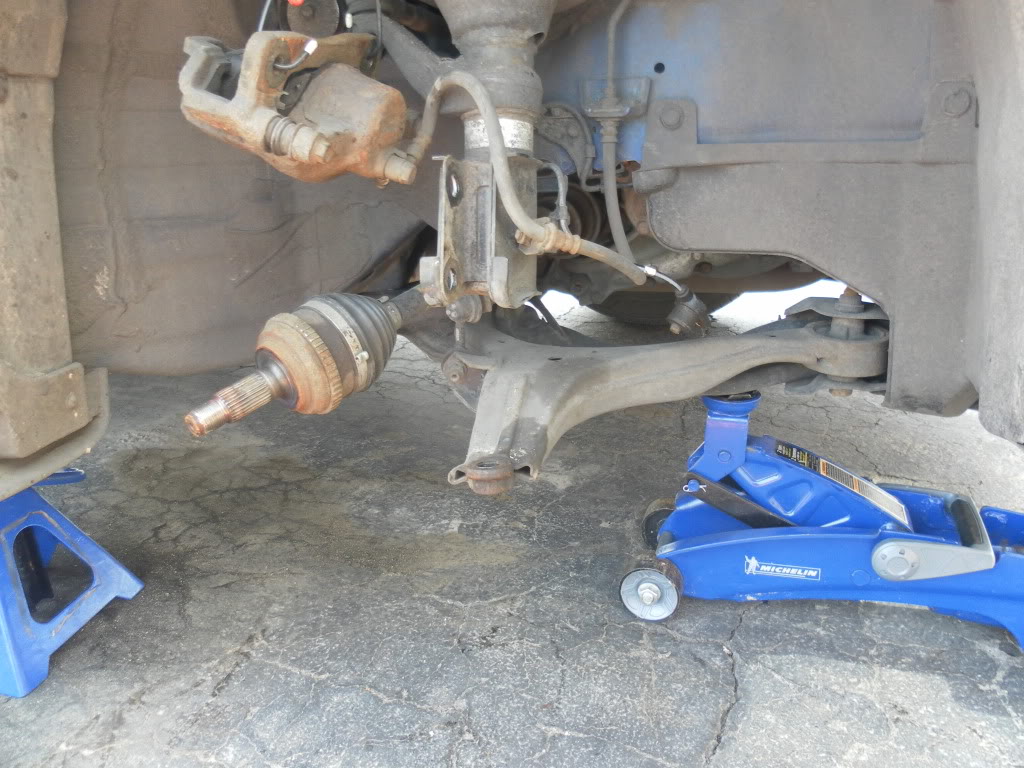
11. Great, the hard part is done, now you can remove the two bolts from the strut assembly. Sorry this picture is a little bit fuzzy but its basically the two bolts that you removed the nuts from earlier. You can tap them with a hammer to get them out. Just don't go buck wild and mess up your threads.
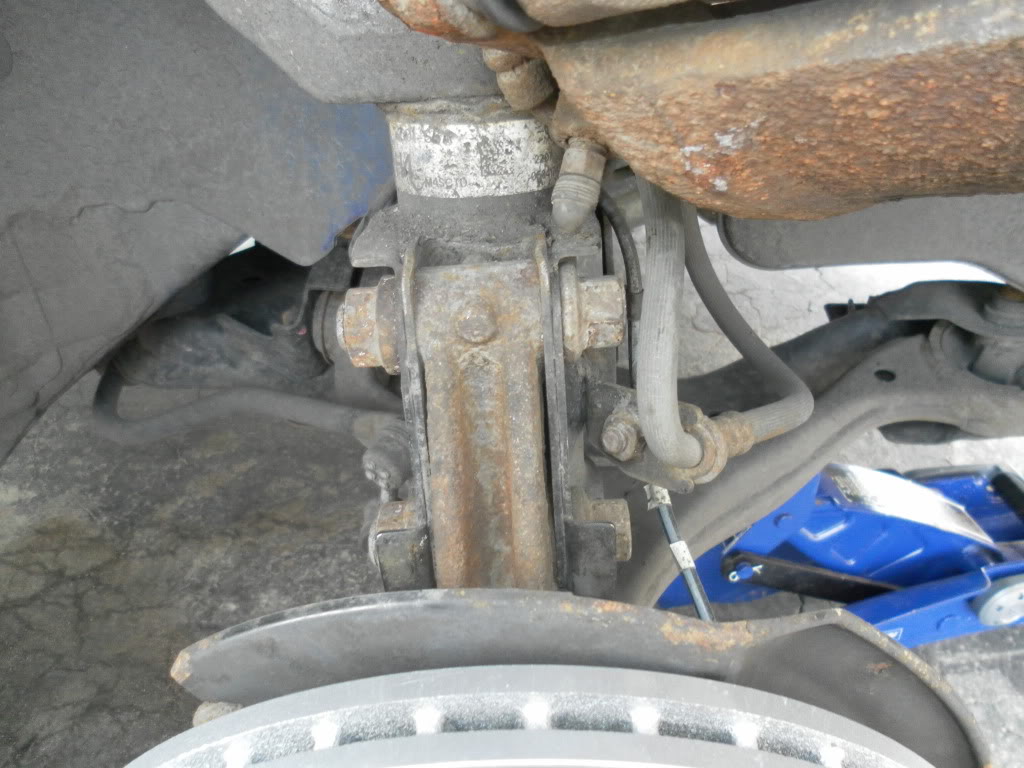
12. The knuckle will want to come out easilly, but you might have to hammer the lower ball joint upwards a little bit to actually remove it from the car. This is where a second person comes in handy, but it can be done by one person. So your kinda doing three things at once here, making sure the axle is fully clear of the knuckle, making sure the balljoint is coming out of the lower control arm nicely, and balancing the knuckle to make sure when it comes free you don't drop it. Great, now the knuickle should be out of the car.
13. Hold the knuckle in your hand with a smile. If you can accomplish this you can do most suspension work on the front end of a honda civic yourself. Anyway... here it is:
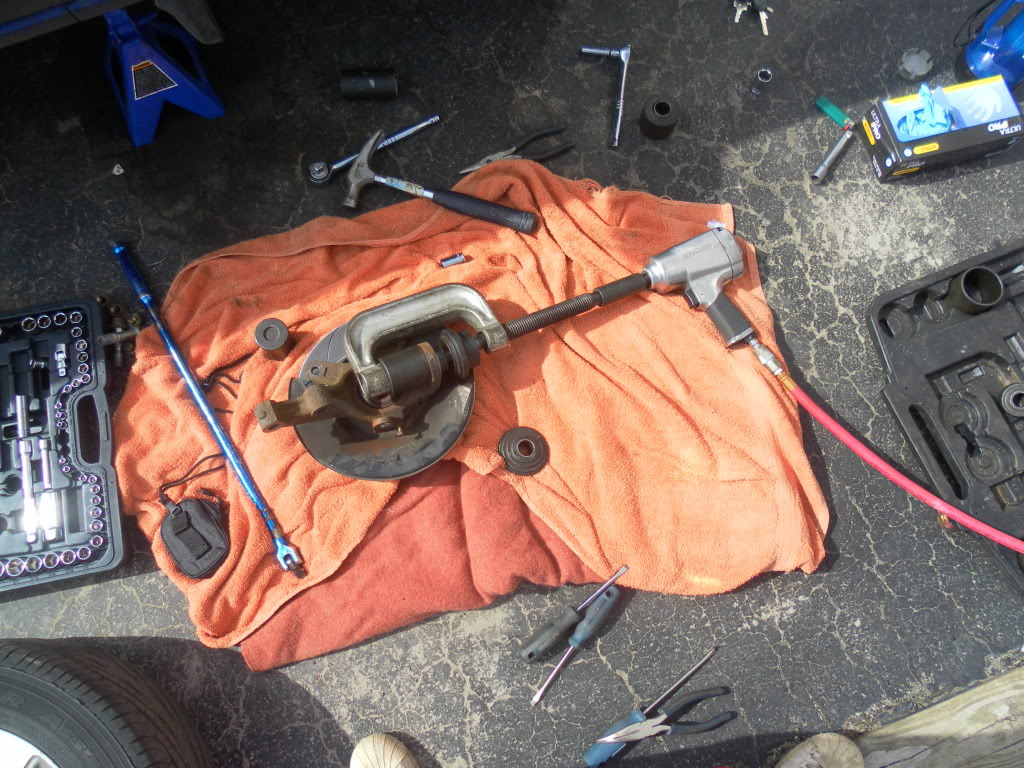
14. Now to press the ball joint out with your fancy *** tool. This is where an impact comes in VERY handy but you can do it with a ratchet. You look at the tool and it looks pretty confusing. Luckilly, you only need a few of the pieces that come with the tool. You have to make sure you select an adapter that will allow the ball joint to "Push" out and an adapter does not sit flat up against the knuckle, it should actually sit up against the flat piece on the bolt of the ball joint. It's very hard to explain but hopefully you get it. It should look like this to remove the ball joint:

15. I cheated and used my impact even though this is an air tool free guide, but I have done it with a ratchet, as you can tell I'm messy as hell:
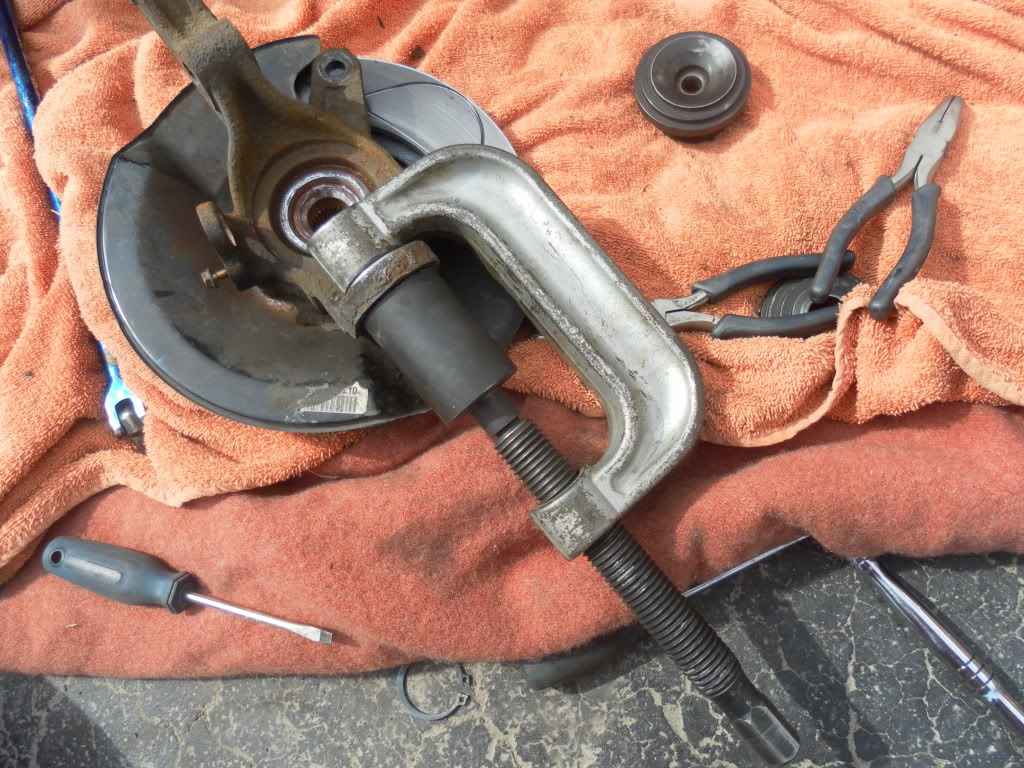
16. You should have no problem pressing the ball joint out with this method, it might take a little bit of time and a little bit of muscle. A vice would help a lot to keep things stable if your not using air. Pressing in the ball joint is pretty much the exact opposite, just make sure you put a **** ton of anti seize paste on the knuckle where the ball joint will seat. The push side has to be up against the flat part of the ball joint. You can actually attach the C clamp right to the ball joint, it fits well. Make sure you select an adapter on the bolt side that allows the joint to slide through fully. You know the ball joint is fully seated when it sits flush up against the knuckle. Some aftermarket joints like the one I got come with rings, you have to insert the rings into the groove on the ball joint on the bolt side. Use the two little holes and insert a pair of needle nose pliers into them, then ****** the rings apart and fit it into the groove. It's a royal pain in the *** and it's nice to have two people for this. It's doable by yourself It should look something like this when you are finished pressing it in:
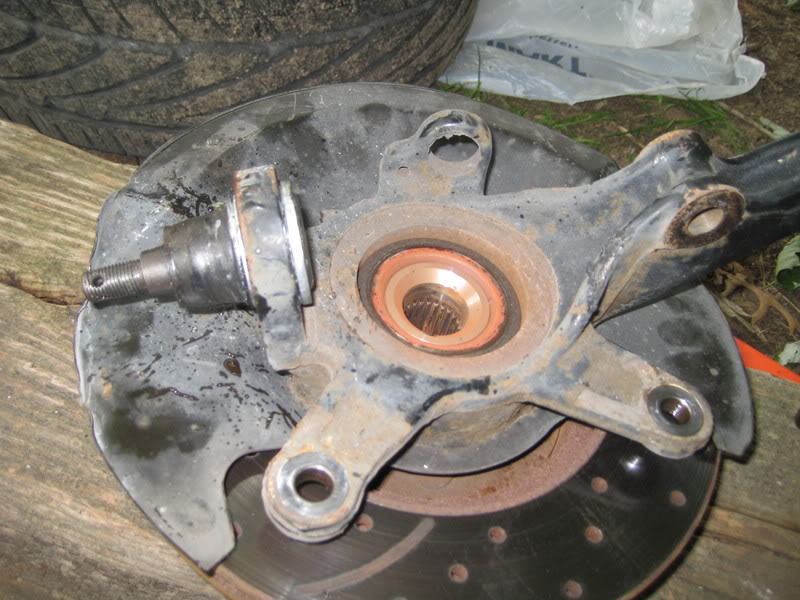
17. I forgot to take a picture of the ball joint installed on the knuckle so I stole one from the other DIY guide, sorry greeen01civic4d
18. Your done, reassembly is very very very very simple and easy. To put the knuckle back on you insert the ball joint into the lower control arm first, then guide the spindle back through the bearing. After that you can seat the upper portion of the knuckle into the lower strut assembly. Once the knuckle is lined up to the bolt holes and the axle is through, you can put the two 19mm lower strut bolts back in and torque the 22mm nuts to 71ft/lbs. Don't forget to apply your anti seize lube on the threads:
19. Lube the hole where the vehicle speed sensor goes with anti seize paste and torque the 10mm bolt to 7.2ft/lbs.
20. Put anti seize paste on the ball joint threads that are sticking through the lower control arm. The castle nut does not have a torque spec it has a torque range. You have to do your best to line up the holes for the cotter pin and still get it within that torque range. The range for the 17mm castle nut is 43-51ft/lbs. I had major issues with this because when hand tight one of the ball joint castle nuts was way past the holes for the cotter pin already. This was a major pissoff so I redid the balljoint with the same result. I ended up putting a washer on it to make the holes line up as I'm afraid to lose the castle nut. I called a mechanic shop and they said it was O.K. Here is a picture of the final result, you can see the washer above the nut:
21. Now to reinstall the caliper. Just carefully slide the caliper onto the rotor and install (after anti seizing) the two 17mm bolts on the back and torque them to 80ft/lbs.
22. Put antiseize on the end of the axle(spindle) and snug up the new axle (spindle) nut on the end of the axle. Now, with your centercap still off your rim, reinstall the tire and snug up the lugnuts. They don't have to be torqued on just yet, lower the car down on so its on its own weight and torque that baby to 134ft/lbs. After torqued grab your flathead screwdriver and smash the end of the nut into the little groove. It should look something like this whe finished:
23. Now you can torque your wheels back on to 80ft/lbs, install your centercap and call it a day.
I tried to make this as comprehensive as possible so anyone can do it. Unfortunatly my camera died halfway through so the actual removal of the knuckle isnt shown that well in pictures. Hopefully this helps you complete your ball joint replacement
Here is my ball joint after it was pulled out, obviously toast:
This is what your going to want to have when you start the job:
A new ball joint
A hydraulic jack
JACKSTANDS, USE THEM
A ratchet set including 10mm, 17mm, 19mm, and 22mm ratchets.
An axle nut impact socket
A good 3' breaker bar helps A LOT
A torque wrench
Some extensions will be necessary for your ratchets.
A 22mm impact socket for use with the ball joint press tool
A hammer
A good set of needlenose pliers, mine had a nice bend in them.
A flathead screwdriver
A bungeeee cord
Anti seize paste
An impact gun helps but is not necessary, obviously a compressor too.
2 Brand Spankin' New Axle Nuts
latex gloves help keep your hands clean.
Here is what I had on hand:
Most importantly: A Ball joint press tool I'm showing this twice because you NEED it if your doing this at home.
Okay, let's have some fun. I'm going to deviate from the service manual right away because I'm assuming you don't have access to air tools.
1. Loosen your lug nuts, jack up the car safely and remove the tire. Knock the centercap out from the inside of the rim. You can pry the centercap off with the wheel on the ground but you risk damaging it. There is almost no way to damage it if you knock it off from the inside. After the centercap is knocked out, use your flathead screwdriver and carefully pry the notch out of the axle nut. Be careful doing this I broke two screwdrivers. Here is a picture of the axle nut.
2. Great, now put the wheel back on the car and just snug up the lug nuts. Put the car back on the ground and grab your breaker bar, an extension, and the massive axle nut socket. Get that baby in there and break the 134 ft/lbs of seized on torque off the nut free. If you can't get the nut free this way, you will need an impact gun. Here is what the socket looks like passing through the rim:
3. Great, now take your stupid wheel back off the stupid car ( a bit repetative I know, if you have access to air tools you can remove the axle nut with the wheel off to begin with which makes it a lot easier. ) After the wheel is removed take these two 17mm bolts off of the caliper, and hang it up out of the way all nice like. DO NOT REMOVE THE BRAKE LINE BOLT!!!:
4. Now, remove the two 22mm nuts off the strut assembly, these are attached at 71ft/lbs and are probably seized a bit so it might be a bit of a battle to get them out. LEAVE the bolts on, you will need them there to break the balljoint free from the lower control arm:
5. Now your well on your way, and it's time to remove the vehicle speed sensor. This was a ROYAL bitch because I was terrified to destroy the sensor and it was seized in. Remove the 10mm bolt, then I ended up having to get a pair of vice grips and attached them tightly to the sensor. Then I slowly started to spin the sensor until it came free. DO NOT disconnect the sensor connector, remove the entire sensor as a whole
6. Now you have to remove the cotter pin off the 17mm castle nut. You can cut it off or pry it straight with plyers and pull it out. Even if you manage to "Save" the cotter pin, use a new one. It should have come with the ball joint anyway. Here is a picture of the castle nut before and after removal.
7. Now its time to break the balljoint free from the lower control arm. There is a very simple method to doing this that will save you LOTS of time if you do it this way. It involves your hydraulic jack and a ratchet. What you do is jack up the lower control arm until you can fit a ratchet between the knuckle and arm itself:
8. Fit the ratchet inbetween the LCA and knuckle.
9. After its in place, simply lower the jack all the way down and you will hear a "POP" sound. If you look the ball joint should be seperated from the control arm:
10. Now you can use a hammer to drive the axle (spindle) back into the knuckle, you can use a regular hammer as long as you don't smash on it. You really shouldn't have to hit it very hard. If you cant get the axle fully out from behind you can get it when you remove the last two bolts off the knuckle.
11. Great, the hard part is done, now you can remove the two bolts from the strut assembly. Sorry this picture is a little bit fuzzy but its basically the two bolts that you removed the nuts from earlier. You can tap them with a hammer to get them out. Just don't go buck wild and mess up your threads.
12. The knuckle will want to come out easilly, but you might have to hammer the lower ball joint upwards a little bit to actually remove it from the car. This is where a second person comes in handy, but it can be done by one person. So your kinda doing three things at once here, making sure the axle is fully clear of the knuckle, making sure the balljoint is coming out of the lower control arm nicely, and balancing the knuckle to make sure when it comes free you don't drop it. Great, now the knuickle should be out of the car.
13. Hold the knuckle in your hand with a smile. If you can accomplish this you can do most suspension work on the front end of a honda civic yourself. Anyway... here it is:
14. Now to press the ball joint out with your fancy *** tool. This is where an impact comes in VERY handy but you can do it with a ratchet. You look at the tool and it looks pretty confusing. Luckilly, you only need a few of the pieces that come with the tool. You have to make sure you select an adapter that will allow the ball joint to "Push" out and an adapter does not sit flat up against the knuckle, it should actually sit up against the flat piece on the bolt of the ball joint. It's very hard to explain but hopefully you get it. It should look like this to remove the ball joint:
15. I cheated and used my impact even though this is an air tool free guide, but I have done it with a ratchet, as you can tell I'm messy as hell:
16. You should have no problem pressing the ball joint out with this method, it might take a little bit of time and a little bit of muscle. A vice would help a lot to keep things stable if your not using air. Pressing in the ball joint is pretty much the exact opposite, just make sure you put a **** ton of anti seize paste on the knuckle where the ball joint will seat. The push side has to be up against the flat part of the ball joint. You can actually attach the C clamp right to the ball joint, it fits well. Make sure you select an adapter on the bolt side that allows the joint to slide through fully. You know the ball joint is fully seated when it sits flush up against the knuckle. Some aftermarket joints like the one I got come with rings, you have to insert the rings into the groove on the ball joint on the bolt side. Use the two little holes and insert a pair of needle nose pliers into them, then ****** the rings apart and fit it into the groove. It's a royal pain in the *** and it's nice to have two people for this. It's doable by yourself It should look something like this when you are finished pressing it in:
17. I forgot to take a picture of the ball joint installed on the knuckle so I stole one from the other DIY guide, sorry greeen01civic4d
18. Your done, reassembly is very very very very simple and easy. To put the knuckle back on you insert the ball joint into the lower control arm first, then guide the spindle back through the bearing. After that you can seat the upper portion of the knuckle into the lower strut assembly. Once the knuckle is lined up to the bolt holes and the axle is through, you can put the two 19mm lower strut bolts back in and torque the 22mm nuts to 71ft/lbs. Don't forget to apply your anti seize lube on the threads:
19. Lube the hole where the vehicle speed sensor goes with anti seize paste and torque the 10mm bolt to 7.2ft/lbs.
20. Put anti seize paste on the ball joint threads that are sticking through the lower control arm. The castle nut does not have a torque spec it has a torque range. You have to do your best to line up the holes for the cotter pin and still get it within that torque range. The range for the 17mm castle nut is 43-51ft/lbs. I had major issues with this because when hand tight one of the ball joint castle nuts was way past the holes for the cotter pin already. This was a major pissoff so I redid the balljoint with the same result. I ended up putting a washer on it to make the holes line up as I'm afraid to lose the castle nut. I called a mechanic shop and they said it was O.K. Here is a picture of the final result, you can see the washer above the nut:
21. Now to reinstall the caliper. Just carefully slide the caliper onto the rotor and install (after anti seizing) the two 17mm bolts on the back and torque them to 80ft/lbs.
22. Put antiseize on the end of the axle(spindle) and snug up the new axle (spindle) nut on the end of the axle. Now, with your centercap still off your rim, reinstall the tire and snug up the lugnuts. They don't have to be torqued on just yet, lower the car down on so its on its own weight and torque that baby to 134ft/lbs. After torqued grab your flathead screwdriver and smash the end of the nut into the little groove. It should look something like this whe finished:
23. Now you can torque your wheels back on to 80ft/lbs, install your centercap and call it a day.
I tried to make this as comprehensive as possible so anyone can do it. Unfortunatly my camera died halfway through so the actual removal of the knuckle isnt shown that well in pictures. Hopefully this helps you complete your ball joint replacement
 17-Apr-2011, 11:02 PM
#2
Inactive

Join Date: Dec 2007
Location: N/A
Posts: 4,641
Great DIY.
Though i have that tool for ball joints, i couldnt manage to make it work on a DC integra nor 5th gen civic. So....last time i did this on a civic, i used a big sledge hammer and it popped right out [after 10-15 blows]
Though i have that tool for ball joints, i couldnt manage to make it work on a DC integra nor 5th gen civic. So....last time i did this on a civic, i used a big sledge hammer and it popped right out [after 10-15 blows]
18-Apr-2011, 05:59 PM
#5
Member
Thread Starter
Join Date: Apr 2011
Posts: 43
Air tools are awesome... I have access to limited air tools myself but it helps a lot to have them  The impact wrench makes this a lot easier with the C clamp, especially if no anti-seize was installed on the balljoint or it's been in there for a long time.
The impact wrench makes this a lot easier with the C clamp, especially if no anti-seize was installed on the balljoint or it's been in there for a long time.
22-Apr-2011, 08:39 AM
#6
Member

Join Date: Sep 2007
Posts: 73
Great job.
My only concern is the washers on the bottom. What I seen done before is to re-drill the cotter pin hole higher up on the ball joint threaded shaft, use another castle nut or re-used the OEM castle nut which usually is taller than the replacement.
My only concern is the washers on the bottom. What I seen done before is to re-drill the cotter pin hole higher up on the ball joint threaded shaft, use another castle nut or re-used the OEM castle nut which usually is taller than the replacement.
22-Apr-2011, 02:11 PM
#7
Member
Thread Starter
Join Date: Apr 2011
Posts: 43
Hmm... I'd rather add a washer than sacrifice the strength of the bolt. I'm not an engineer so I'm not going to go drilling into structural parts. That being said I know the washer isn't ideal. I just go and check it every couple of days for a while until the nut starts to seize on.
23-Apr-2011, 09:10 AM
#9
Member
Join Date: Sep 2007
Posts: 73
A mechanic shop saying that it is OK means nothing. That nut is to be fastened directly to the knuckle with no washer/washers in between.
Drilling the end of the threaded stud of the ball joint is after the fastening /torque contact point of the nut to the knuckle. It does not affect the properties of the ball joint/ locking nut combo. Putting washer between the nut and the knuckle is at the point where the nut tightens and is to be torqued to the knuckle. You are at the contact point of the assembly where it matters the most. Anyway, it is your vehicle so if you feel comfortable and safe with it like that, so be it.
Drilling the end of the threaded stud of the ball joint is after the fastening /torque contact point of the nut to the knuckle. It does not affect the properties of the ball joint/ locking nut combo. Putting washer between the nut and the knuckle is at the point where the nut tightens and is to be torqued to the knuckle. You are at the contact point of the assembly where it matters the most. Anyway, it is your vehicle so if you feel comfortable and safe with it like that, so be it.
23-Apr-2011, 11:29 AM
#10
Inactive
Join Date: Dec 2007
Location: N/A
Posts: 4,641
Having the washer under the nut is not a big deal, but usually new balljoints come with new castlenuts. Moreover drilling holes in balljoint seems like you can just damage the thread and potentially end up cross threading the stud when trying to tighten the nut.
Op try going to a part store and finding a taller castle nut. I think I even got few laying around my place if you want it.
Op try going to a part store and finding a taller castle nut. I think I even got few laying around my place if you want it.
24-Apr-2011, 07:43 AM
#11
Member
Thread Starter
Join Date: Apr 2011
Posts: 43
That is a new castle nut. I did search for a taller one but good luck finding anything around here  If you look it actually has some pretty good height to it (the castle nut). I feel pretty safe with the washer there. This doesnt affect the DIY regardless because it won't happen to most cars. In fact it only did it to one side, not sure why. Some ball joints actually come pre supplied with washers just in case this happens
If you look it actually has some pretty good height to it (the castle nut). I feel pretty safe with the washer there. This doesnt affect the DIY regardless because it won't happen to most cars. In fact it only did it to one side, not sure why. Some ball joints actually come pre supplied with washers just in case this happens

Thread
Thread Starter
Forum
Replies
Last Post
SaYjAiBaO
Suspension - Chassis
2
25-Apr-2008 07:45 AM
imported_BlitzSix
Honda Civic Performance - JDM Discussion
2
30-Dec-2006 09:34 AM


