DIY - Valve Cover Painting
 03-May-2009, 02:28 PM
#1
Junior Member
Thread Starter

Join Date: Oct 2008
Location: Kitchener
Posts: 11
DIY - Valve Cover Painting
Hey, this week I repainted my B series valve cover; I took pictures as I went through the steps so here’s a little write up DIY if you’re thinking of painting a valve cover.
Here’s a list of the stuff I used.
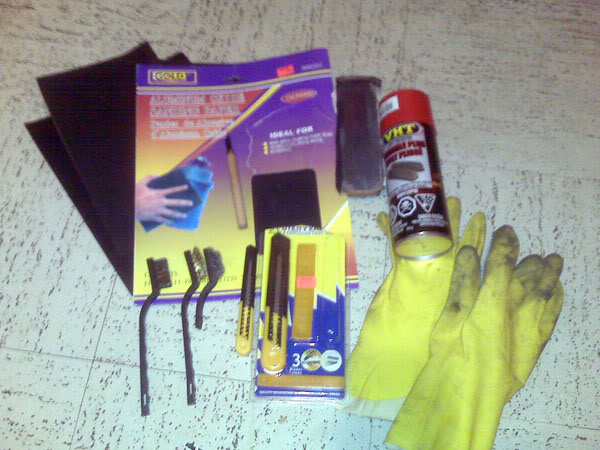
* VHT red wrinkle plus paint (picked up from performance improvements, Toronto. $12-13)
* Paint stripper
* Isopropyl alcohol
---*The following can be picked up at a dollar store.*---
* Small steel brush (saved my life)
* Wet sandpaper
* Sanding block
* Gloves
* Exacto knives
* Painter’s tape
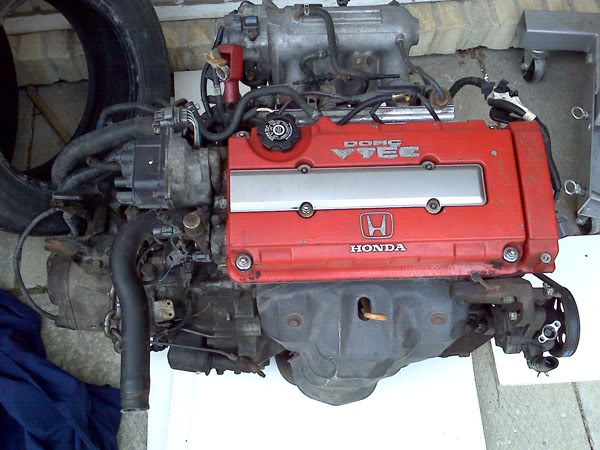
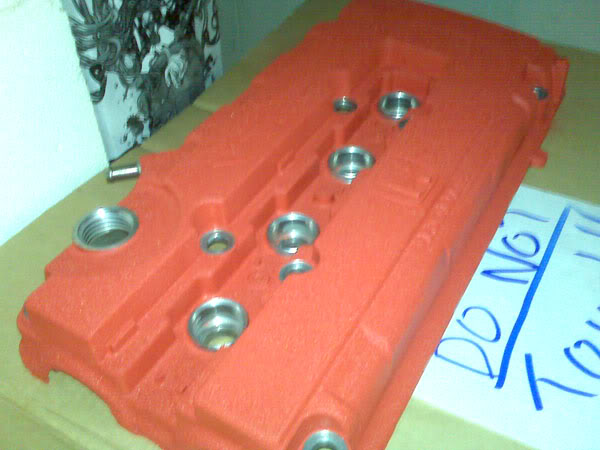
Here is a look at the cover before I painted it.
Once you’ve taken the valve cover of also remove the rubber gaskets, the paint stripper can ruin them. I put the paint stripper on, waited about 10 minutes, and then pressure hosed it off. I did this about 3 times then sanded or brushed of any small amounts of paint that remained.
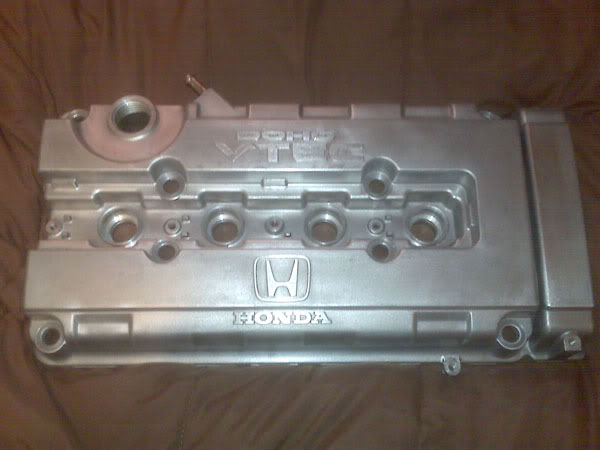
Once the paint is fully off your ready to sand. Personally the little steel brush I bought worked better than anything else I tried. It got all the hard to reach places and didn’t take forever, steel wool was a waste of time and sandpaper wouldn't let me get all the tight spots. This is what it looked like once I was done.
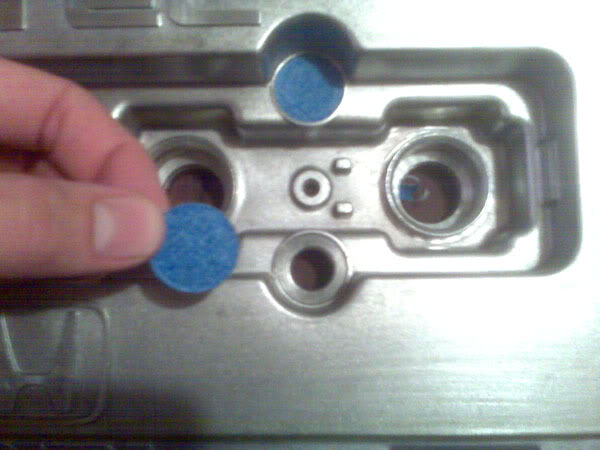
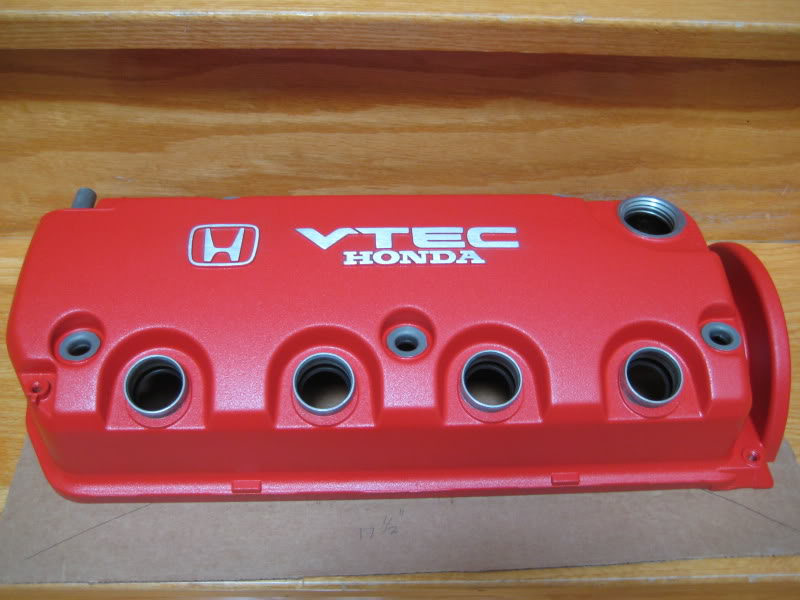
Once all sanding is complete you are ready to mask off the parts of your valve cover you wont be painting. I found out something that will save you lots of time if you have a B series cover. A quarter is the EXACT size of some of the spots you have to mask off, I saved a bunch of time just cutting around quarters. For the purpose of this write-up I also masked the Honda symbol to see if it was worth it, some people mask all the letters. I found it to be completely pointless I wouldn’t waste your time.
Once you’re done masking the cover wipe it down with isopropyl alcohol to remove any debris to allow the paint to adhere properly.

You’re ready to paint your cover. I suggest spraying about 3 coats. Spray the first vertically, then the next horizontally, then another vertically. Wait 5 minutes between coats. I sat with a blow dryer on hot and low air for about 20 minutes to speed up the drying / wrinkling process, before I put it in the over at 200 degrees for an hour.
After the oven I took most of the masking tape off, then let it dry for another day and a half.
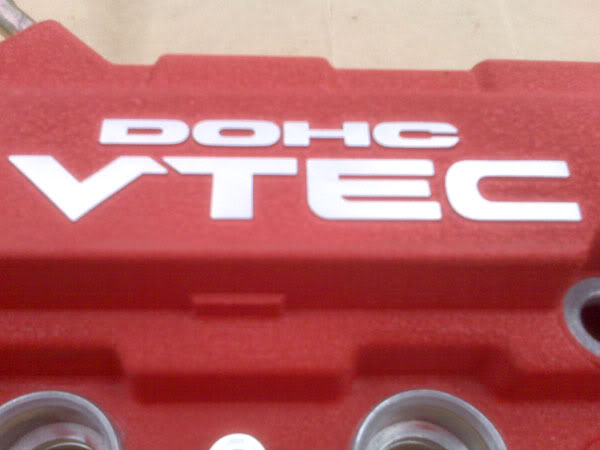
Finishing up, I used a sanding block to sand away the paint covering the letters. I sanded horizontally to get the authentic look.

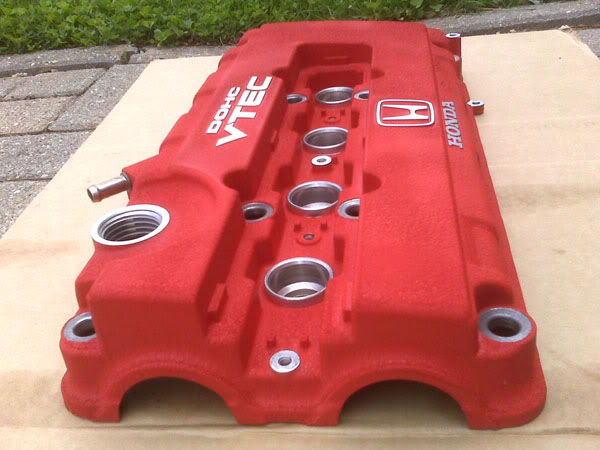
Hope this helps whoever is thinking about doing theirs. Thanks.
Here’s a list of the stuff I used.
* VHT red wrinkle plus paint (picked up from performance improvements, Toronto. $12-13)
* Paint stripper
* Isopropyl alcohol
---*The following can be picked up at a dollar store.*---
* Small steel brush (saved my life)
* Wet sandpaper
* Sanding block
* Gloves
* Exacto knives
* Painter’s tape
Here is a look at the cover before I painted it.
Once you’ve taken the valve cover of also remove the rubber gaskets, the paint stripper can ruin them. I put the paint stripper on, waited about 10 minutes, and then pressure hosed it off. I did this about 3 times then sanded or brushed of any small amounts of paint that remained.
Once the paint is fully off your ready to sand. Personally the little steel brush I bought worked better than anything else I tried. It got all the hard to reach places and didn’t take forever, steel wool was a waste of time and sandpaper wouldn't let me get all the tight spots. This is what it looked like once I was done.
Once all sanding is complete you are ready to mask off the parts of your valve cover you wont be painting. I found out something that will save you lots of time if you have a B series cover. A quarter is the EXACT size of some of the spots you have to mask off, I saved a bunch of time just cutting around quarters. For the purpose of this write-up I also masked the Honda symbol to see if it was worth it, some people mask all the letters. I found it to be completely pointless I wouldn’t waste your time.
Once you’re done masking the cover wipe it down with isopropyl alcohol to remove any debris to allow the paint to adhere properly.
You’re ready to paint your cover. I suggest spraying about 3 coats. Spray the first vertically, then the next horizontally, then another vertically. Wait 5 minutes between coats. I sat with a blow dryer on hot and low air for about 20 minutes to speed up the drying / wrinkling process, before I put it in the over at 200 degrees for an hour.
After the oven I took most of the masking tape off, then let it dry for another day and a half.
Finishing up, I used a sanding block to sand away the paint covering the letters. I sanded horizontally to get the authentic look.
Hope this helps whoever is thinking about doing theirs. Thanks.


 19-May-2009, 04:13 PM
#15
Senior Member
Join Date: Oct 2007
Location: Burlington
Posts: 734
I just picked up the paint today at performance improvements for like $12. Reading the directions on the can is exactly how ehmis did it. So I hope mine turns out as well as his. Should I cover the engine with something while the valve cover is off for that long, or will it be fine with just the hood closed?
19-May-2009, 04:32 PM
#16
Senior Member
Join Date: Mar 2009
Location: Malton / Etobicoke
Posts: 561
I just picked up the paint today at performance improvements for like $12. Reading the directions on the can is exactly how ehmis did it. So I hope mine turns out as well as his. Should I cover the engine with something while the valve cover is off for that long, or will it be fine with just the hood closed?


