[DIY] 96-00 Suspension Swap
 23-Apr-2005, 06:44 PM
#1
Senior Member
Thread Starter

Join Date: May 2003
Location: Ontario
Posts: 18,367
Matt and I did this on a Saturday afternoon. The swap is straight forward and simple. 2 people can tackle this, even 1 could. But 2 people can communicate and help out one another at times.
Tools Needed (I am a bit stupid when it comes to tool names):
Subject suspension to be swapped onto the car:
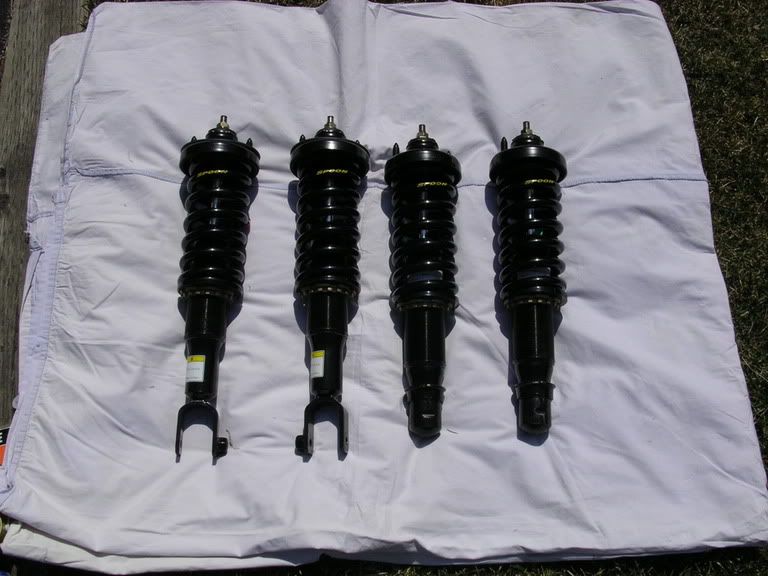
Comparison between stock 6th gen suspension and the aftermarket:
FRONT
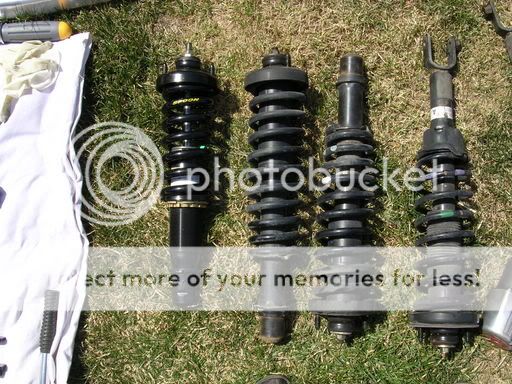
REAR

As you can see, the shock bodys are already shorter than the stock suspension. The car will sit low with little adjustment. My car has no camber kit, just stock tie rods and compensator arms. All I did afterwards was to do the alignment and set the TOE to ZERO. This suspension is a complete set which does not require swap springs, or swap OEM top hat. That's why it is much easier than swapping springs and whatnot. Notice the aftermarket suspension did not come with dust boots. If they were made that way, then I am not gonna bother with the dust boots.
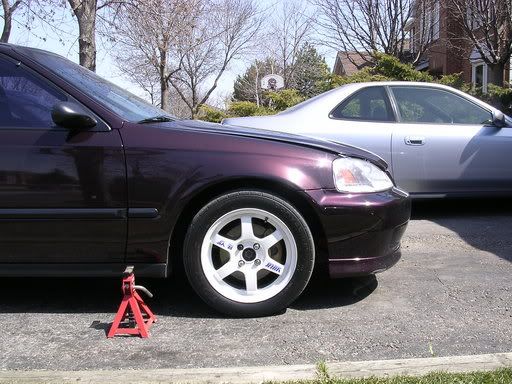
Step 1 - Loosen the lug nuts and Jack up the car
A lot of people ask where to jack for the front of the car. To be honest, I didn't know either. It is the little metal square thingy. After the car is high enough, place the jack stands at the sides. For the rear, use the tow hook loop. Do not jack up at the subframe or the rear lower control arm. If in doubt, use Honda factory manual.

Step 2
Remove the wheels. You can do either the front first or the rear first, it is your choice. We started with the front. Left side and right sides are identital so I am just going to talk about one side. Again, I apologize for not taking enough photos.
Step 3
Open the hood, and remove the 2 top nuts at the top of the shock tower. For some people, it is where they mount their strut bar.
Step 4
Now the top nuts are off, go to the side. You should be looking at the tire well (either driver side, or the passenger side) and facing the brake rotor, and the caliper. Go to the back area, behind the rotor and the caliper and you will see that your front suspension is sitting on a "FORK", where the bottom of the suspension is securely bolted onto the top of the fork, and the fork is then bolted onto the front lower control arm.
Some people remove the fork AFTER they remove the suspension off the car while with the fork still attach to it. It is your choice of how you want to do it. But what we did was to loosen the top fork nut and the bottom fork bolt all together, then just take out the suspension body, leaving the fork sitting on the front lower control arm.
Step 5
That's it for the front, very simple. Now you just pick up your aftermarket pre-assembled suspension and put it back it. For mine, we noticed at the very top, the part that actually goes through the hole inside the chassis, isn't rounded compare to OEM suspension. There are 4 little nipples sticking out on 4 sides. You either grind down the edge of the chassis hole, or you grind down the nipples, just a little. So that's what Matt and I decided to do - grind down the nipple. Just a little bit will allow us to fit the strut back into the hole.
Please note that this design might not apply to other brand of aftermarket suspensions. But if you happen to be using this particular brand, you will know. This is funny because the suspension is made for 6th gen Civic. Unless USDM chassis was made with a smaller opening compare to JDM chassis, we don't understand why it is designed this way.
For your other side, please repeat Step 2 to Step 5.
Tools Needed (I am a bit stupid when it comes to tool names):
- 10 - 19mm sockets (for small bolts like sway bar end links to lug nuts)
- Torque wrench (1/2 or 3/8 drive)
- Rachets (1/2 or 3/8 drive)
- 14/17mm open end rachets (if you are lazy to dismental front strut bar, use this to get the bolts off, otherwise, use torque wrench)
- Breaker bar
- Jack (1 or 2)
- Jack Stands (4)
- Air tools (easier to take off bolts initially, but always use hand tools to torque to spec)
- Nickle Anti Seize (Better than Copper Anti seize)
- Solution to soak the bolts before removal. We used Liquid Foam. You can use Liquid Wrench, or the like.
Subject suspension to be swapped onto the car:
Comparison between stock 6th gen suspension and the aftermarket:
FRONT
REAR
As you can see, the shock bodys are already shorter than the stock suspension. The car will sit low with little adjustment. My car has no camber kit, just stock tie rods and compensator arms. All I did afterwards was to do the alignment and set the TOE to ZERO. This suspension is a complete set which does not require swap springs, or swap OEM top hat. That's why it is much easier than swapping springs and whatnot. Notice the aftermarket suspension did not come with dust boots. If they were made that way, then I am not gonna bother with the dust boots.
Step 1 - Loosen the lug nuts and Jack up the car
A lot of people ask where to jack for the front of the car. To be honest, I didn't know either. It is the little metal square thingy. After the car is high enough, place the jack stands at the sides. For the rear, use the tow hook loop. Do not jack up at the subframe or the rear lower control arm. If in doubt, use Honda factory manual.
Step 2
Remove the wheels. You can do either the front first or the rear first, it is your choice. We started with the front. Left side and right sides are identital so I am just going to talk about one side. Again, I apologize for not taking enough photos.
Step 3
Open the hood, and remove the 2 top nuts at the top of the shock tower. For some people, it is where they mount their strut bar.
Step 4
Now the top nuts are off, go to the side. You should be looking at the tire well (either driver side, or the passenger side) and facing the brake rotor, and the caliper. Go to the back area, behind the rotor and the caliper and you will see that your front suspension is sitting on a "FORK", where the bottom of the suspension is securely bolted onto the top of the fork, and the fork is then bolted onto the front lower control arm.
Some people remove the fork AFTER they remove the suspension off the car while with the fork still attach to it. It is your choice of how you want to do it. But what we did was to loosen the top fork nut and the bottom fork bolt all together, then just take out the suspension body, leaving the fork sitting on the front lower control arm.
Step 5
That's it for the front, very simple. Now you just pick up your aftermarket pre-assembled suspension and put it back it. For mine, we noticed at the very top, the part that actually goes through the hole inside the chassis, isn't rounded compare to OEM suspension. There are 4 little nipples sticking out on 4 sides. You either grind down the edge of the chassis hole, or you grind down the nipples, just a little. So that's what Matt and I decided to do - grind down the nipple. Just a little bit will allow us to fit the strut back into the hole.
Please note that this design might not apply to other brand of aftermarket suspensions. But if you happen to be using this particular brand, you will know. This is funny because the suspension is made for 6th gen Civic. Unless USDM chassis was made with a smaller opening compare to JDM chassis, we don't understand why it is designed this way.
For your other side, please repeat Step 2 to Step 5.
 23-Apr-2005, 06:45 PM
#2
Senior Member
Thread Starter
Join Date: May 2003
Location: Ontario
Posts: 18,367
Step 6 - Rear Suspensions
If you have your interior panels in, then you will need to remove them. My car does not have any so we just open the hatch door and get to the top of it. The top of the rear suspension shares the same size nuts as the front suspension - 14mm. Remove them and just put them in the trunk.
Step 7
Now take off the rear wheels (or you might already have) and you should be looking at the drum, or disc brake. Now look at the bottom of the drum/disc brake assembly and you should see 3 bolts that go through your rear lower control arm - 1 for the trailing arm, 1 for the suspension fork, and 1 for the subframe. Unbolt the ones for Trailing Arm and Suspension ONLY. There is no need to take the rear LCA completely off UNLESS you are swapping them out for something else.
If you have rear sway bar, unbolt the endlink nut because you need full movement of the rear LCA and with the sway bar intack, your LCA ain't gonna go up and down.
Step 8
Now you have the trailing arm bolt and suspension bolt off, the rear suspension should slide right out. Now take the your aftermarket rear suspension and put it in. You will want to bolt the trailing arm bolt FIRST, then you bolt on the suspension fork bolt. DO NOT bolt on the rear swap bar until you have both left and right rear suspensions installed completely or else, you won't be able to move the other LCA.
For your other side, just repeat Step 6 to 8.
Step 9
Put the nuts back onto the sway bar endlinks. If you don't have a rear sway bar, please ignore this step.
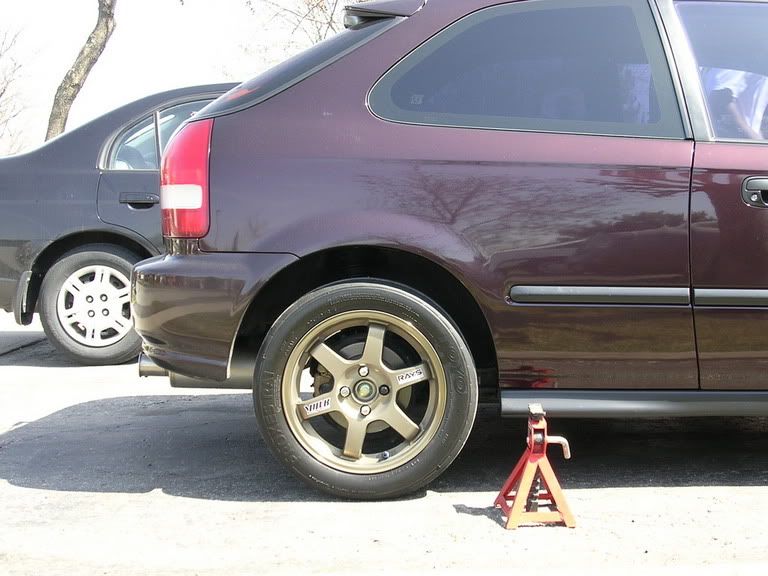
What we noticed after we put the shocks on is that the front and rear brakes have moved up significantly - which proofs that the shock body are actually shorter than stock. What this means, is that camber was designed into this whole assembly. If the shocks are compressed down further after you put the car back on the road, the camber will increase because the car has sat down lower. But, if the shocks are shorter already, you won't notice too much camber.
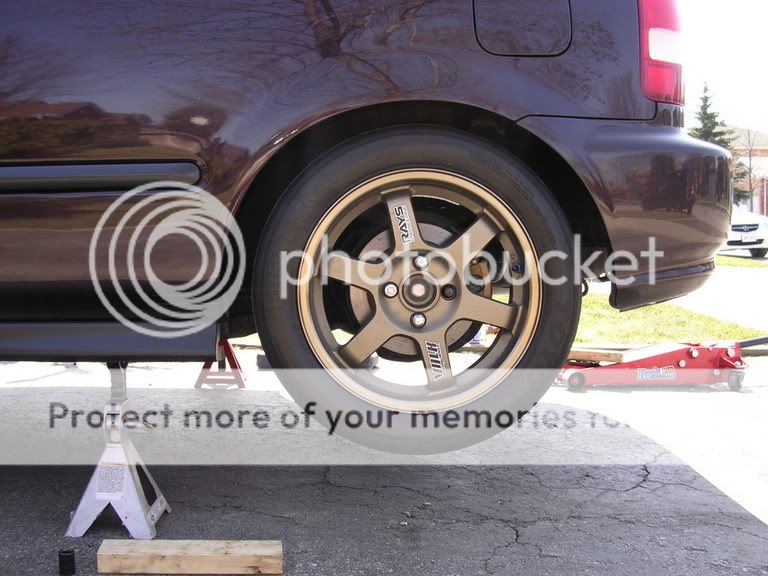
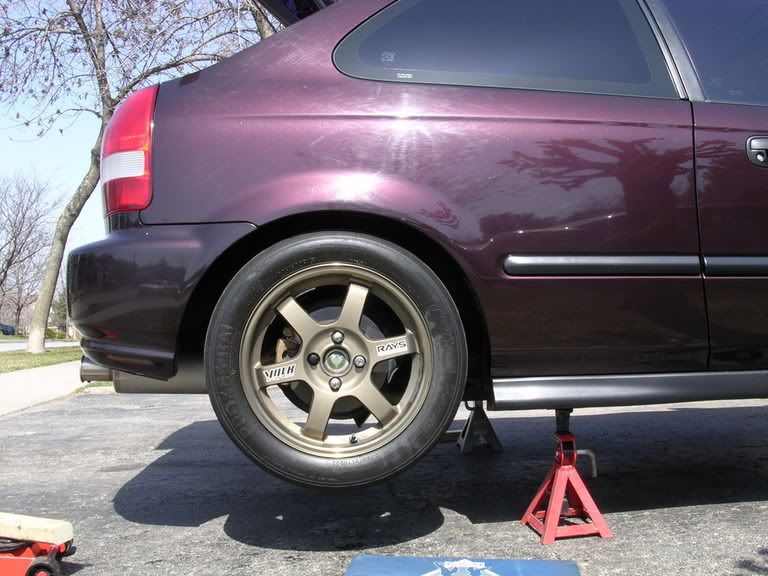
This is what it looks like after we put the rear wheels back onto to the car. Notice how it is already up inside the tire well. Obviously, the car was up on the jacks all these time and we only jacked up the car enough so we could take off the tires.
Before
Front
Rear
After
Ride quality
The suspension comes with 16K spring rates at the front, and 14K at the back. That's roughly 900lbs at the front, and 780lbs at the rear. The shock body was designed to be big enough to support such heavy springs (and it can support up to 24k). It comes with 5 settings and for street, I am using 1/1. We tested on the road with 1/1 and go all the way to 4/5 and the car basically bounced up over uneven road, then goes right back down. It does not bounce twice. There were roads which made us fly up, like a rollercoaster ride.
Cornering was very nice. We didn't drive fast on the street. At turns, we only did 50km. When I take this car to the track, along with track tires, I should be able to test the suspension further.
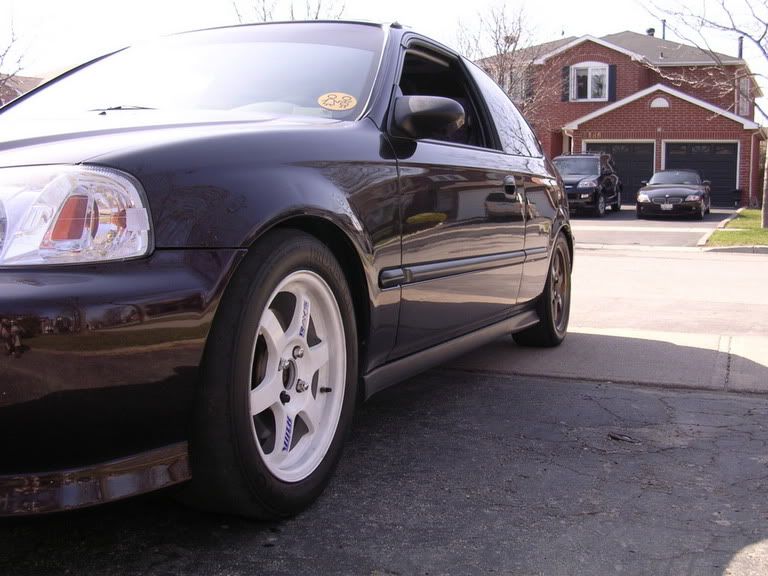
Because it is height adjustable, I was going to set the height to 600mm, measuring from the tip of the fender to the bottom of the wheel. But after we put the car on the road, it is 588mm all the way around, with the exception of rear driver side being a little off which I will adjust later. I will not corner weight this year. Perhaps next. But the driver side front sits 2mm higher without me in it. So after I am inside the car, all sides are even.
Side note:
When I put the passenger side rear suspension back in, and was about to bolt on the trailing arm onto the rear LCA, we noticed the nut that was 3 point tag welded on the other side was stripped. Matt looked inside and it was rather shinny. That's why I was torquing down the bolt and that thing just keeps on turning and turning and turning... What we did was the use the impact hammer to take that nut off, and put on a washer and a nut to secure that bolt. Why was that nut stirpped? I do not know. But only air tools can over tighten it and make that strip. That's another story which I have no intention of telling.
This also explains why I was experiencing some strange sound coming from the back. There is no way I would have thought about that place until we did the suspension swap. But now, the noise is gone.
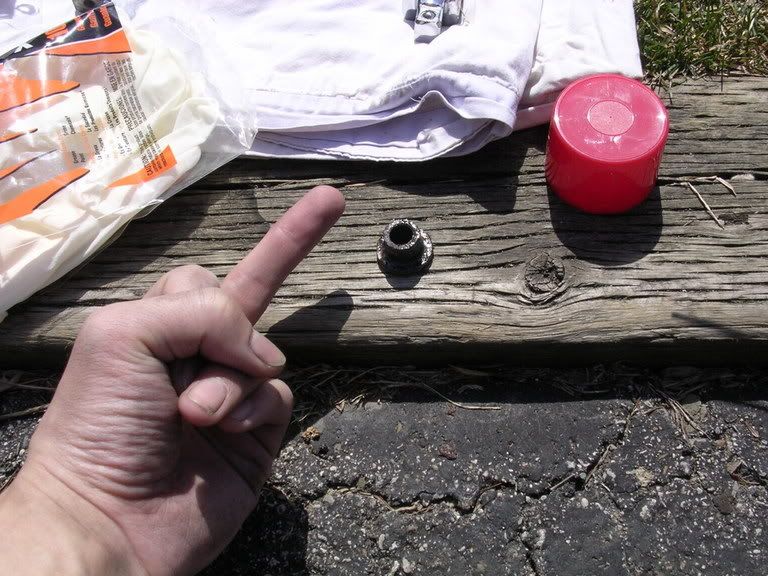
That stripped nut, after we knocked if off from the trailing arm.
Hope you all enjoyed this little DIY. Thank you
If you have your interior panels in, then you will need to remove them. My car does not have any so we just open the hatch door and get to the top of it. The top of the rear suspension shares the same size nuts as the front suspension - 14mm. Remove them and just put them in the trunk.
Step 7
Now take off the rear wheels (or you might already have) and you should be looking at the drum, or disc brake. Now look at the bottom of the drum/disc brake assembly and you should see 3 bolts that go through your rear lower control arm - 1 for the trailing arm, 1 for the suspension fork, and 1 for the subframe. Unbolt the ones for Trailing Arm and Suspension ONLY. There is no need to take the rear LCA completely off UNLESS you are swapping them out for something else.
If you have rear sway bar, unbolt the endlink nut because you need full movement of the rear LCA and with the sway bar intack, your LCA ain't gonna go up and down.
Step 8
Now you have the trailing arm bolt and suspension bolt off, the rear suspension should slide right out. Now take the your aftermarket rear suspension and put it in. You will want to bolt the trailing arm bolt FIRST, then you bolt on the suspension fork bolt. DO NOT bolt on the rear swap bar until you have both left and right rear suspensions installed completely or else, you won't be able to move the other LCA.
For your other side, just repeat Step 6 to 8.
Step 9
Put the nuts back onto the sway bar endlinks. If you don't have a rear sway bar, please ignore this step.
What we noticed after we put the shocks on is that the front and rear brakes have moved up significantly - which proofs that the shock body are actually shorter than stock. What this means, is that camber was designed into this whole assembly. If the shocks are compressed down further after you put the car back on the road, the camber will increase because the car has sat down lower. But, if the shocks are shorter already, you won't notice too much camber.
This is what it looks like after we put the rear wheels back onto to the car. Notice how it is already up inside the tire well. Obviously, the car was up on the jacks all these time and we only jacked up the car enough so we could take off the tires.
Before
Front
Rear
After
Ride quality
The suspension comes with 16K spring rates at the front, and 14K at the back. That's roughly 900lbs at the front, and 780lbs at the rear. The shock body was designed to be big enough to support such heavy springs (and it can support up to 24k). It comes with 5 settings and for street, I am using 1/1. We tested on the road with 1/1 and go all the way to 4/5 and the car basically bounced up over uneven road, then goes right back down. It does not bounce twice. There were roads which made us fly up, like a rollercoaster ride.
Cornering was very nice. We didn't drive fast on the street. At turns, we only did 50km. When I take this car to the track, along with track tires, I should be able to test the suspension further.
Because it is height adjustable, I was going to set the height to 600mm, measuring from the tip of the fender to the bottom of the wheel. But after we put the car on the road, it is 588mm all the way around, with the exception of rear driver side being a little off which I will adjust later. I will not corner weight this year. Perhaps next. But the driver side front sits 2mm higher without me in it. So after I am inside the car, all sides are even.
Side note:
When I put the passenger side rear suspension back in, and was about to bolt on the trailing arm onto the rear LCA, we noticed the nut that was 3 point tag welded on the other side was stripped. Matt looked inside and it was rather shinny. That's why I was torquing down the bolt and that thing just keeps on turning and turning and turning... What we did was the use the impact hammer to take that nut off, and put on a washer and a nut to secure that bolt. Why was that nut stirpped? I do not know. But only air tools can over tighten it and make that strip. That's another story which I have no intention of telling.
This also explains why I was experiencing some strange sound coming from the back. There is no way I would have thought about that place until we did the suspension swap. But now, the noise is gone.
That stripped nut, after we knocked if off from the trailing arm.
Hope you all enjoyed this little DIY. Thank you
23-Apr-2005, 07:05 PM
#3
Registered User

Join Date: Oct 2004
Location: Milton
Posts: 439
Good write up and pics.
Must be nice to have neighbours that don't call and complain to the city about you doing work in driveway.
Good job!
Must be nice to have neighbours that don't call and complain to the city about you doing work in driveway.
Good job!
23-Apr-2005, 07:14 PM
#4
Registered User
Join Date: May 2004
Location: Toronto, Ontario
Posts: 3,474
Nice Job Charles and Matt.
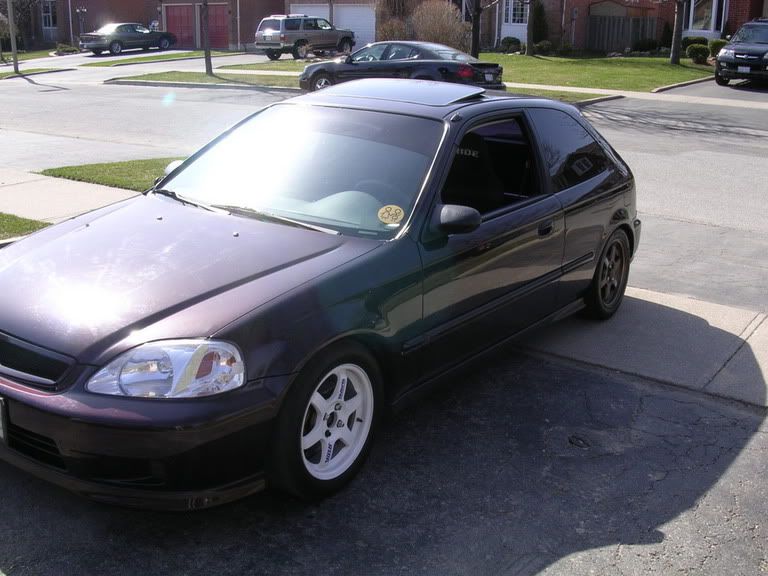
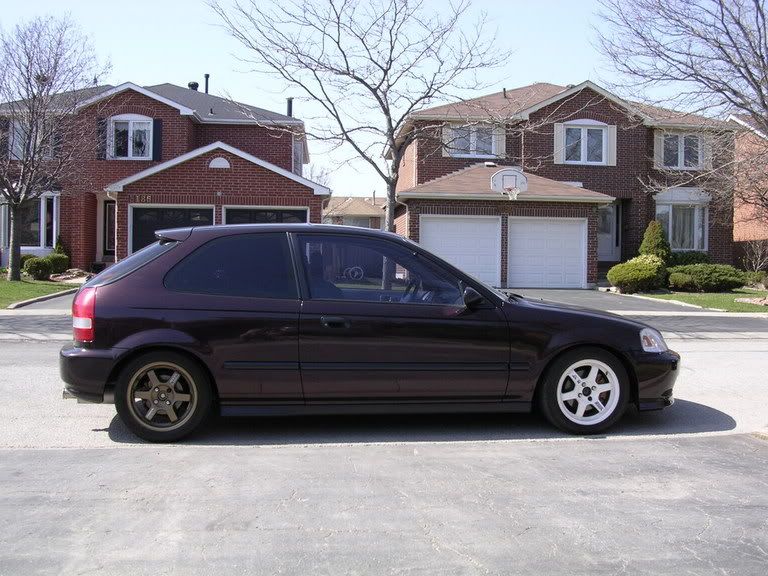
We could always use more pics of the car, though!
We could always use more pics of the car, though!
23-Apr-2005, 07:33 PM
#5
Registered User

Join Date: Apr 2002
Location: Mississauga West Side
Posts: 11,206
Great detail charles, even better than mine lol
Finally a pic of the front jack point so I can show those other people
Best pic was with you flipping the bird to that nut
Finally a pic of the front jack point so I can show those other people
Best pic was with you flipping the bird to that nut
23-Apr-2005, 07:47 PM
#6
Registered User
Join Date: Mar 2004
Posts: 7,745
haha nice diy charles, car is looking very sexy, i may just make love to it at the next meet
23-Apr-2005, 08:11 PM
#7
Senior Member
Join Date: Aug 2003
Posts: 15,801
Great write up Charles. Car looks good as usual.
23-Apr-2005, 08:19 PM
#8


good DIY.....just goes to show how simple it really is to install suspension components.
But you forgot to mention how the bolt that holds the shock to the rear LCA can be seized, and a real PITA to get out. When i did mine in my EG both of the rear shock-lca bolts were seized so, to make a long story short, i had to press out the bushings and press in new ones.....stupid splined bolts, rust forms in between the splines and makes it impossible to get the bolt out.
But you forgot to mention how the bolt that holds the shock to the rear LCA can be seized, and a real PITA to get out. When i did mine in my EG both of the rear shock-lca bolts were seized so, to make a long story short, i had to press out the bushings and press in new ones.....stupid splined bolts, rust forms in between the splines and makes it impossible to get the bolt out.
23-Apr-2005, 10:26 PM
#9
Senior Member
Thread Starter
Join Date: May 2003
Location: Ontario
Posts: 18,367
Indeed, bolts seizing is not fun. We were lucky that everything went out smoothly and we applied a **** load of anti seize.
24-Apr-2005, 05:49 AM
#10
Luka

Join Date: Aug 2003
Posts: 14,319
gotta put my tein ss in this week sometime
 29-Apr-2005, 12:03 AM
#12
Senior Member
Thread Starter
Join Date: May 2003
Location: Ontario
Posts: 18,367
The car is ridiculously stiff now, that I jack up the driver side and the rear wheel is also up in the air.
It has been 2 weeks now and daily driving is acceptable. Driving over pot hole sometimes is not even a trouble because the suspension is so stiff and short bodied that before the tire reach into the pot hole, the car is already over and pass it. But I still avoid the holes when ever possible.
It has been 2 weeks now and daily driving is acceptable. Driving over pot hole sometimes is not even a trouble because the suspension is so stiff and short bodied that before the tire reach into the pot hole, the car is already over and pass it. But I still avoid the holes when ever possible.
29-Apr-2005, 12:11 AM
#13
Registered User
Join Date: Dec 2003
Location: mississauga
Posts: 1,098
The suspension comes with 16K spring rates at the front, and 14K at the back
But hey man great write up, yer car is lookin very nice. how much did that susp. run u.
BTW if u want yer old wheels back we can do a straight trade if u'd like
 haha
09-May-2005, 09:06 AM
haha
09-May-2005, 09:06 AM
#15
Senior Member
Thread Starter
Join Date: May 2003
Location: Ontario
Posts: 18,367
As Mark pointed out, I am sorry I mislead the title of the thread. It is really a Coilover Swap, not the suspension swap, as suspension includes control arms, swap bars and all that things.
10-May-2005, 06:44 PM
#16
Registered User
Join Date: Jul 2003
Posts: 276
i know it wasn't addressed in this case but in terms of the bumpstop.. does it need to be cut or not.. i was told that for h&r sports on a 96-00 civic i wouldnt need to cut them.. is this true?
17-May-2005, 10:52 AM
#18
Senior Member
Join Date: Aug 2002
Location: Mississauga
Posts: 13,184
hmmm really, and no problems after cutting the bumpstop?
does this depend on how stiff a suspension you're getting? or you'd cut it like that everytime
does this depend on how stiff a suspension you're getting? or you'd cut it like that everytime


