DIY: Wheel stud replacement 96-00 Civic
 06-Jul-2009, 10:28 PM
#1
Senior Member
Thread Starter
Join Date: Oct 2007
Location: Toronto
Posts: 131
DIY: Wheel stud replacement 96-00 Civic
This DIY will walk you through how to replace your wheel studs and install wheel spacers. Its pretty straight forward but I couldn't find a DIY when I did mine, so I decided to post one. I needed wheel spacers and extended studs on the front wheels because I recently installed a new brake kit and need more clearance for my rims to clear the calipers. I didn't want to remove the entire hub and press out the studs so I used the alternative method by using a hammer to bump out the studs and washers to press in the new ones.
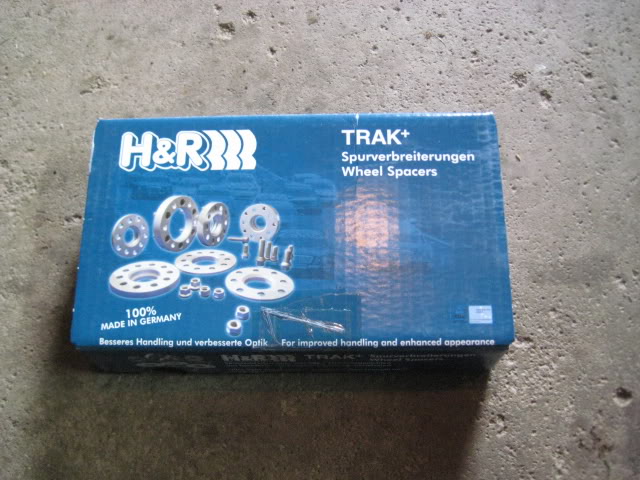
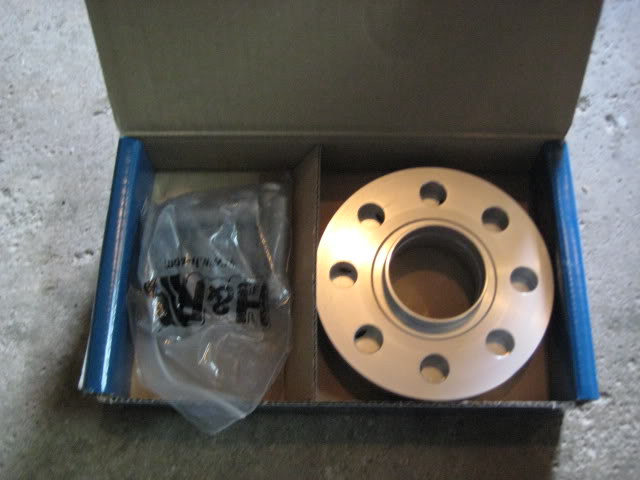
These are the wheel studs and wheel spacers that I bought:
H&R SPACER (PAIR): ACURA/HONDA (4:100) 15mm-Options Auto Salon
All you need are a few things:
- 17mm socket
- socket wrench and/or torque wrench
- philips screwdriver
- hammer
- a handful of washers
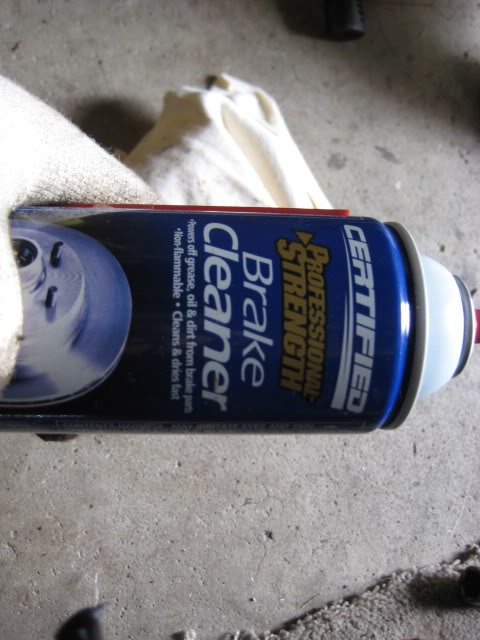
- rotor cleaner (optional)
1) Start by putting bricks behind/in front your wheels, loosening your lug nuts and placing the car on jack stands.
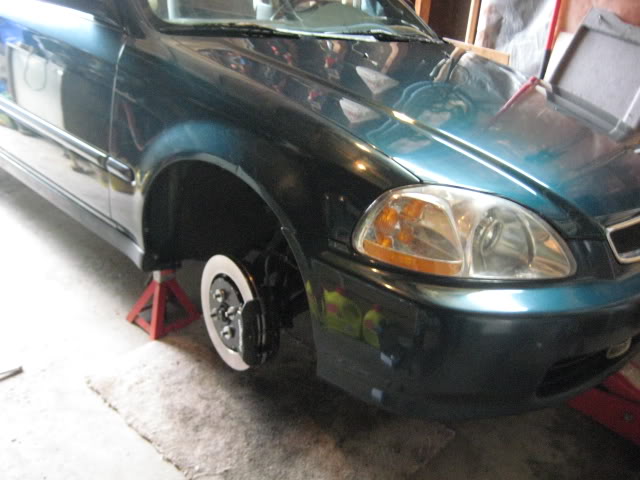
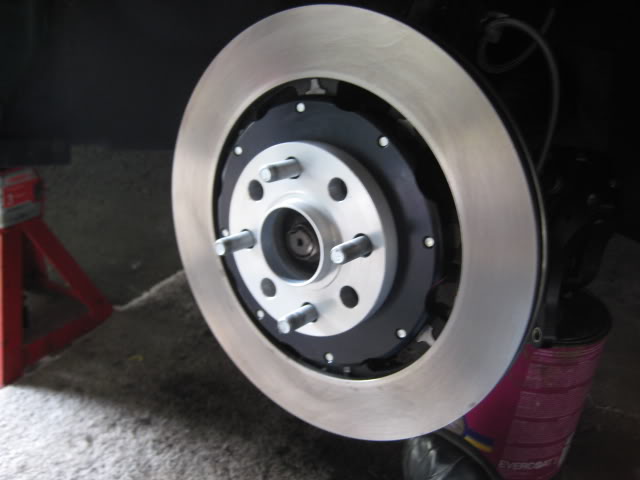
2) You need to take off the caliper and rotor in order to pop out the studs. Start be removing the brake calipers by removing the two 17mm nuts. I used a empty bodyfiller can to hold the caliper so I don't have to disconnect the brake line.

3) Now with the caliper removed you can take off your rotor. Use a philips screwdriver to remove the two screws. You may need to use an impact drill if they're not coming off.
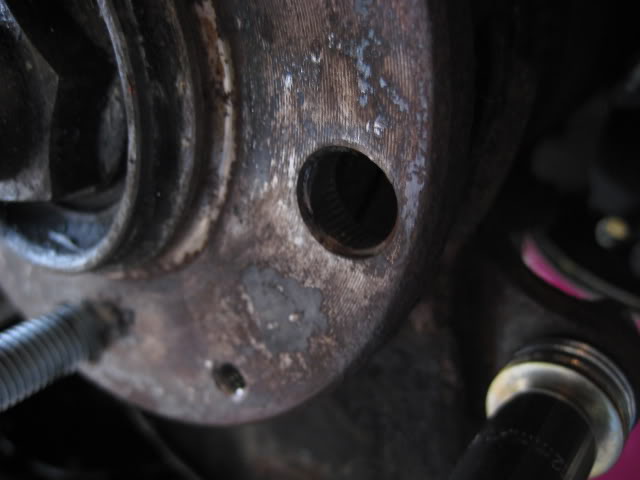
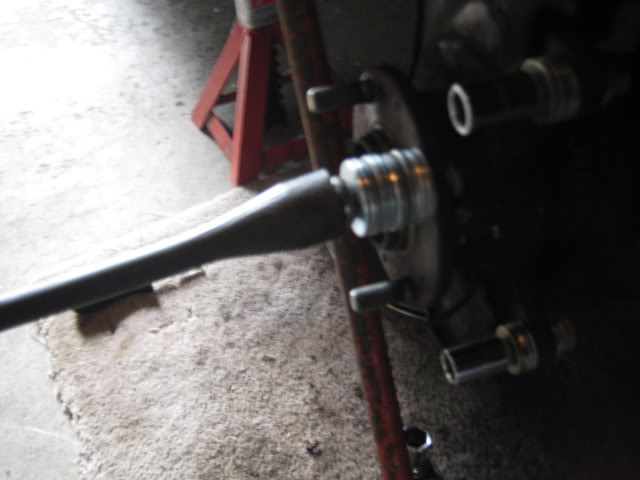
4) Turn the hub so there is enough room for the first stud to come out without hitting any obstacles. You will be hammering it out.
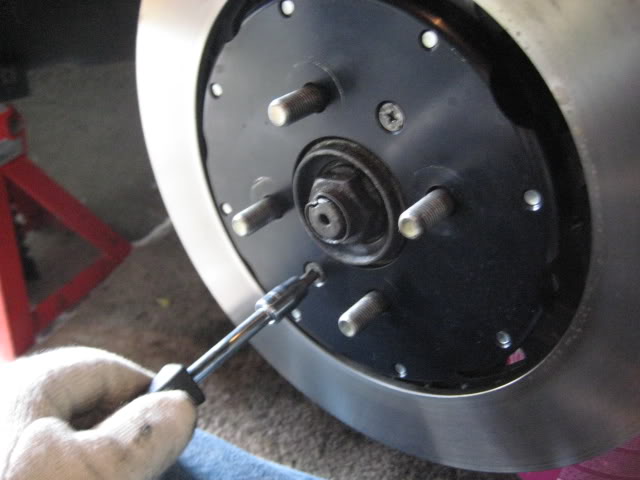
5) Using a hammer, bump out the first stud. You might need to put some muscle into it if you're a bitch. I didn't have much trouble popping them out. Alternatively, you can choose to cut it off if you don't have enough room.
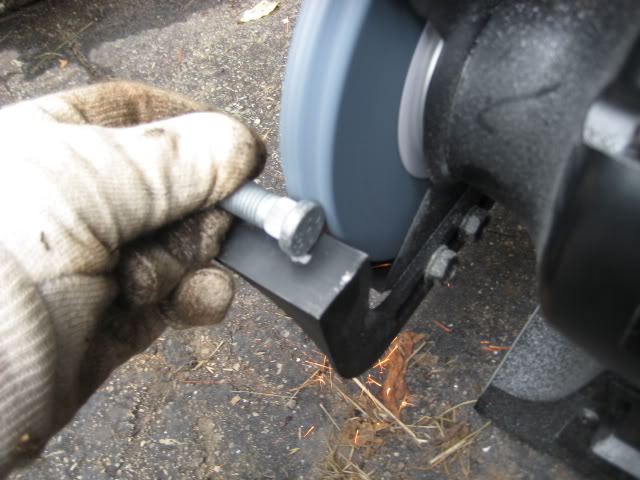
6) You can try putting in the new studs by just hammering them back in, but I didn't want to risk wrecking the thread since there isn't much room and even moreso since the new studs I was using were 15mm longer. So I decided to grind off part of the nut at the end. I've read on some other sites about people doing this so I thought I'd give it a try... I found it to work like a charm.
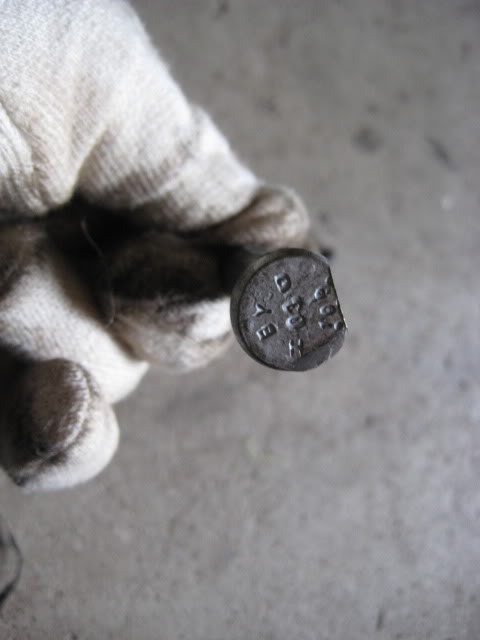
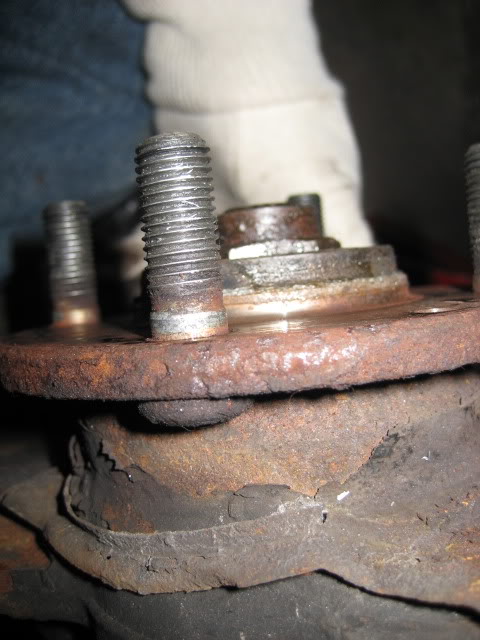
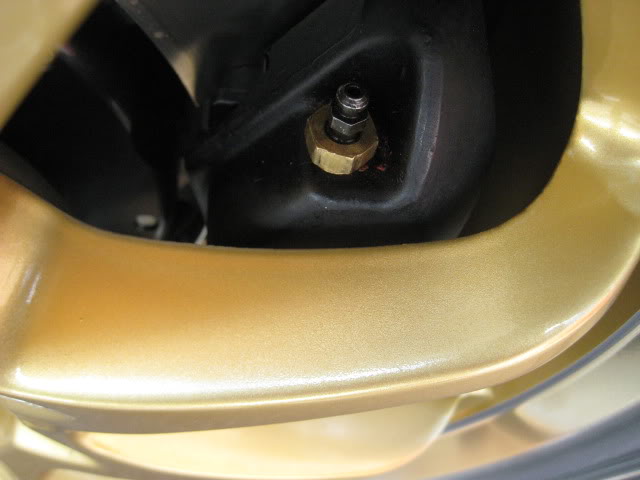
Here you can see the difference between the old and new studs:

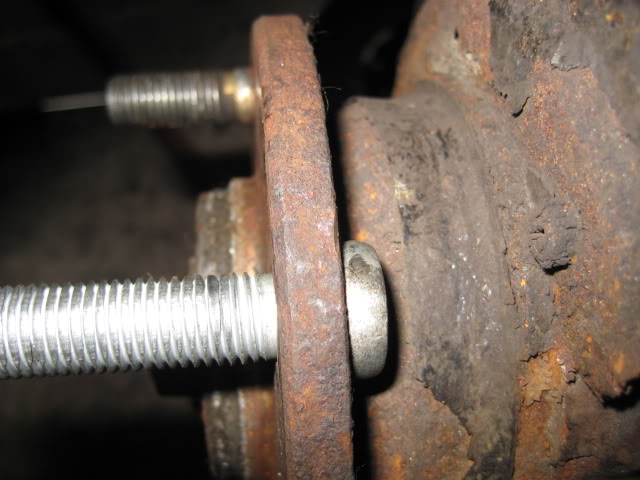
7) With the new stud now partially grinded, it slides in quite easily and you don't have to worry about ruining the thread. Don't push it in all the way.
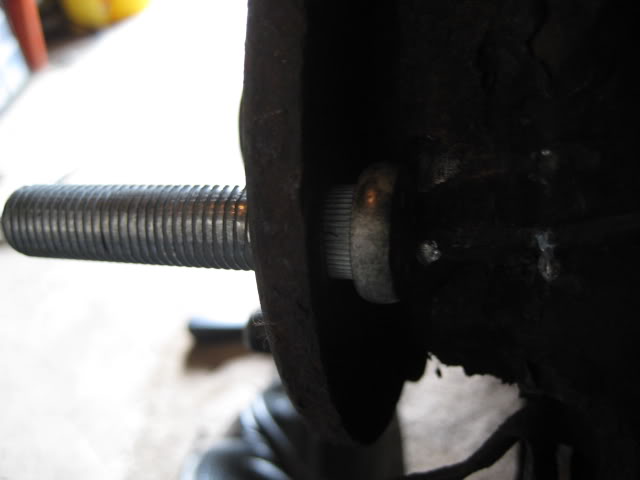
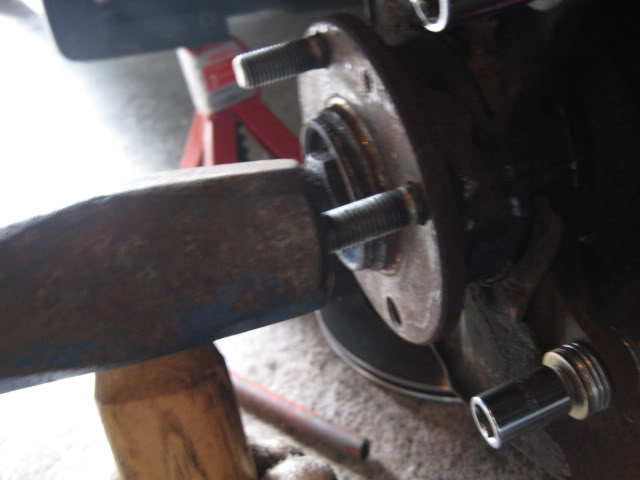
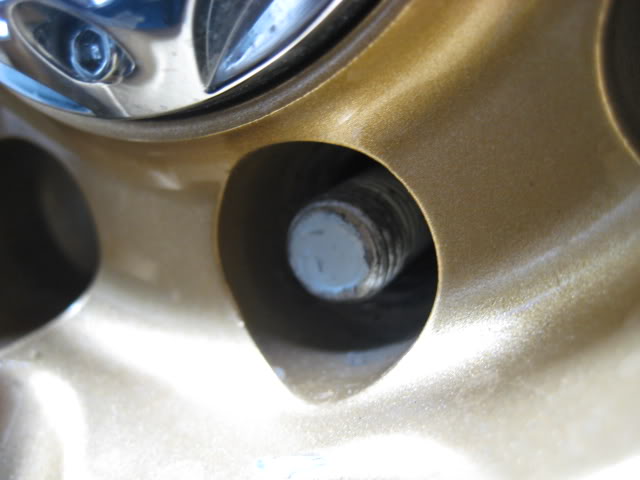
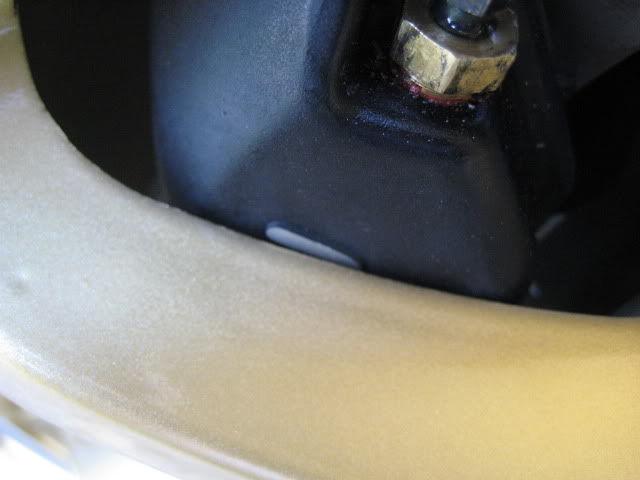
8) I put enough washers on the stud to leave just about enough room for the stock lug nuts. Then I put on the lug nut and twisted it on, thus pressing the new stud into the hub. I used a metal pole to keep the hub from turning while I tightened the lug not. Be careful not to over tighten as to not ruin the thread. You'll know the stud is steated correctly just by looking at the back of the hub.
9) BAM! now you've replaced one stud. Like I said, pretty straight forward
10) Now repeat steps 4-8 on the remaining studs.
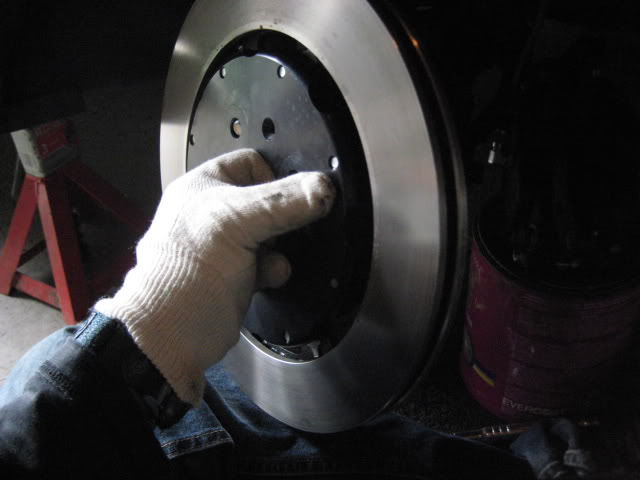
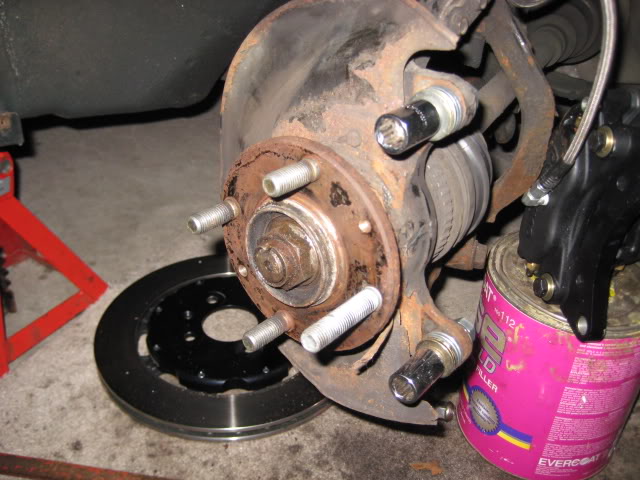
11) Once all the studs have been replaced you can put you can re-assemble everything buy putting the rotor, caliper and wheel back on and you're done. In my case, I also put on some spacers. The ones I got were hubcentric which I think is important. First, put your rotor back on and tighten the two philip screws your removed. Next, simply slide on your new spacers and use a hammer (I used a rubber one) to seat it in the centre correctly.
12) Anytime I touch my rotors I like to clean them.
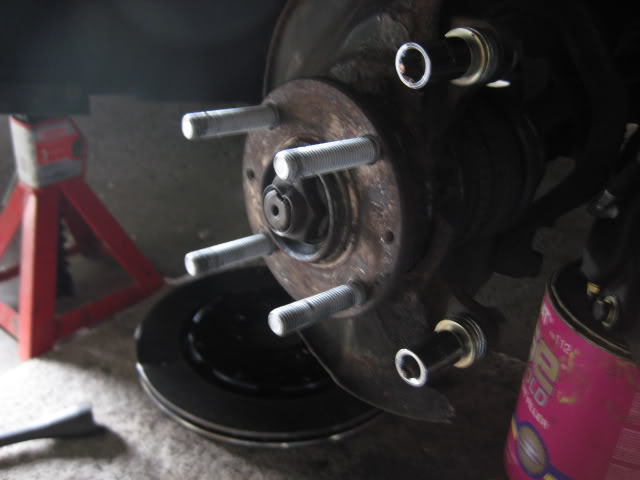
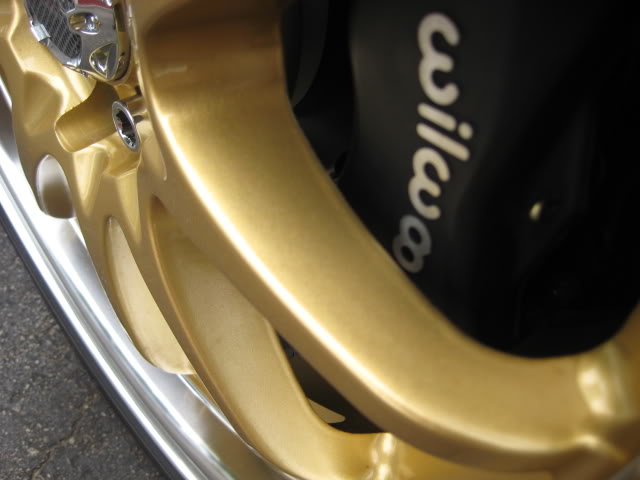
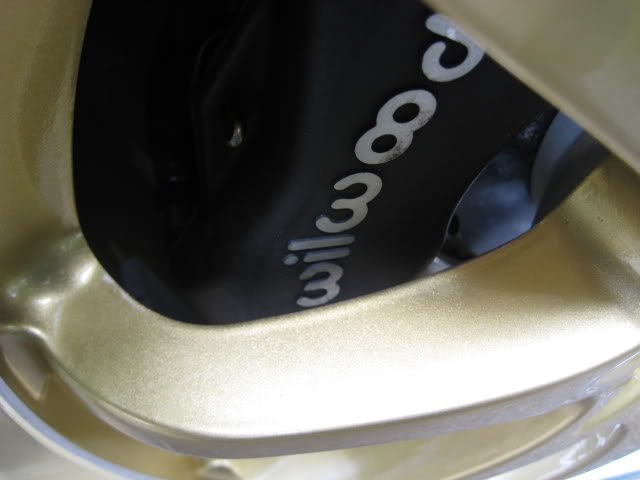
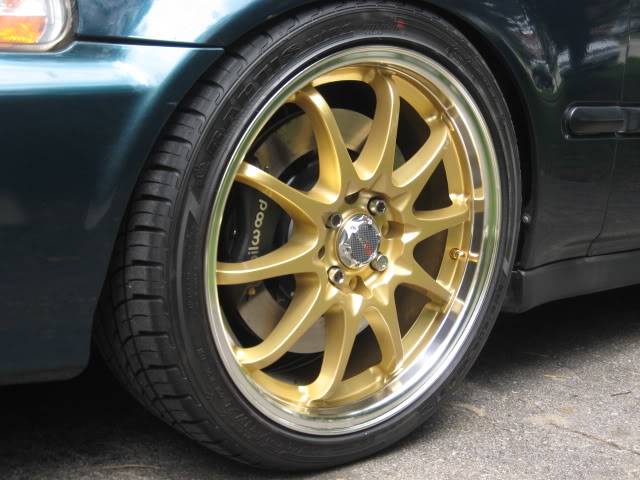
13) Now reinstall your brake caliper and you can put your wheels back on. I had to Torque the 17mm caliper nuts to 47 ft-lbs but yours might be different. When putting on your wheels, tighten them in a star pattern while the car is still on jack stands and after you lower the car to the ground, torque them to 80 ft-lbs. As you can see, I now have enough thread on the stud to safely install my wheels while also clearing the calipers with some extra room!
14) Repeat the same steps to any other wheels.
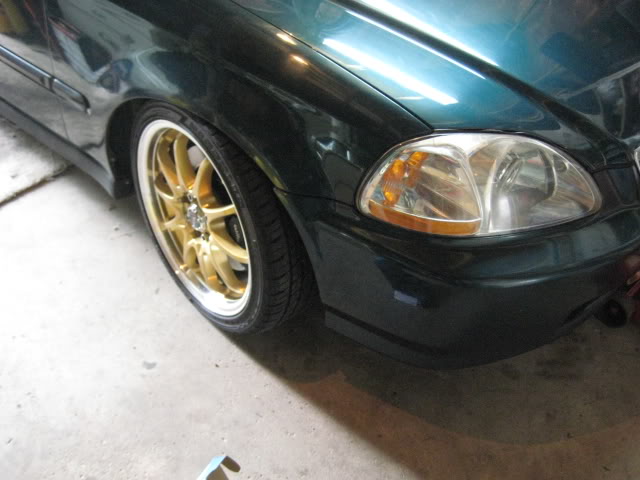
Before:
After:
Hope this might one day help someone who snaps a stud or wants to install new ones.
These are the wheel studs and wheel spacers that I bought:
H&R SPACER (PAIR): ACURA/HONDA (4:100) 15mm-Options Auto Salon
All you need are a few things:
- 17mm socket
- socket wrench and/or torque wrench
- philips screwdriver
- hammer
- a handful of washers
- rotor cleaner (optional)
1) Start by putting bricks behind/in front your wheels, loosening your lug nuts and placing the car on jack stands.
2) You need to take off the caliper and rotor in order to pop out the studs. Start be removing the brake calipers by removing the two 17mm nuts. I used a empty bodyfiller can to hold the caliper so I don't have to disconnect the brake line.
3) Now with the caliper removed you can take off your rotor. Use a philips screwdriver to remove the two screws. You may need to use an impact drill if they're not coming off.
4) Turn the hub so there is enough room for the first stud to come out without hitting any obstacles. You will be hammering it out.
5) Using a hammer, bump out the first stud. You might need to put some muscle into it if you're a bitch. I didn't have much trouble popping them out. Alternatively, you can choose to cut it off if you don't have enough room.
6) You can try putting in the new studs by just hammering them back in, but I didn't want to risk wrecking the thread since there isn't much room and even moreso since the new studs I was using were 15mm longer. So I decided to grind off part of the nut at the end. I've read on some other sites about people doing this so I thought I'd give it a try... I found it to work like a charm.
Here you can see the difference between the old and new studs:
7) With the new stud now partially grinded, it slides in quite easily and you don't have to worry about ruining the thread. Don't push it in all the way.
8) I put enough washers on the stud to leave just about enough room for the stock lug nuts. Then I put on the lug nut and twisted it on, thus pressing the new stud into the hub. I used a metal pole to keep the hub from turning while I tightened the lug not. Be careful not to over tighten as to not ruin the thread. You'll know the stud is steated correctly just by looking at the back of the hub.
9) BAM! now you've replaced one stud. Like I said, pretty straight forward
10) Now repeat steps 4-8 on the remaining studs.
11) Once all the studs have been replaced you can put you can re-assemble everything buy putting the rotor, caliper and wheel back on and you're done. In my case, I also put on some spacers. The ones I got were hubcentric which I think is important. First, put your rotor back on and tighten the two philip screws your removed. Next, simply slide on your new spacers and use a hammer (I used a rubber one) to seat it in the centre correctly.
12) Anytime I touch my rotors I like to clean them.
13) Now reinstall your brake caliper and you can put your wheels back on. I had to Torque the 17mm caliper nuts to 47 ft-lbs but yours might be different. When putting on your wheels, tighten them in a star pattern while the car is still on jack stands and after you lower the car to the ground, torque them to 80 ft-lbs. As you can see, I now have enough thread on the stud to safely install my wheels while also clearing the calipers with some extra room!
14) Repeat the same steps to any other wheels.
Before:
After:
Hope this might one day help someone who snaps a stud or wants to install new ones.
 08-Jul-2009, 10:29 AM
#5
Senior Member

Join Date: Oct 2007
Posts: 242
I've thought about doing this but feared ruining the front wheel bearing by bashing the studs with the hammer.. the rears you can just replace the hubs easy enough tho.
Nice work, what size rims and what are the specs on the brake setup?
Nice work, what size rims and what are the specs on the brake setup?
09-Jul-2009, 01:01 AM
#7
Senior Member
Thread Starter
Join Date: Oct 2007
Location: Toronto
Posts: 131
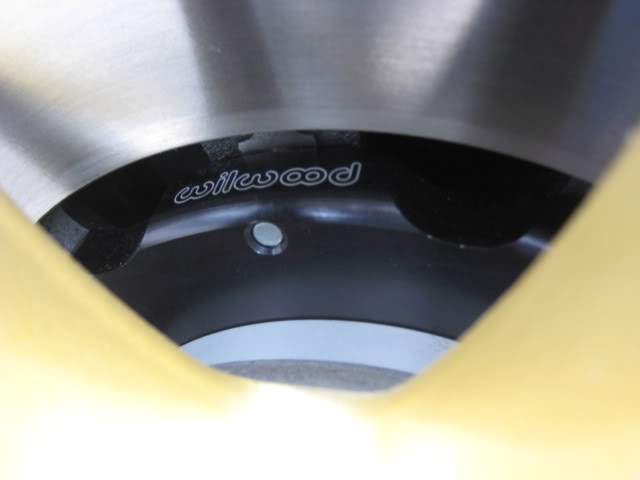
Wheels are 17x7 with 205/40/17 tires and brake kit consists of 12.19" rotors w/ 4 piston dynalite calipers from Wilwood. Now I'm wondering if I should have gone with the vented rotors

More info on brakes here if you're interested:
Brake Kits Product
 what car was it?
09-Jul-2009, 07:12 PM
what car was it?
09-Jul-2009, 07:12 PM
#8
Junior Member

Join Date: May 2009
Posts: 21
A chevy cavalier. I was pulling the tires to check the brakes and one of the lugnuts on the last tire was stuck...wouldnt go back on and wouldnt come off. Somebody at canadian tire I guess had installed it wrong the last time. In any case I just went back and forth on it and it snapped so hammered it out did the washer thing and that was it.

Thread
Thread Starter
Forum
Replies
Last Post
ahmed_17
Civic DIY Tutorials - Info
6
02-Oct-2010 12:57 AM
SlimBoJones
Honda Civic (+ other) Parts/Accessories for Sale or Trade
0
11-Dec-2005 05:54 PM
imported_SpitFire
Honda Civic (+ other) Parts/Accessories for Sale or Trade
0
07-Oct-2005 04:11 PM


