Civic DIY Tutorials - Info The forum for "do-it-yourselfers". Place DIYs or links to ones that you think will be valuable in here.
Please, NO TECH QUESTIONS...DIY INSTRUCTIONS ONLY.

DIY - Valve Cover Painting

Thread Tools
 
Search this Thread
 
Old 18-Apr-2010, 11:46 PM
  #61  
Junior Member
 
OBoSsMoN's Avatar
 
Join Date: Dec 2009
Posts: 7
Wow this is perfect. I always wanted to paint mine because it was flaking. I also have a cam seal that is leaking oil so I'm going to replace that and paint at the same time.
OBoSsMoN is offline  
Old 19-Apr-2010, 11:15 PM
  #62  
Member
 
WIDELOAD's Avatar
 
Join Date: Sep 2007
Location: Toronto
Posts: 94
I will do this to my spare valve cover! Very Nice!
WIDELOAD is offline  
Old 23-Apr-2010, 08:06 AM
  #63  
Member
 
gixxer09's Avatar
 
Join Date: Apr 2010
Location: Brampton
Posts: 61
AMAZING! Had to do it myself!

Guys this DIY is PHENOMENAL! Thank you so much for posting this. I did it last night. Came out better than anything I've ever done on any car lol. Keep posting DIY's. Really appreciate it!!!


gixxer09 is offline  
Old 23-Apr-2010, 08:09 AM
  #64  
Member
 
gixxer09's Avatar
 
Join Date: Apr 2010
Location: Brampton
Posts: 61
Let's Try that again lol.

Name:  IMG00107-20100422-2014.jpg
Views: 550
Size:  100.7 KB

Name:  IMG00108-20100422-2015.jpg
Views: 607
Size:  136.1 KB
gixxer09 is offline  
Old 23-Apr-2010, 08:10 AM
  #65  
Member
 
gixxer09's Avatar
 
Join Date: Apr 2010
Location: Brampton
Posts: 61
Name:  IMG00110-20100422-2246.jpg
Views: 522
Size:  111.4 KB

Name:  IMG00111-20100423-0625.jpg
Views: 605
Size:  134.0 KB
gixxer09 is offline  
Old 23-Apr-2010, 08:24 PM
  #66  
Member
 
razzyarmo_eg's Avatar
 
Join Date: Apr 2010
Location: scarbrough
Posts: 31
i want 2 do this do i have 2 relpace the seal after
razzyarmo_eg is offline  
Old 23-Apr-2010, 09:50 PM
  #67  
Member
 
gixxer09's Avatar
 
Join Date: Apr 2010
Location: Brampton
Posts: 61
Originally Posted by razzyarmo_eg
i want 2 do this do i have 2 relpace the seal after
I did. 22 something from honda plus some sticky icky for the corners around the shafts.
gixxer09 is offline  
Old 23-Apr-2010, 10:04 PM
  #68  
Junior Member
 
dwilsonjr74's Avatar
 
Join Date: Apr 2010
Posts: 5
so that's the way to do it. thanks for the wonderful tips.
dwilsonjr74 is offline  
Old 24-Apr-2010, 09:38 PM
  #69  
Registered User
 
civic_82's Avatar
 
Join Date: Apr 2006
Posts: 43
looks great!!!!
civic_82 is offline  
Old 25-Apr-2010, 10:13 AM
  #70  
Junior Member
 
oldskool325's Avatar
 
Join Date: Jan 2009
Posts: 18
wicked
oldskool325 is offline  
Old 26-Apr-2010, 12:56 AM
  #71  
Member
 
razzyarmo_eg's Avatar
 
Join Date: Apr 2010
Location: scarbrough
Posts: 31
22 something thanks buddy I'll pick that up do I have to drain the oil first or not
and where can I get the stripper from not the pole stripper lol that's covered
razzyarmo_eg is offline  
Old 26-Apr-2010, 10:32 AM
  #72  
Member
 
gixxer09's Avatar
 
Join Date: Apr 2010
Location: Brampton
Posts: 61
No, you don't have to drain the oil. I just grabbed a paint stripper spray from the auto department at crappy Tire. When I get home from work I'll post the name and picture of it. Worked like a charm. One coat removed the majority of the paint with barely any elbow grease. The second coat cleaned everything off easily, barely had to scrub. THe iron brushes.... A MUST! Make things so much easier.
gixxer09 is offline  
Old 26-Apr-2010, 10:26 PM
  #73  
Member
 
razzyarmo_eg's Avatar
 
Join Date: Apr 2010
Location: scarbrough
Posts: 31
thanx man i picked up some dominion shure seal paint stripper from crappy tire 2day worked great
razzyarmo_eg is offline  
Old 27-Apr-2010, 03:49 PM
  #74  
Member
 
gixxer09's Avatar
 
Join Date: Apr 2010
Location: Brampton
Posts: 61
Sorry dude, I didn't mean to leave u hanging regarding the stripper. I was out in the garage working on the sound system till stupid late. THe my buddy rolls in and asked for me to install his HID's. Wasn't a good night but I'm glad it worked out well for you. Planning on posting any pics?
gixxer09 is offline  
Old 27-Apr-2010, 11:31 PM
  #75  
Member
 
razzyarmo_eg's Avatar
 
Join Date: Apr 2010
Location: scarbrough
Posts: 31
no problem man ya im planning 2 post some pics soon
razzyarmo_eg is offline  
Old 12-Jun-2010, 03:52 PM
  #76  
Junior Member
 
CleanSi's Avatar
 
Join Date: Aug 2009
Location: Hamilton, Ontario
Posts: 24
This is by far the best diy i have seen to date. Something that a lot of people have always wanted todo without spending the $300+ for an OEM part. Just a quick note that when reinstalling the valve cover, I think 20ft/lbs is the proper torque specs.... Going to do mine when I get the other car running, how long would you say this left your car valve coverless in the garage? Also, when putting on a new gasket what else is needed to ensure no leaks....
CleanSi is offline  
Old 13-Jun-2010, 05:53 PM
  #77  
Member
 
*CivicChick*'s Avatar
 
Join Date: Mar 2010
Location: GTA
Posts: 47
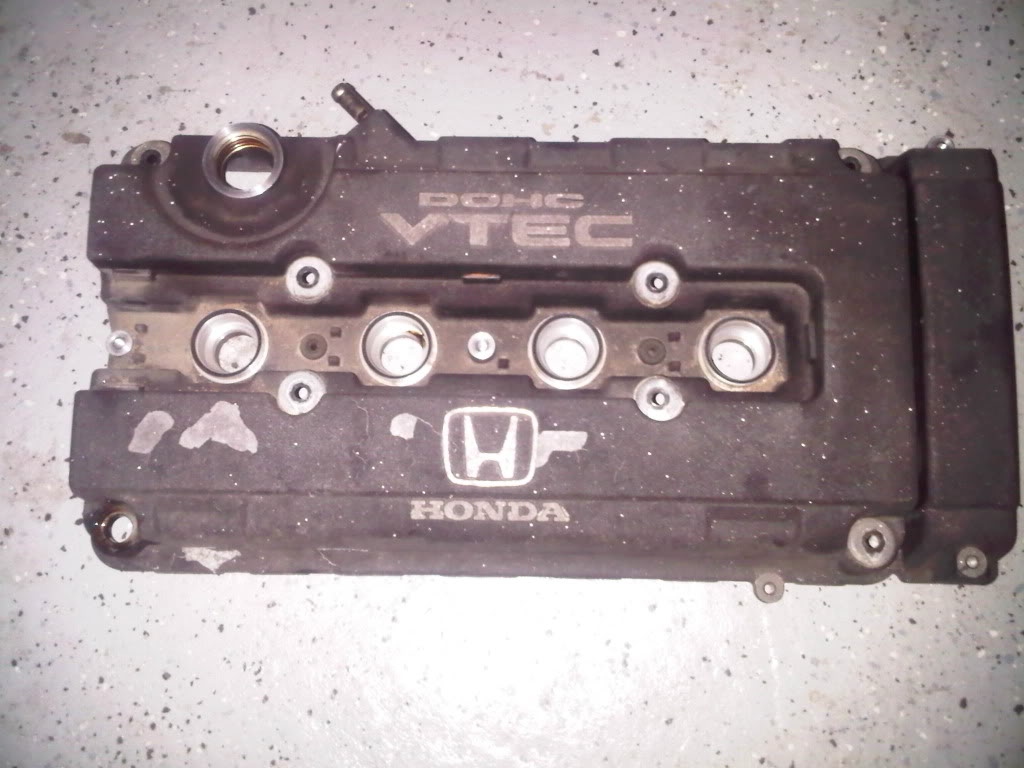
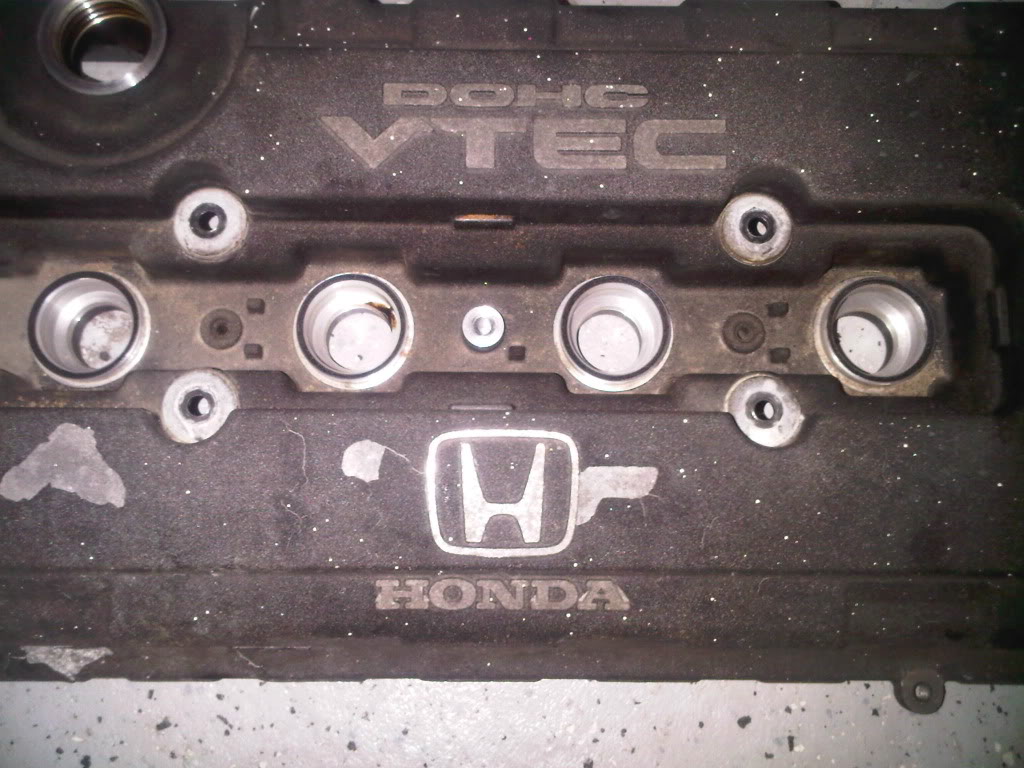
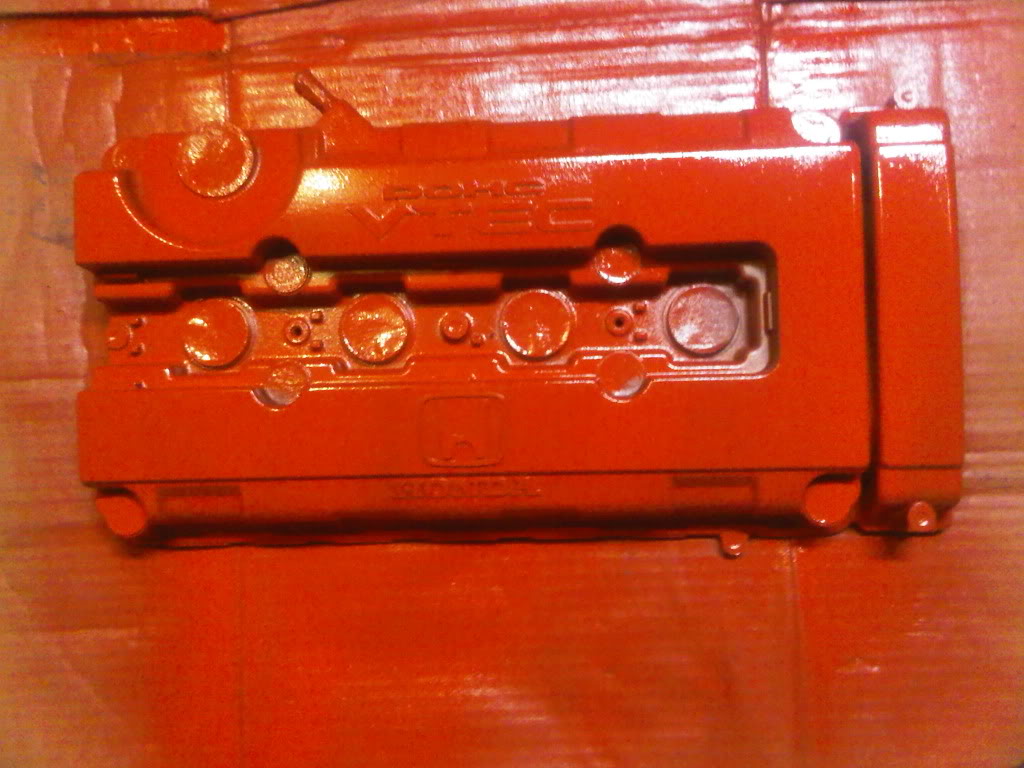
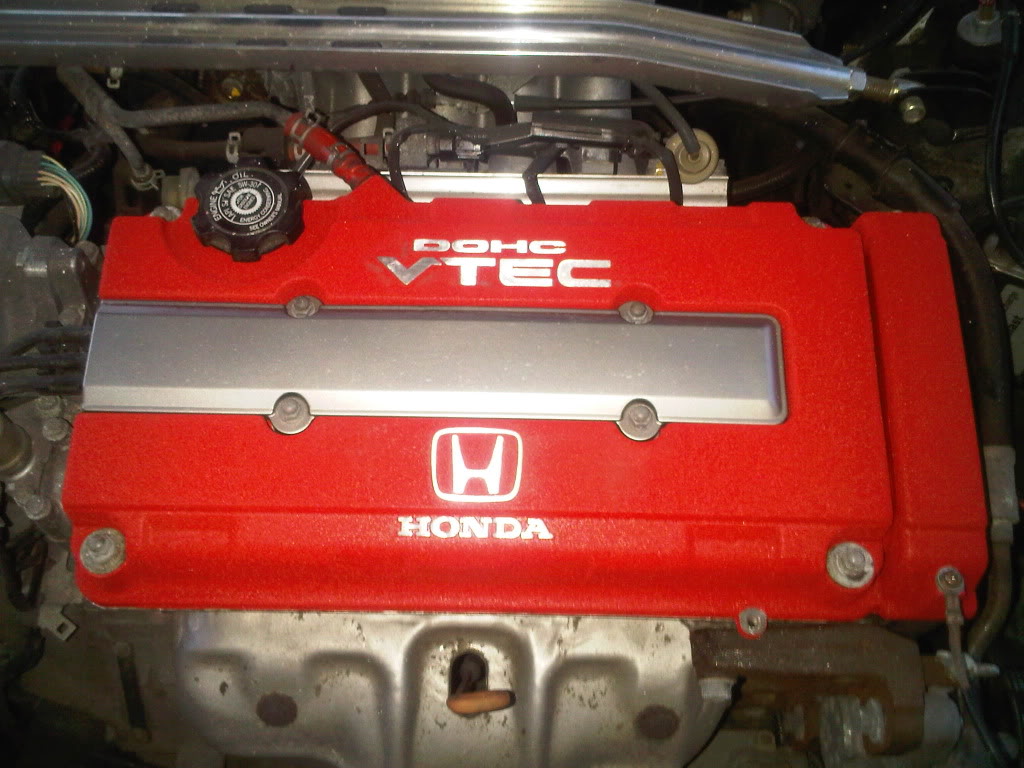
So I'm finally getting around to posting these pics, this is a great DIY. This is my boyfriends valve cover from his 92 Integra gsr. I did it all about 2 months ago, stripping, painting and sanding off the letters. It really turned out amazing. It looks even better now with the chrome spark plug cover we ordered. I'm definitely going to do mine next! Hope the pictures work okay..


*CivicChick* is offline  
Old 13-Jun-2010, 08:19 PM
  #78  
Senior Member
iTrader: (1)
 
jaebreezie's Avatar
 
Join Date: Jun 2008
Location: GTA
Posts: 237
looks good
jaebreezie is offline  
Old 13-Jun-2010, 08:38 PM
  #79  
Junior Member
 
CleanSi's Avatar
 
Join Date: Aug 2009
Location: Hamilton, Ontario
Posts: 24
what did we use to sand the logos and such after the paint. what grit. and did it leave a little bit of pealing on the letters?
CleanSi is offline  
Old 13-Jun-2010, 11:33 PM
  #80  
Member
 
*CivicChick*'s Avatar
 
Join Date: Mar 2010
Location: GTA
Posts: 47
Originally Posted by CleanSi
what did we use to sand the logos and such after the paint. what grit. and did it leave a little bit of pealing on the letters?
I found it easiest to get most of the lettering with a sanding block and I believe it was 100 or 120 grit. Don't think it really matters, I just used whatever was lying around. Then for the last bit I didn't use the sanding block because some letters had paint left on them and the v for example is kind of difficult. It didn't leave any paint peeling on them since you sand to metal. To get horizontal lines through the letters, just make sure you sand only in one direction (left to right), and that you dont sand anything but the letters, lol... I had one little slip; you can see it under the V in Vtec. .. The spark plug cover makes it unnoticeable hehe.
*CivicChick* is offline  


Quick Reply: DIY - Valve Cover Painting


All times are GMT -4. The time now is 04:12 AM.