|
 |
 
HOW-TO: Black Housing Headlights - 6th Gens
Posted May 22, 2002 by jaysi
Subject Vehicle: 1997 Honda Civic Si Coupe
How To Clear & Paint Headlight Housing Black
Tools Needed:
10mm socket & ratchet
Oven
Razor knife
Large flathead screwdriver
Philips screwdriver
DISCLAIMER: These instructions are just a guide for you to make your own clear headlights/black housing.
I am not responsible for anything.
Click to enlarge

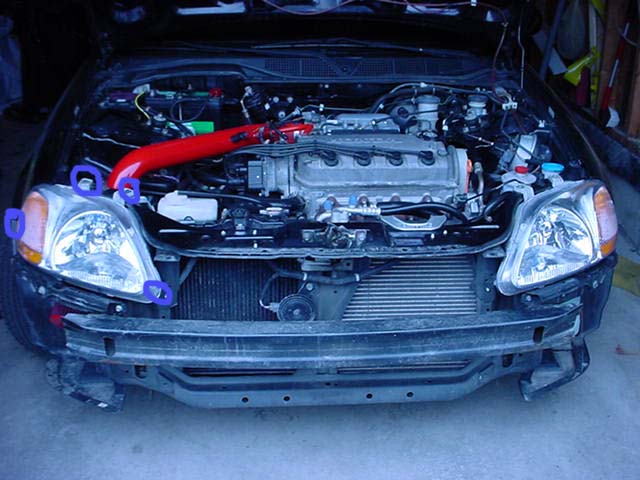
Fig.1 - Bumper removed.
|

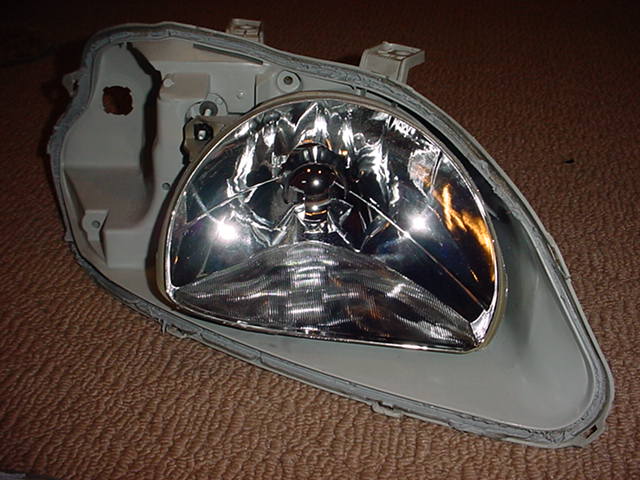
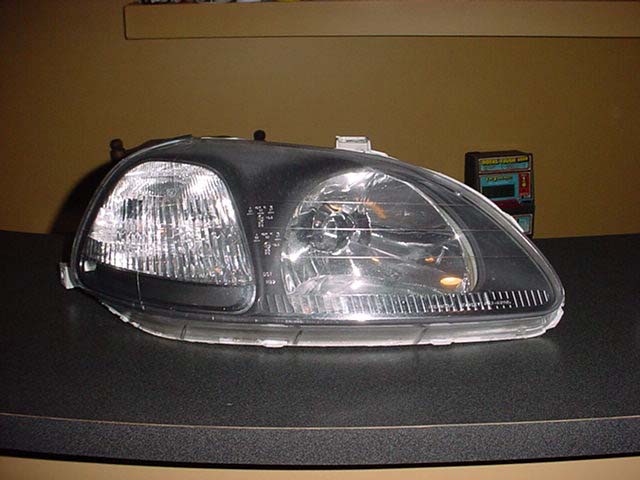
Fig.2 - Headlight housing.
|
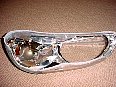
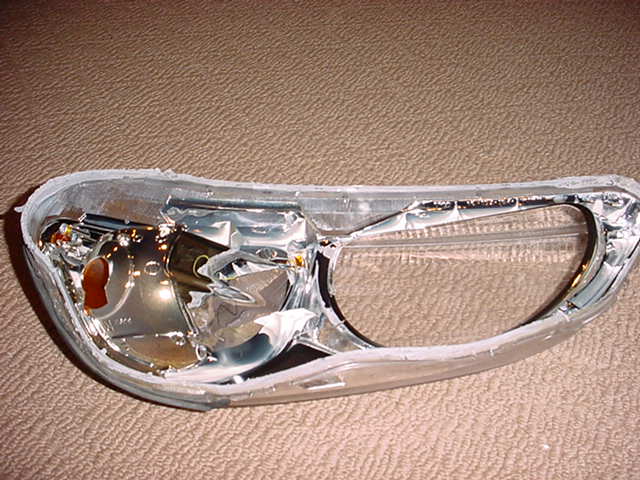
Fig.3 - Headlight lense.
|
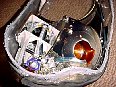
Fig.4 - Reflector screw.
|

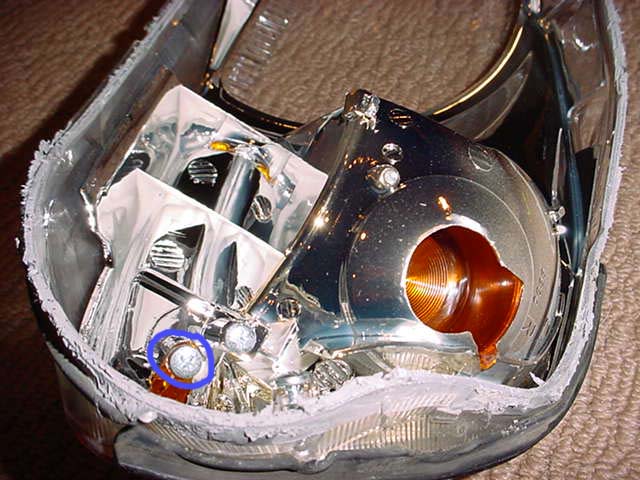
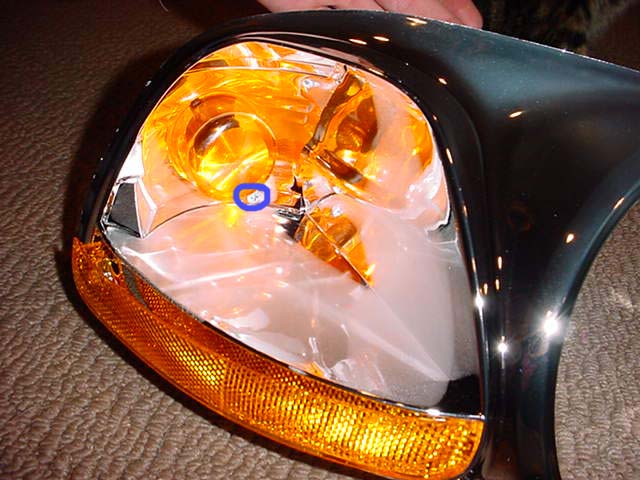
Fig.5 - Amber cap screw.
|

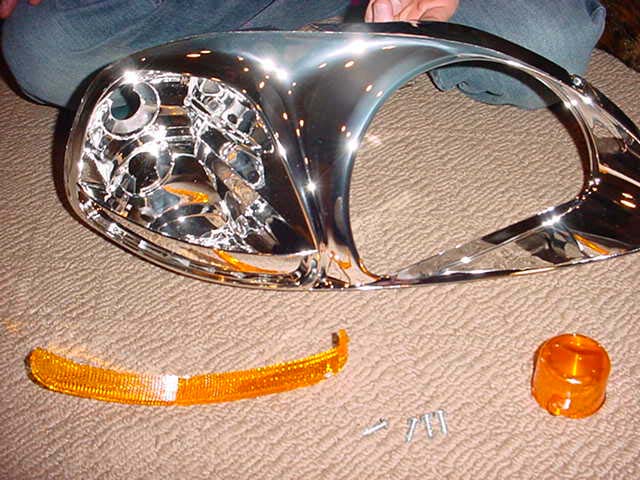
Fig.6 - Both amber pieces removed.
|

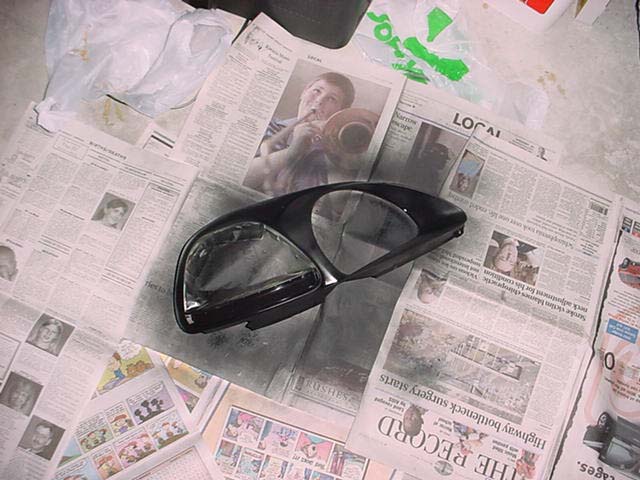
Fig.7 - Paint carefully. Use light coats.
|
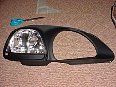
Fig.8 - Painted inner piece.
|
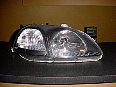
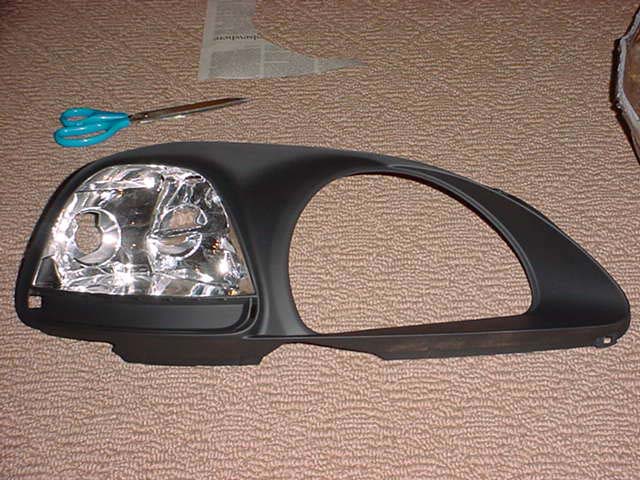
Fig.9 - Finished product.
|
Let's begin!
1. Pop the hood and prop using the arm.
2. Remove the bumper following the instructions found here: http://jdmfan.com/technical/other/remove_bumper/ (or check a Haynes/Helms/Chiltons manual)
3. Bumper can now be gently pulled forward and set aside on a large blanket.
4. Remove the 4 screws holding in the headlight housings using the 10mm socket. (Fig.1) Once the housing is free, remove the bulbs and bulb harnesses.
5. You should now be holding one of your headlights, which have no bulbs in it. Set your oven to 250F and place headlight
on a baking sheet and place in the oven for 10 mins. Keep an eye on it and periodically check to see if the sealant is gooey.
6. Remove the headlight when it's ready. It shouldn't be too hot to handle. Gently pry the lens from the housing using the
large flat head screwdriver. Cut the sealant using the razor knife. When done you should have 2 pieces, the housing and lens.(Fig.2)(Fig.3)
7. Take the lens part shown in Fig.7 and remove 2 philips screws around the edge. This will allow the inner
chrome piece to be removed. You will now have 3 pieces, the housing, lens, and inner chrome part.
8. If you wish to clear the headlights, now is the time. Remove the long reflector by removing the philips screw
located on the back of the chrome shell. (Fig.4) The inner amber cap has its own screw, remove this. (Fig.5)
9. You'll now have all the amber pieces out. (Fig.6) Time to tape off the turn signal area if you wish to leave it chrome, otherwise move on to Step 10.
Using PAINTERS MASKING TAPE, tape a piece of newspaper roughly the shape as the signal over the signal area. Tape anything else you don't want painted.
10. It's time to paint! I chose to use Tremclad Automotive Rust Paint, avaliable at Canadian Tire. It's in a variety of colors, you may also experiment
with any paint you wish. Spray LIGHT coats and let dry before applying the next coat. (Fig.7) Repeat untill it meets your standards.
*** APPLYING MORE LIGHT COATS IS BETTER THAN LESS THICK COATS!!! ***
11. At this point you should have a nice painted inner piece. (Fig.8) It's time to re-assemble the headlight. Place the painted piece in the clear lens.
Screw back the 2 philips screws you removed in the beginning. I used Mono Ultra Clear Exterior Silicone to seal the headlights. Run a THICK bead
along the groove of the grey plastic housing. Now take the clear lens and press it back into the housing where you just applied the silicone.
If you used enough, it should now be oozing out the sides. Simply wipe this up. You're almost done!
12. At this point you should have a whole headlight basically assembled. If you're like me and want to be sure not to have any condensation forming inside
the housing follow this last step. Take the same silicone use in the previous step and run a thin bead along the outer edge where the clear lens meets the housing.
Rub it level with your fingers. Fill all little cracks where you think air could get in.
13. Repeat steps 4-12 for the other headlight, then re-install them on your car. You may want to check their vertical alignment by looking at the gauge in your headlight.
Follow owners manual on how to adjust alignment if needed.
14. Finished product should look something like this. (Fig.9)
Discuss this article on our Discussion Forums
|
|
|
 |
|